20 ICE iS1100
OPERATOR
DUST FILTER CLEANING AND INTEGRITY
CHECK
NOTE:Besides the standard paper fillter,
polyester lters are also available. The following
procedure is applicable to each type of lter.
1) Drive the machine on a level oor and release
the pedal (2) and stop the machine.
2) Turn the ignition key (71) to "0".
3) Disengage the hook (29) by pulling its lower
end.
4) Remove the hopper (28) by using the handle
(30) and by using hand and by disengaging it
from the inner guides.
5) Unscrew the knobs (37) and remove the lter
compartment cover (36).
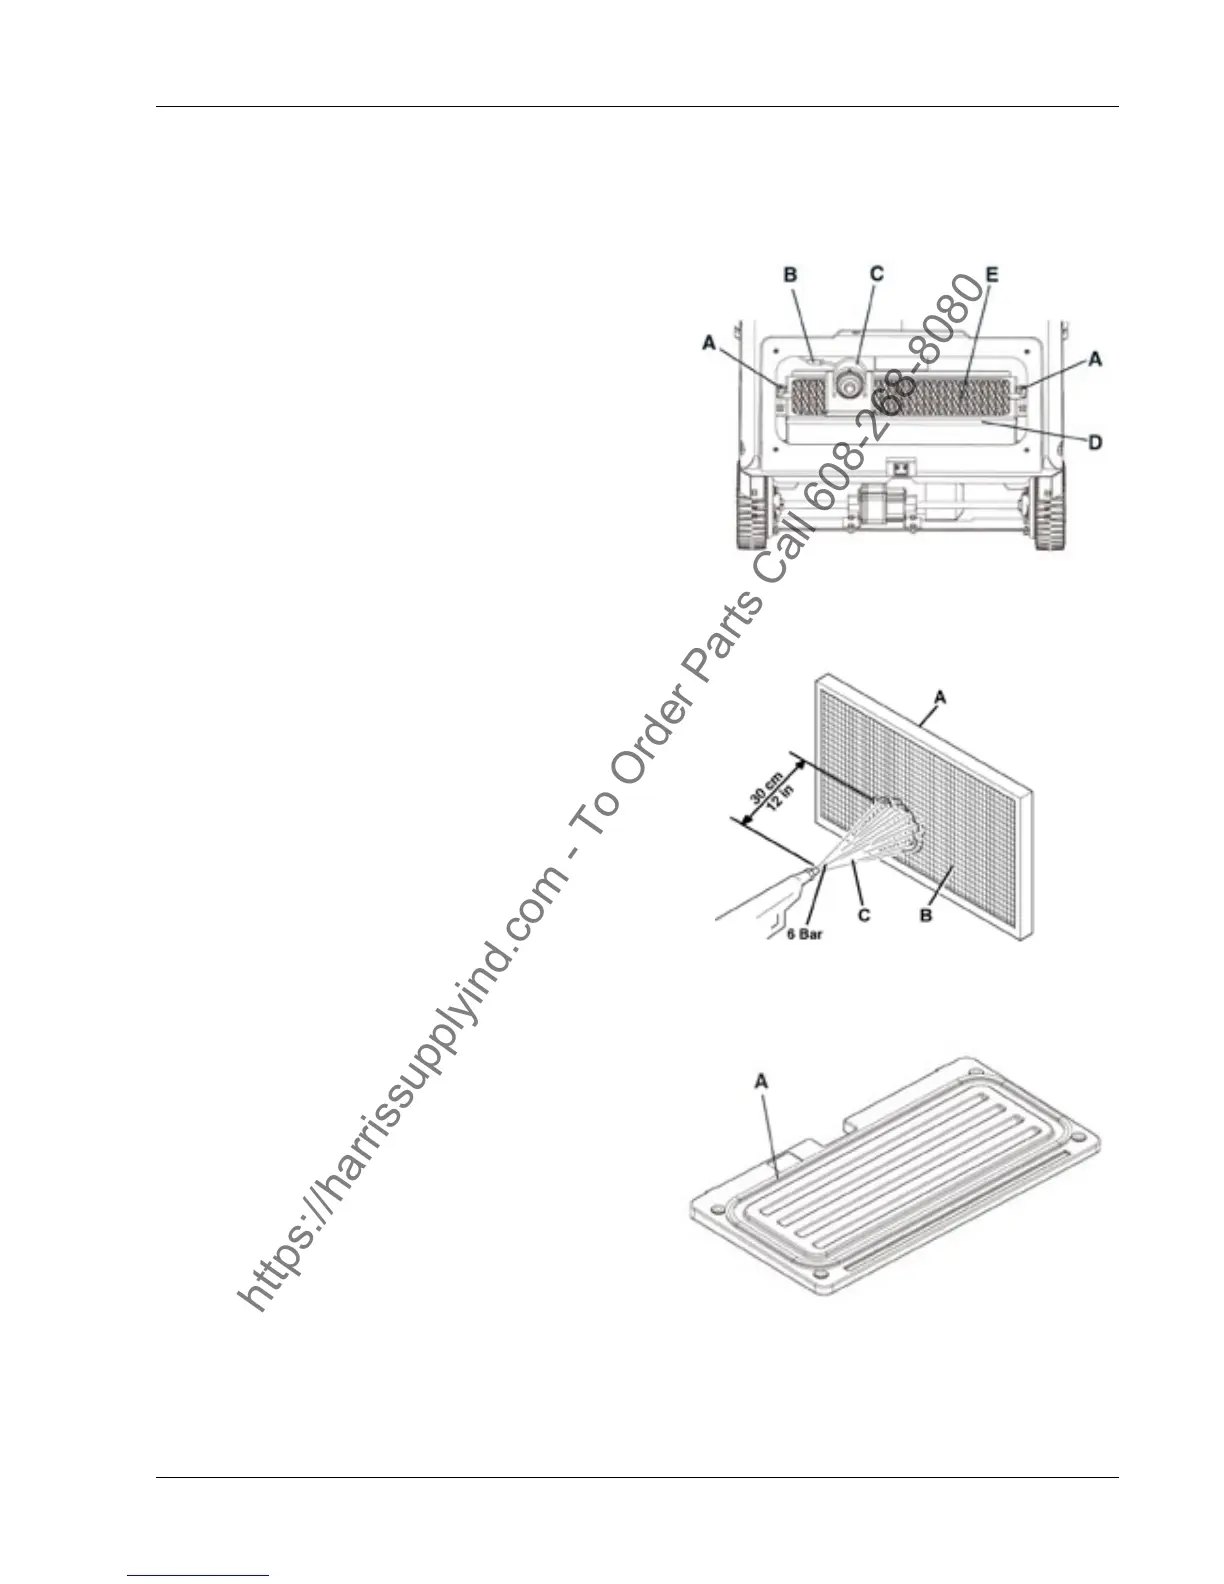
6) Loosen the knobs (A, Fig.9).
7) Disconnect the connector (B, Fig.9) from the
lter shaker motor (C).
8) Remove the dust filter fastening frame (D,
Fig.9).
9) Remove the dust lter (E, Fig. 9).
10) In an outdoor area, clean the lter by shaking
it on a level and clean surface, tapping the side (A,
Fig. 10) opposite to the wire gauze (B).
Complete the cleaning procedure by using
compressed air (C, Fig. 10) at maximum 6 Bar,
blowing only from the side of the wire gauze (B),
at a minimum distance of 11.8 in (30 cm).
According to the lter type, observe the following
cautions:
-Paper filter : Do not use water or detergents to
clean it, otherwise it can be damaged.
-Polyester lter : For a better cleaning, it is allowed
to wash the filter with water and non-lathering
detergents. This provides better quality cleaning
but reduces the life of the lter, which will have to
be replaced more frequently. The use of inadequate
detergents can damage the lter.
11) Check the lter body for tears. If necessary,
replace the lter.
13) Clean the rubber gasket (A, Fig.10) of
the cover (36) and check it for integrity and
efciency; if necessary replace it.
14) Assemble the components in the reverse
order of disassembly, and note the following:
-Install the lter (E, Fig. 9) with the wire gauze
(B, Fig. 10) facing upwards.
Figure9
Figure10
Figure11


 To Next Page