This document is the user manual for the ICETRO ICE Maker, covering models A25B15, A25B150, IU-0070-AB, IU-0070-ABP, A25015, A25B15P, WU-0070-AB, A25015P, 44R213, IU-0070-OU, IU-0070-OUP, OU-0070-AB, A25B15POD, and 3597. It provides essential information for safe installation, operation, and maintenance of the ice maker.
Function Description
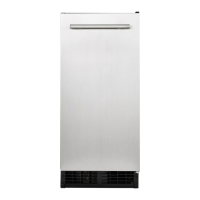
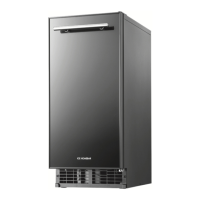
The ICETRO ICE Maker is designed to produce good-quality, transparent ice automatically. It operates by spraying water onto a frozen ice-forming mold, where mineral impurities are separated as the water freezes. Melted ice and concentrated minerals are drained away, ensuring the production of clear ice. The machine continues to make ice until the ice container is full, detected by a temperature sensing tube. It features an automatic ice-removal function and a left/right opening door system for user convenience. The product is designed for both indoor and outdoor use, with front ventilation possible via an attachable kick plate/grill.
Important Technical Specifications
The ice maker models listed have a maximum manufacturing capacity of 28 kg/day (61.7 lb/day). Each cycle produces 24 pieces of ice.
- Dimensions (WxDxH): 380 x 625 x 857 mm (14.9 x 24.6 x 33.7 inches), including handle, leg, and hinge.
- Electrical Rating: 115 V / 60 Hz / 4.0 A.
- Weight: 103.6 lb (Before Box), 119 lb (After Box).
- Refrigerant: R-134a.
- Cooling Capacity: 723 kcal/hr (at 45°F).
- Cooling Method: Air Cooled.
- Ice Storage Capacity: The maximum capacity of the ice container is 26 lb (12 kg).
- Water Supply Condition: Temperature 50~90°F, Pressure 14.22~71.12 psig.
- Ambient Temperature: 50~100°F.
- Power Consumption: 340 W.
- Ice Size Control: Controlled by an EVA SENSOR.
- Full Ice Detection: Controlled by an electronic sensor with differential application per ambient temperature (automatic PCB control).
- Refrigerant Control: MICOM Control.
The optimal functionality is achieved at room temperatures of 50~68°F and supplied water temperatures lower than 50°F. The maximum ice capacity is based on 50°F ambient and water temperature, and high summer temperatures may affect capacity.
Usage Features
- Initial Operation: To start, open the water supply valve, plug in the ice maker, turn the switch to "ICE" position. The first batch of ice should be discarded, with good-quality ice produced within 1-2 hours.
- Ice Production Cycle: The ice maker automatically produces 24 pieces of ice every 30 minutes. The compressor, fan motor, and pump motor work to freeze water onto the ice-forming mold.
- Ice Removal Cycle: Once sufficiently cooled, the ice production cycle stops. The compressor continues to work, while the pump and fan motors stop. Hot gas and water supply valves open, heating the frozen surfaces to release ice into the container. Water is fed to dilute minerals and wash them through the drain pipe.
- Ice Shape: The ice produced has a rectangular bell shape, clear and transparent. Cracks may appear but typically disappear over time. Frosting may occur on stored ice but disappears when water is poured on it.
- Door Opening Method: The door hinges can be reconfigured to open from either the left or right side, providing flexibility for installation.
- Drainage: The ice maker is available in two types: gravity drain (naturally drains water) and drain pump (drains water to an adjacent sink, capable of raising water up to 8ft/2.4m). A drain pump kit can be installed on gravity drain models for conversion.
- Water Supply: Requires a 1/4" diameter copper cable connection to the tap water pipe with a shutoff valve. A pipeline filter is recommended for water with high mineral levels.
Maintenance Features
Regular maintenance is crucial for optimal performance and longevity.
- Cleaning Frequency: The nozzle, ice slide, and water tank should be cleaned at least once a month after turning off power. Filters of the water tank and ice tank should also be cleaned monthly. The condenser should be cleaned at least once a month.
- Cleaning Procedure (Nozzle/Ice Slide/Water Tank):
- Open the door and remove two front injection bolts on the top cover.
- Pull off the top cover.
- Slightly lift and remove the ice slide.
- Clean the ice slide with a soft plastic brush or sponge.
- Clean the gap of the nozzle frame on the vessel sheet (water tank).
- Lift the drain projectile inside the vessel sheet, clean it, and drain the water. Ensure the drain projectile is correctly reassembled.
- Cleaning Procedure (Filters):
- Empty the ice tank.
- Prepare a cleaning solution (30g neutral dishwashing detergent with 8L warm water, 35~45°C).
- Soak a clean cloth in the solution and clean the inside of the ice tank. Pour solution into the draining pipe and allow to dry.
- Press the switch to "WASH" for automatic cleaning, which repeats water supply and circulation pump operation.
- Open the front door and remove filter screens from the bottom of the ice tank and water tank.
- Rinse screens with running water and reassemble. Insert the bottom filter screen first, then the top screen.
- Cleaning Procedure (Condenser):
- Remove two screws on the front panel at the center inside.
- Remove dust from the condenser surface using a vacuum cleaner.
- Reassemble the screw to the panel.
- Ice Machine Cleaning and Sanitizing (Every Six Months):
- Use certified ice-maker detergent and disinfectant (complying with 40 CFR 180.9403 and registered with USA Office of Pesticides Program Antimicrobials Division).
- Wear rubber gloves and goggles.
- Washing: Mix 150 ml (5.1 oz) detergent with 4 liters of water. Immerse components or spray surfaces.
- Sanitizing: Mix 200 ml (6.7 oz) 5.25% Sodium Hypochlorite disinfectant with 5 liters of water. Immerse components for 10 minutes or spray surfaces.
- Thoroughly rinse all components with clean tap water to prevent cross-contamination.
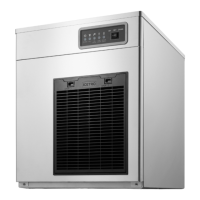
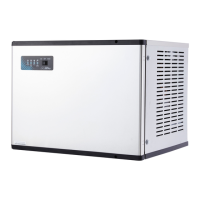
- The manual provides detailed steps for disassembling and cleaning specific parts for both "Cubic Type" and "Vertical Type" ice makers.
- Management in the Coldest Season:
- Clean the ice-production system.
- Turn off the power.
- Empty the water container. Remove the pump hose and the back panel.
- Separate the inlet pipe connected to the water supply valve.
- Turn on the power and turn the switch to "WASH" to open the water supply valve and remove water from the inlet pipe.
- In the case of the drain pump model, pour 1/2 gallon of RV anti-freeze mixture (propylene glycol) into the ice container.
- Turn off the ice maker and pull the plug. Re-connect the pump hose and other hoses. Repeat initial starting steps.
Safety Cautions
The manual emphasizes several safety precautions:
- Electrical Safety: Do not use if the supply voltage differs from requirements. Avoid touching electrical components with wet hands, altering the power cord, or plugging too many appliances into one outlet. Unplug the product if water gets inside power components.
- Installation Safety: Install on a level surface, away from moisture, dust, rain, or heat sources. Ensure proper ventilation. Do not install on a tilted surface.
- Material Safety: Keep combustible gases or flammable materials away from the product.
- Product Handling: Do not apply excessive force or shock. Do not disassemble or modify the product.
- Drainage: Ensure proper water supply and drainage facilities. The floor should be waterproofed and sloped to drain any leaks.
- Child Safety: Remove the door or fix it firmly when disposing of an old ice maker to prevent children from getting trapped.
- Chemical Handling: Detergents and disinfectants can cause burns. If ingested, drink large amounts of water or milk and contact a doctor. If on skin, wash with water. Keep out of reach of children.