4 7
5 8
6 9
10
11
12
13
14
15
Wiring Diagrams
Single Compressor
Cool Active
Heat Pump – with electric backup
Dual Compressor
Cool Active
Heat Pump
Note: For systems without emergency strip heat, a jumper wire should be placed between W2 & E.
Transformer
120
VAC
24 VAC
Reversing Valve
Compressor
Auxiliary Heat
Service Led Wire
Emergency Heat
Fan
Compressor #2
Transformer
120
VAC
24 VAC
Reversing Valve
Compressor #1
Service Led Wire
Emergency Heat
Fan
NOTE: Place jumper between W2 and Y2
Single Compressor
Heat Active
Heat Pump – with electric backup
Dual Compressor
Heat Active
Heat Pump
Note: For systems without emergency strip heat, a jumper wire should be placed between W2 & E.
Transformer
120
VAC
24 VAC
Reversing Valve
Compressor
Auxiliary Heat
Service Led Wire
Emergency Heat
Fan
Compressor #2
Transformer
120
VAC
24 VAC
Reversing Valve
Compressor #1
Service Led Wire
Emergency Heat
Fan
NOTE: Place jumper between W2 and Y2
Operation
Setting the Setpoint Temperature
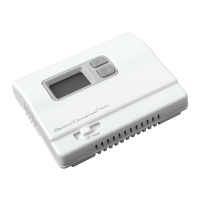
Parts Diagram
Reset switch
Conguration switch
Mode switch
Up button
Down button
Fan switch
Left (PROG) button
Right (HOLD) button
Field programming pins
The SimpleComfort
®
SC3211L thermostat has buttons that are used to:
• Adjust the setpoints of the thermostat • Set the operation mode • Program the schedule
• Enter vacation Hold • Reset the thermostat • Activate the program feature
1. With the system switch in Heat, Emergency Heat or Cool, the current temperature setpoint displays.
2. Press the up or down button until the desired temperature setpoint displays.
3. The new temperature setpoint is automatically saved in memory.
6. Lockout (0°F-8°F) (0°C-4°C) – Select the number of degrees set
temperature can be changed during keypad lockout
Press the up or down button to select.
Press the right button to advance to the next screen.
7. Maximum Heat Setpoint (45°F to 90°F) (7°C to 32°C)
Adjust to control the maximum heat set temperature allowed.
Press the up or down button to select.
Press the right button to advance to the next screen.
5. Auxiliary Delay ON – (0-30 minutes) – Set the delay time in minutes for auxiliary
heat to be locked out after a call for second stage. This extra savings feature is
used to temporarily lock out auxiliary heat devices, allowing just heat pump to try to
satisfy heat call.
Press the up or down button to select.
Press the right button to advance to the next screen.
4. Staged Off Outputs
Select whether the outputs for heating and cooling are staged off independently or
are satised simultaneously.
1 = outputs staged off independently
0 = outputs off simultaneously
Press the up or down button to set.
Press the right button to advance to the next screen.
Configuration Mode Settings
The setup screens for Conguration Mode are as follows:
1. Temperature Scale (F or C) – Choose Fahrenheit or Celsius.
Press the up or down button to select.
Press the
right
button to advance to the next screen.
3. 2
nd
Stage Temperature Differential (1°F to 5°F) (1°C to 3°C)
Set the number of degrees between when stage 1 turns on and when stage 2 turns
on.
Press the up or down button to set differential value.
Press the right button to advance to the next screen.
2. 1
st
Stage Temperature Differential (1°F to 5°F) (1°C to 3°C)
Set the number of degrees between your “setpoint” temperature and your “turn on”
temperature.
Press the up or down button to set differential value.
Press the right button to advance to the next screen.
Configuration Mode
1. Verify the SC3211L is in the OFF mode.
Slide the system switch until off mode displays.
2. Remove the cover of the thermostat by gently pulling near one of the corners at
the top of the thermostat.
3. Press the CONFIG button for 1 second while the SC3211L is in OFF mode.
To exit conguration mode, press the CONFIG switch for 1 second or slide
the mode switch to heat or cool.
Press the up or down button to change settings within each screen.
Down
button
Up
button
Press the right button to advance to the next screen.
Note: Pressing the
left
button will return you to the previous screen.
Left
button
Right
button
The conguration mode is used to set the SC3211L to match your heat pump system.
To congure the SC3211L, perform the following steps:
8. Minimum Cool Setpoint (45°F to 90°F) (7°C to 32°C)
Adjust to control the minimum cool set temperature allowed.
Press the up or down button to select.
Press the right button to advance to the next screen.
9. Room Temperature Offset (+9°F to -9°F) (+5°C to -4°C)
Adjust to calibrate displayed room temperature to match actual room temperature.
Press the up or down button to select.
Press the right button to advance to the next screen.
10. Maximum Cycles Allowed Per Hour (- -, 2-6)
- - = as many as needed, 2-6 = maximum cycles/hour
Press the up or down button to select.
To exit conguration mode, press the conguration button for 2 seconds or slide the
mode switch to heat or cool.
Starting the Thermostat
CAUTION!
: Do not use air conditioning when the outdoor temperature is below 50 degrees. This can damage
your air conditioning system and cause personal injuries.
1. Move the Fan Auto/On switch to the Auto position.
2. Move the Cool/Off/Heat switch to Cool or Heat, depending on the season.
Room Temperature
OFF Indicator
Time
Testing the Thermostat
Once the thermostat is installed, it should be thoroughly tested.
CAUTION!
: Do not energize the air conditioning system when the outdoor temperature is below 50 degrees. It
can result in equipment damage or personal injury.
Cool Test
1. Slide system switch to Cool position. Cool mode screen is displayed.
2. Adjust set temperature so it is 5 degrees below room temperature.
3. Air conditioning should come on within a few seconds.
4. Adjust the set temperature 2 degrees above the room temperature and the A/C should
turn off. There may be a fan delay on your system.
Note: There is a four minute delay to protect your compressor.
Heat Test
1. Slide system switch to Heat position. Heat mode screen is displayed.
2. Adjust the set temperature so it is 5 degrees above the room temperature.
3. Heat should come on within a few seconds.
4. Adjust the set temperature so it is 2 degrees below the room temperature and the
heat should turn off. There may be a fan delay on your system.
Note: There is a four minute delay to protect your compressor.
Fan Test
1. Slide Fan switch to On position.
2. Indoor fan turns ON.
3. Slide Fan switch to Auto position.
4. Indoor fan turns OFF.
Operating Modes
OFF Mode
• In this mode, the thermostat will not turn on the heating or cooling devices (manual fan can operate)
• OFF mode is also used to access setup and the program schedule
Cool Mode
• In this mode, the thermostat controls the cooling system
• Press the PROG button to enter and exit Program Cool mode
• In Program Cool (PROG solid on display) mode, the thermostat will follow the program schedule that is stored in
memory
Heat Mode
• In this mode, the thermostat controls the heating system
• Press the PROG button to enter or exit the Program Heat mode
• In Program Heat (PROG solid on display) mode, the thermostat will follow the program schedule that is stored in
memory
Emergency Heat Mode
• In this mode, the thermostat controls the heating system and the heat pump is disabled
• Press the PROG button to enter or exit the Program Emergency Heat mode
• In Program Emergency Heat (PROG solid on display) mode, the thermostat will follow the program schedule that
is stored in memory
Hold Functions
When in Programmable Cool, Programmable Heat or Programmable Emergency Heat, you can lock in the
present settings indenitely by pressing the Hold button once (PROG ashes). Press Hold button again to exit Hold
mode (PROG solid). For a temporary hold period, raise or lower set temperature to desired set temperature. The
thermostat will automatically return to programmed set temperature after 2 hours.
Setting the Time and Day of the Week
2. Press and hold the PROG button (left) and HOLD (right) buttons (simultaneously) in for 6 seconds.
1. Slide the system switch to the OFF position. You are in the OFF mode.
The time and day of the week must be set for your program schedule to operate correctly.
5. Press the HOLD (right) button once to select day of the week (TODAY ashing).
Press the up or down button to select current day of the week
(01/Monday, 02/Tuesday, etc.).
Note: At any time, press the PROG (left) button to return to the previous screen or
press the HOLD (right) button to advance to the next screen.
Press the PROG button and HOLD button (simultaneously) in for 2 seconds to lock
values into memory and return to the OFF mode or press the HOLD (right) button once
to enter programming.
4. Press the HOLD (right) button once to select minutes (minutes ashing).
Press the up or down button to adjust the minutes.
3. Time displays (hour ashing).
Press the up or down button to adjust the hour.
Setting the program schedule:
1. Slide the system switch to the center position. You are in OFF mode.
2. Press and hold the PROG and HOLD buttons (pressed simultaneously) for 6 seconds.
3. Press the HOLD (right) button 3 times.
4. Day 1-7 are blinking.
From this screen you have 2 options:
1. Press the HOLD (right) button to begin programming all 7 days at one time, or
2. Press the
up
button to see the other programming options.
Note: The days of the week shown on the display will be programmed simultaneously.
The screens are listed below.
Screen 1 1-7 SUN MON TUE WED THU FRI SAT
Screen 2 1-5 MON TUE WED THU FRI
Screen 3 01 MON
Screen 4 02 TUE
Screen 5 03 WED
Screen 6 04 THU
Screen 7 05 FRI
Screen 8 6-7 SUN SAT
Screen 9 06 SAT
Screen 10 07 SUN
Program Overview
The SC3211L programmable thermostat has four periods (MORN, DAY, EVE, NITE) that are customizable for each
day of the week. Each period will have a start time, heat temperature, and cool temperature. The SC3211L monitors
the day and time, while maintaining the specic conditions you have chosen for each period in your program.
 Loading...