•
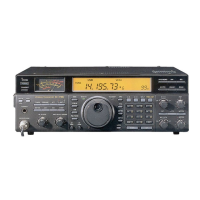
FRONT PANEL
1.
MODE
SWITCH
This switch selects the mode
of
operation for both transmit
and receive.
USB
Upper Sideband, mainly for 10, 14,
18,21,24
and
28M
Hz
bands.
LSB
Lower Sideband, mainly for
3.5
and 7MHz bands.
ON Continuous
Wave,
for
CW
operation on
all
bands.
CW-N
Narrow ON. The narrow crystal filter
is
auto-
matically turned
ON
in this position
to
improve
selectivity when receiving.
(When
optional crystal
filter
is
installed).
AM
Amplitude Modulation.
2.
POWER
SWITCH
The
POWER
SWITCH
is
a push-lock type switch which
controls the input
DC
power
to
the IC-730. When the
external
AC
power supply (lC-PS15)
is
used, the switch also
acts
as
the
AC
power supply switch. When the switch
is
pushed
in
and locked, power
is
supplied
to
the set. When
the switch
is
pushed again and released, power
is
cut
to
all
circuits except the
PA
unit.
(When
the BC-10A
is
used,
power
will
also be supplied
to
the
CPU.
3.
MIC
CONNECTOR
Connect the supplied microphone or optional microphone,
IC-SM5
or IC-HM10
to
this jack.
If
you wish
to
use a dif-
ferent microphone.
4.
PHONES JACK
Accepts a standard
1/4
inch headphone plug for headphones
'of 4 - 16 ohms. Stereo phones can
be
used without modi-
fication.
5.
MIC
GAIN
CONTROL
Adjusts the
level
of
modulation according
to
the input
of
the microphone. Oockwise rotation increases the micro-
phones gain. As the input
will
vary with different micro-
phones and different voices, the knob should be turned until
the
Meter needle, in the ALC mode, begins
to
move slightly
within the ALC zone.
In
SSB
and
AM
modes, when
the
speech processor
is
in
use, the
MIC
GAIN
CONTROL sets
the clipping
limits, while
the
RF
POWER
CONTROL sets
the
RF
drive
level
to
the maximum power level, where ALC
starts
at
the saturation point
of
the amplifiers.
6. RF
POWER
CONTROL
Controls the RF
output
power 10 Watts
to
maximum (SSB:
100 Watts PEP,
CW:
100 Watts,
AM:
40
Watts). Clockwise
rotation increases
the
output
power.
7. AF
GAIN CONTROL
Controls the audio
output
level
in
the receive mode. Clock-.
wise rotation increases
the
level.
8. RF GAIN CONTROL
Controls the gain
of
the
R F section
in
the receive mode.
Clockwise rotation gives the maximum gain.
As the control
is
rotated counterclockwise, the needle
of
the METER rises,
and only signals stronger than the
level
indicated by the
needle
will
be heard.
2-2
9.
T/R (TRANSMIT/RECEIVE)
SWITCH
This switch
is
for manually switching from transmit
to
receive and vice versa. Set the switch
to
RECEIVE (out)
and
the
IC-730
is
in
the receive mode. Set the switch
to
TRANSMIT (in) and it switches
to
transmit.
When
switch-
ing with the PTT switch on the microphone
or
with
the
VOX
switch set
to
ON, the T/R switch must
be
in
the
R
ECE
IV
E position.
10. VOX
SWITCH
This switches
the
VOX
circuit
ON
and OFF. When it
is
in
the
ON
(in) position,
in
SSB, T/R switching
is
accomplished
by means
qf
a voice signal.
In
CW
operation, semi-break-in
switching
by means
of
keying
is
possible.
11.
NB
(NOISE BLANKER)
SWITCH
When
pulse
type
noise such
as
automobile ignition noise
is
present, set this switch
to
the
ON
(in) position. The noise
will
be reduced
to
provide comfortable reception.
The blanking time can be selected
NARROW and WIDE,
by the
NB
WIDTH
switch under the access cover.
It
will
be
effective against any type noises.
12. AGC
(AUTOMATIC GAIN CONTROL)
SWITCH
For changing the time-constant
of
the
AGC
circuit.
With
the
switch
in
the
AGC
position (out)
the
AGC
voltage
is
released slowly, and thus
is
suitable for
SSB
reception.
With the switch
in
the FAST (in) position, the
AGC
voltage
is
released faster, and the
AGC
is
suitable for stations suffer-
ing from fast fading
or
when operating
in
the
CW
mode.
13.
PREAMP SWITCH
Switches the preamplifier for the receiver.
14.
MEMORYNFO WRITE BUTTON
By
pushing this button, A VFO's frequency
is
written into
Memory,
or
one VFO's frequency
is
transferred
to
the
other
VFO.
15. MEMORY
SWITCH
Push this switch when you wish
to
write a frequency into
memory,
or
to
call a memorized frequency.
16.
TUNING CONTROL
KNOB
Rotating the TUNING CONTROL
KNOB
clockwise
in-
creases the frequency, while rotating it counterclockwise
decreases the frequency. The frequency
is
changed
in
10Hz,
100Hz
or
1KHz steps which
is
according
to
the TUNING
RATE switches. One complete rotation
of
the tuning
knob results
in
a 1
KHz
frequency increase
or
decrease
in
10Hz steps, 10KHz
in
100Hz steps and 100KHz
in
1KHz
steps.
17. METER
When
in
the receive mode the meter acts
as
an S meter
regardless
of
the position
of
the meter select switch. Signal
strength
is
indicated on a scale
of
S1-S9, and S9
to
S9+6OdB.
for
free
by
RadioAmateur.eu
 Loading...