3. The display will read: Set Date/Time.
4. Press ∧ or ∨ on the time clock to select the current month. Press Enter.
5. Follow the same procedure to advance through each step as prompted to complete the date and time setup. If
you make a mistake, press Clear on the time clock to go back and correct the entry.
6. Once you’ve completed these steps, the time clock will display:
Date and Time Set. If the clock detects a Wi-Fi connection, the display will read: Network Detected Press
Enter.
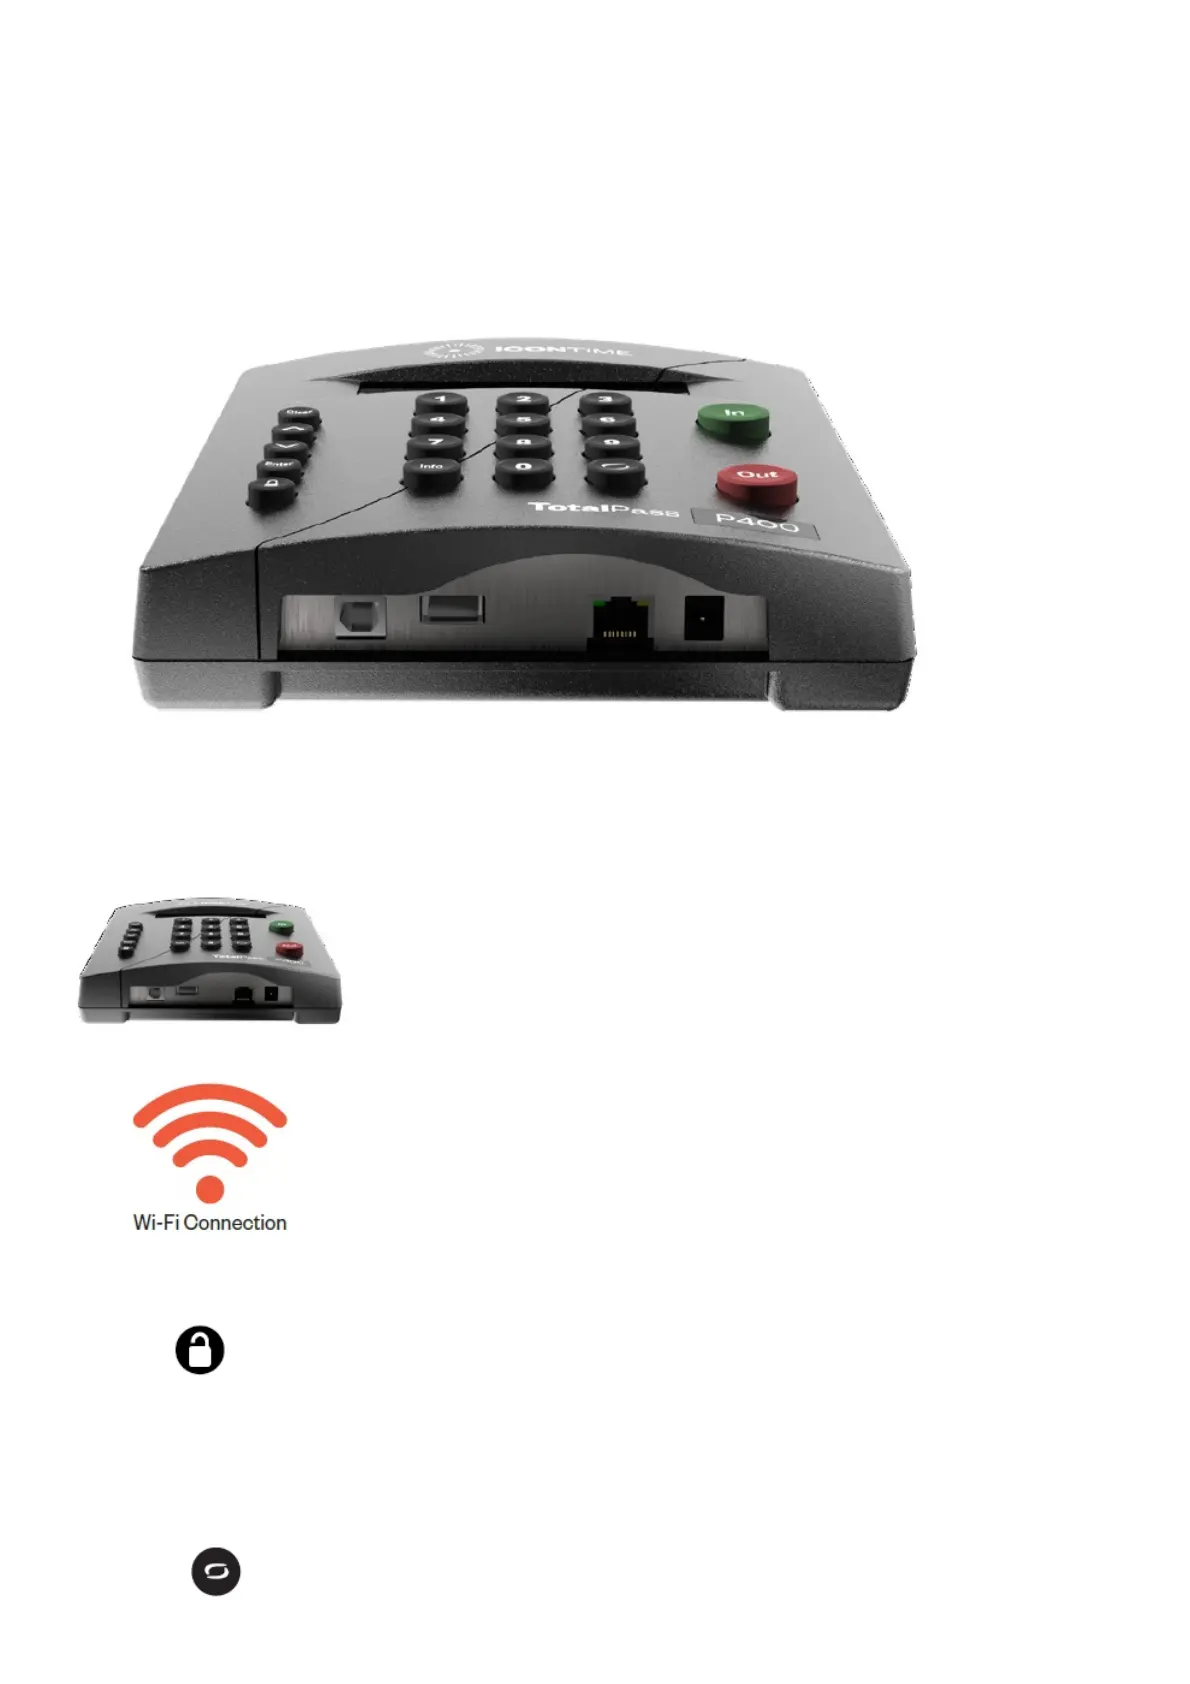
5. CHOOSE YOUR CONNECTION OPTION
TotalPass P400 Time Clock
The TotalPass P400 time clock includes three connection options: Wi-Fi, Ethernet, or USB.
6. CONNECT USING WI-FI
1. If your wireless network is detected automatically, press Enter and go to Step 5. (If a wireless network is not
immediately detected, please go to Step 6.)
2. Press on the time clock to enter Supervisor Mode.
3. Enter the default security code: 00 00 00.
4. Use the ∧ on the time clock to scroll and go to Network Settings. Press Enter.
5. Go to Wi-Fi Settings. Press Enter.
6. Go to View Networks. Press Enter.
7. Select your Network from the list. Press Enter.
8. Enter your Network Password using the ∨ on the time clock to scroll through your character options.
Use the key to change the character set to lowercase, uppercase, # or symbol.