18
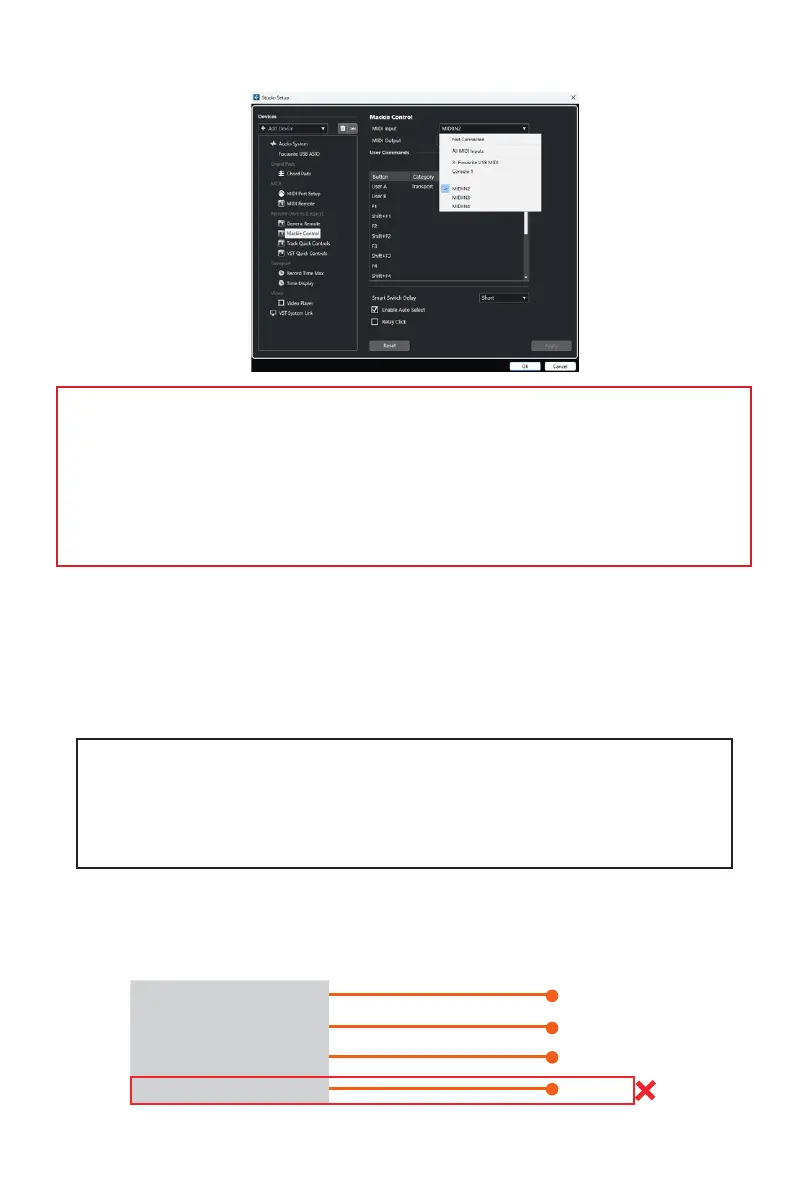
Here's an example of how it is set up in Cubase.
iCON P1-M V1.02 DAW #1
MIDIIN2(P1-M V1.02) DAW #1
MIDIIN3(P1-M V1.02) DAW #1
MIDIIN4(P1-M V1.02) iMAP
iCON P1-M V1.02
(iCON P1-M V1.02)
(iCON P1-M V1.04)
(iCON P1-M V1.02)
(iCON P1-M V1.02)
As you can see, when conguring the device as a Mackie controller, there is a choice
of 4 possible options. Because we have set up Cubase to respond to DAW control
button '2' on the P1-M, we are going to select 'MIDIIN2 ( P1-M V1.02)'.
Please also note, (although this is specic to Cubase), that users should use Mackie
Control in the usual way to set up their devices in Cubase 12 onwards and not
Cubase's MIDI Remote Manager. Regardless of the supported DAWs you are using,
the principle will be largely the same.
Now, we've covered how we allocate DAWs to the P1-M DAW button of your choice (1-
3) in the iMAP and, in principle, how to congure the DAW to the corresponding MIDI
port, (as depicted above), let's move on to conguring our DAW/s in the next section.
Before we move on, let’s remember CiD;
Step 1: Switch on the Controller
Step 2: Open the iMap
Step 3: Launch the DAW/s you intend to use
Note: Please wait a few moments between each step, to ensure each is fully
loaded.
The reason for the order of this process is that, as you can see from the diagram below,
the iMAP must occupy MIDI port 4 in order to communicate eectively. Unfortunately, some
DAWs will automatically try to occupy that port when launched and this will prevent the iMAP
from functioning properly. The iMAP, therefore, needs to be turned on after the controller and
before the DAW to make sure it occupies that MIDI port.
 Loading...