9
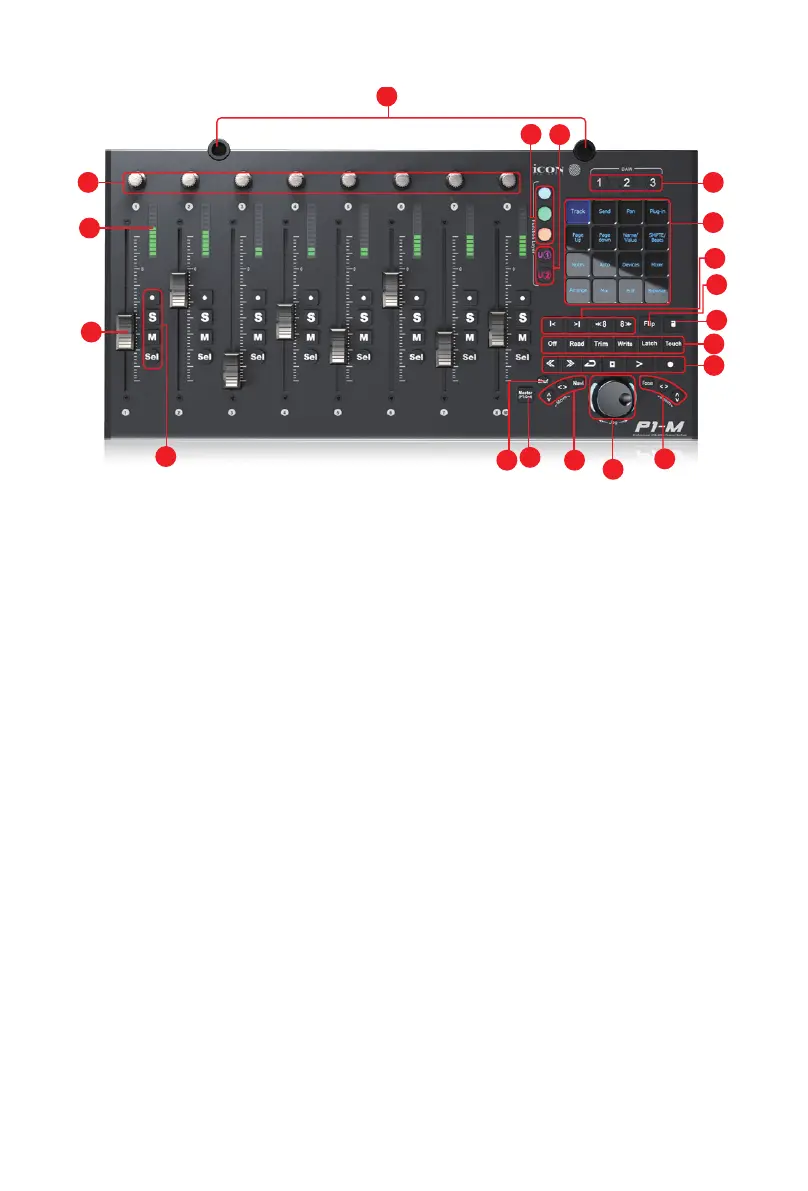
Top Panel Layout
1. Faders
The eight ergonomically designed, motorized faders are generally used for
controlling the track volume of the DAW. Depending on your DAW, you may use
the “Flip” button to swap the rotary encoders and the fader functions. This may
be useful if making very intricate moves for PAN or plug-in parameter values
commonly executed using the rotary encoders. The 12 bit resolution faders are
capable of very detailed movement.
Any automation recorded in a project will be reected by the fader positions.
All faders are touch sensitive and allow the user to override automation the
moment a fader is touched.
Select the 'Master' button to assign channel 8 as the Master channel, (except with Pro
Tools).
2. Control buttons
2a) Recording channel control buttons section
REC button -
Activate and deactivate the recording state of the associated
channel. The switch will light red when the channel is armed.
SOLO button -
Activate/deactivate the solo state of the associated channel. The
switch will light green when the channel solo state is on and other channels will
be muted.
MUTE button -
Activate and deactivate the mute state of the associated
channel. The switch will light blue when the channel is muted.
SEL button
- Activate the selected track.
NOTE: The P1-M is a universal DAW controller (i.e. not designed for one specic DAW).
Functions will operate slightly dierently between DAWs. Please refer to your DAW manual for each function.
12
2a
1
6a
5
4
7
10
6b
3c3d
3a
3b
2b
8
9
11
13