22
(Tip: Platform M+ will memorize your last selected DAW mode and re-enter the
same mode a few seconds after it has been switched on. (i.e. DAW mode selection
is not needed if the last mode is being used.)
4. Select the DAW at Platform M+
Turn on the power of Platform M+ rst and make the DAW selection as shown in the
instructions below.
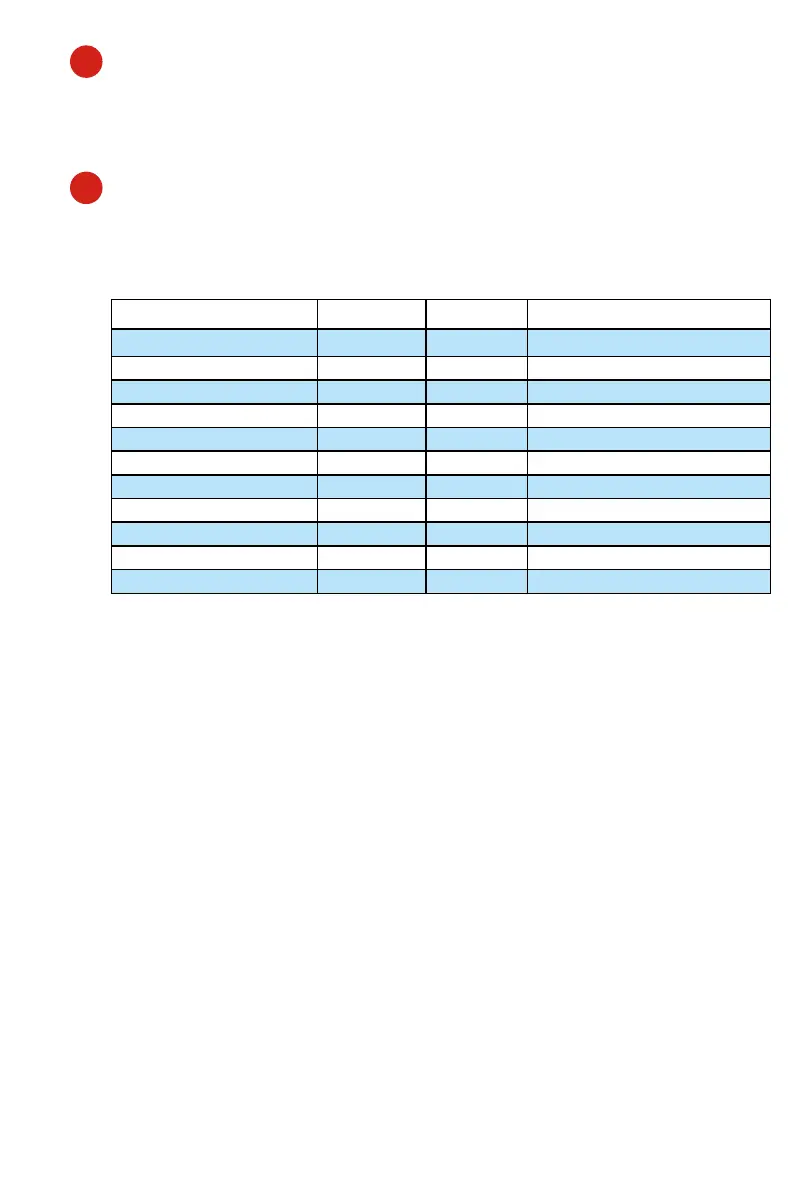
Press one of the 4 mode button according to your DAW as the below table.
MCP LogicPro HUI UserDene
1. Nuendo/Cubase Logic Pro ProTools User self mapping with iMap
2. Digital Performer
3. FL Studio
4. SamplitudePro
5. Reaper
6. Studio One
7. Bitwig
8. Reasons
9. Sonar
10. Audition
11. Ableton Live
Then turn on the power of Platform B+, it will switch to the same DAW mode as
Platform M+.
8. Setup your DAW
The Platform M+ & Platform B+ built-in Mackie Control, LogicPro and HUI protocol,
which will save you considerable trouble in setting up the device at your DAW.
Simply add the “Mackie Control” or “HUI” device under the “MIDI Controller” on
your software. After the Mackie Control or HUI device has been added, select
Platform M+ controller as your MIDI input and output device in your DAW.
(Note: You will only see Platform M+ on your hardware list as Platform B+ will be
recognized as part of Platform M+.)
(Tip: You may also refer to our website at www.icoproaudio.com, where you’ll nd
set up illustrations for different DAW’s in each controller (Platform B+) product page’s
“Setup demo” section.
For DAW’s not on our setup demo list, please refer to your software user manual for
hardware setup.)
1. Connect the Platform B+ to your Platform M+ with the provided
cable.
Use the provided cable to connect devices Platform B+ and Platform M+ via the
expansion ports.
2
6