4
5
PRE-INSTALLATION ASSEMBLY REQUIREMENTS
BEFORE INSTALLATION, ENSURE THAT YOUR DOOR IS PROPERLY BALANCED AND RUNNING
SMOOTHLY. ALSO ENSURE THAT THE LIMIT BRACKETS (SUPPLIED) ARE INSTALLED AND
SECURED PROPERLY. BUMPER/PUSHER SPRINGS MAY BE USED IN PLACE OF, OR IN ADDITION TO
LIMIT BRACKETS FOR PULSE OPERATORS, BUT MUST BE INSTALLED PRIOR TO OPERATION.
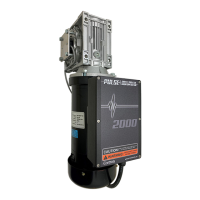
Operator Mounting Requirements
Pulse operators are mounted directly on the door sha. Before installing the operator, please en-
sure following criteria is met:
The door is well balanced, is tested for
smooth functioning without any unusual
noise.
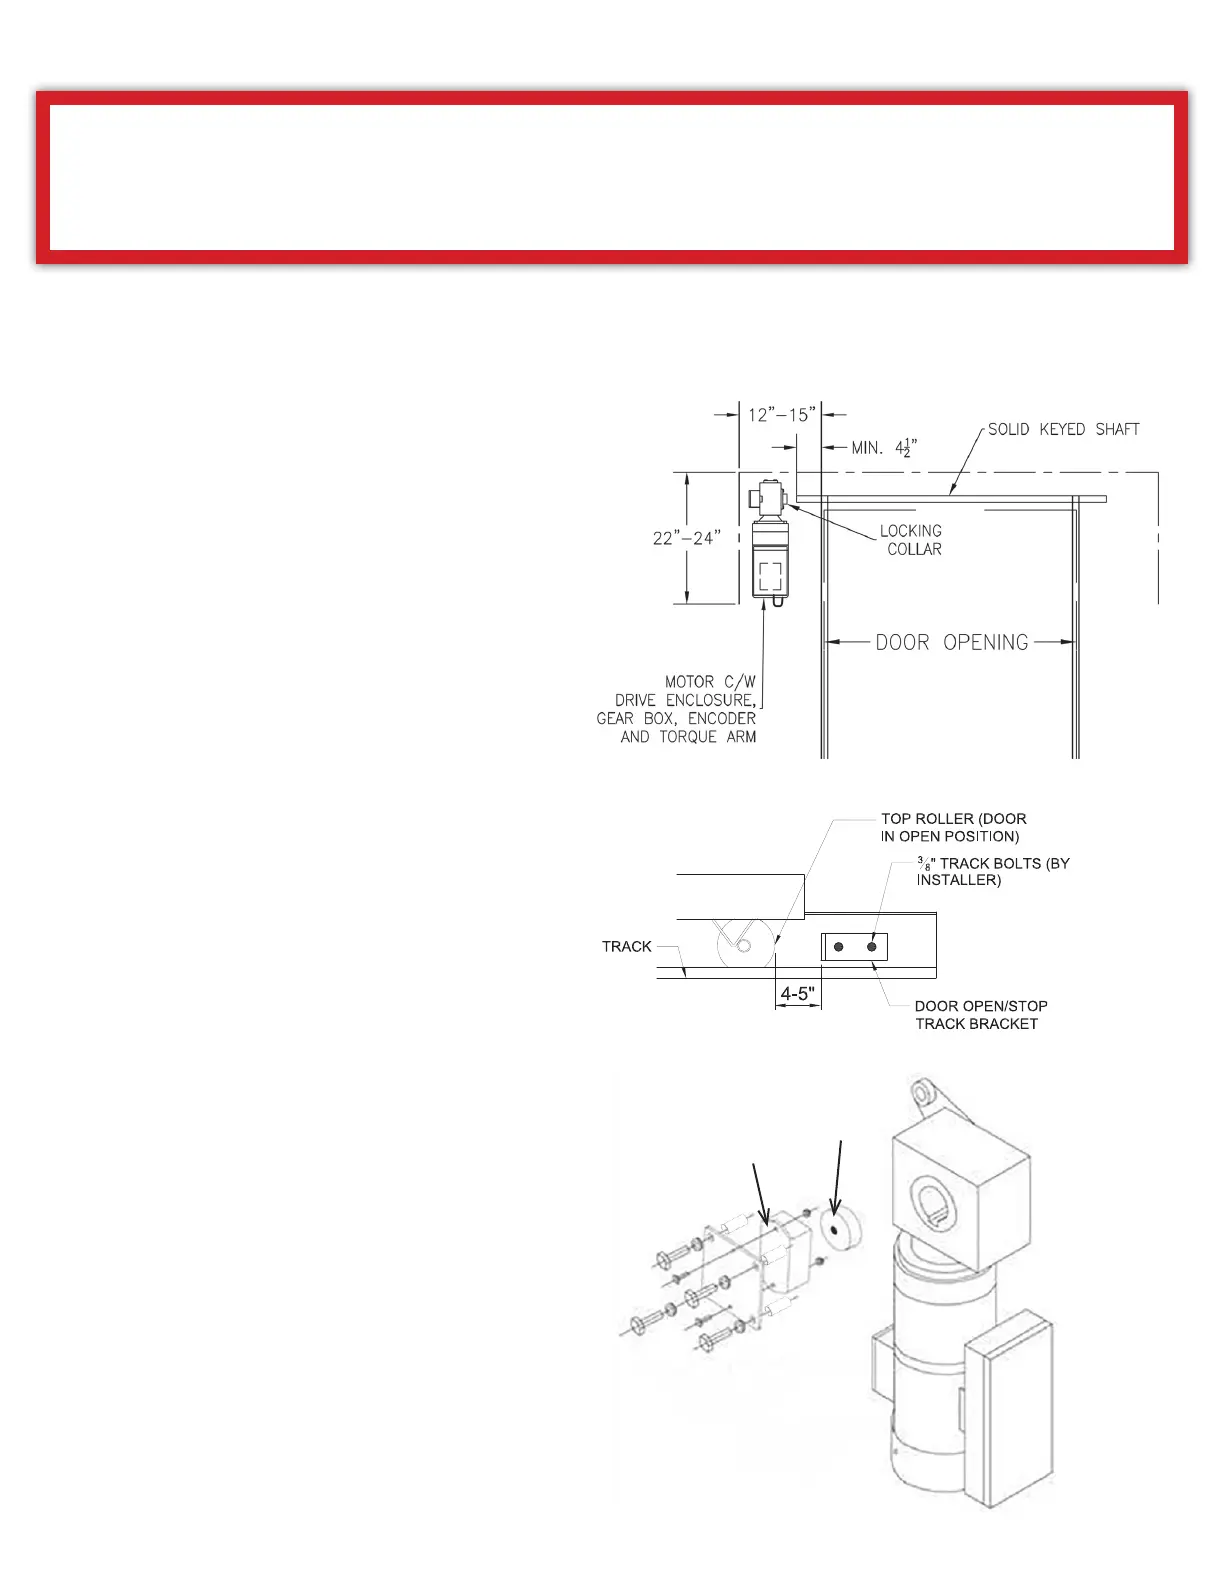
Provided Limit Brackets must be installed
4"-5" past door's desired open position (and
within allowable maximum cable height) to
prevent the doors from over-travel. (See Fig.
1A)
The door has a solid keyed sha with a
minimum exposed length of 4.5” on the
operator side.
Clearance of at least 12” horizontally from
the side of the door (or 9” from end of sha),
and 24” vertically below the sha. There
is adequate structural support surface to
securely install the torque arm mounting
bracket, the torque arm and the junction
box. For more details, see mounting
installation instructions
Fig: 1 & 7.
Mounting space for the operator Control
Panel (Min. 5 . from ground level, within
clear sight of the door but far enough away
as to prevent users from contacting moving
parts).
Le Hand Mounting:
The factory default mounting as shown
(Shown in Fig: 2) is for le-hand side of the
door, hence no modification is required.
FIGURE: 1
FIGURE: 2
Magnet on
this side
Encoder
FIGURE: 1A