8
9
WARNING
• TO REDUCE THE RISK OF PERSONAL INJURY OR DEATH, DO NOT CONNECT ELECTRICAL POWER UNTIL
COMPLETE OPERATOR, JUNCTION BOX AND CONTROL PANEL ARE INSTALLED, SECURED AND PROTECTED PER
FOLLOWING INSTRUCTIONS.
• ENSURE THAT AREA IS CLEAR OF PERSONNEL AND CORDONED OFF TO ACCESS WHILE INSTALLING
OPERATOR.
• USE PROPER SAFETY PROTOCOLS ACCORDING TO INTERNAL, LOCAL AND FEDERAL REQUIREMENTS.
MANDATORY FIRST STEP - Limit Bracket Installation
If your door is not already equipped with bumper/pusher springs, it is mandatory to install the
supplied Limit Brackets. Mount one bracket to the top of each track (See Figure 1A) to prevent
over-travel of the door, and enable automatic encoder recalibration prior to setting limits and aer
a power-loss. These should be mounted inside the door-tracks at the door’s maximum allowable
travel point, and are required to be located at the same exact position on both tracks so that the
top rollers of the door rest against them in a level position.
To install, manually open the door to the uppermost opening position allowable by the cables,
clamp the door in place, and secure the brackets to the track as shown Figure 1A using the top
rollers as the reference points for the brackets.
IN THE ABSENCE OF BUMPER/PUSHER SPRINGS, INSTALLATION OF LIMIT BRACKETS IS
MANDATORY PRIOR TO OPERATOR INSTALLATION. WITHOUT PHYSICAL LIMITS, THE DOOR CAN
RUN OUT OF ITS TRACKS AND CAUSE SEVERE PERSONAL INJURY AND/OR CAUSE SEVERE DAMAGE
TO THE DOOR. FURTHERMORE, YOU WILL BE UNABLE TO SET THE LIMITS.
MOUNTING INSTALLATION INSTRUCTION
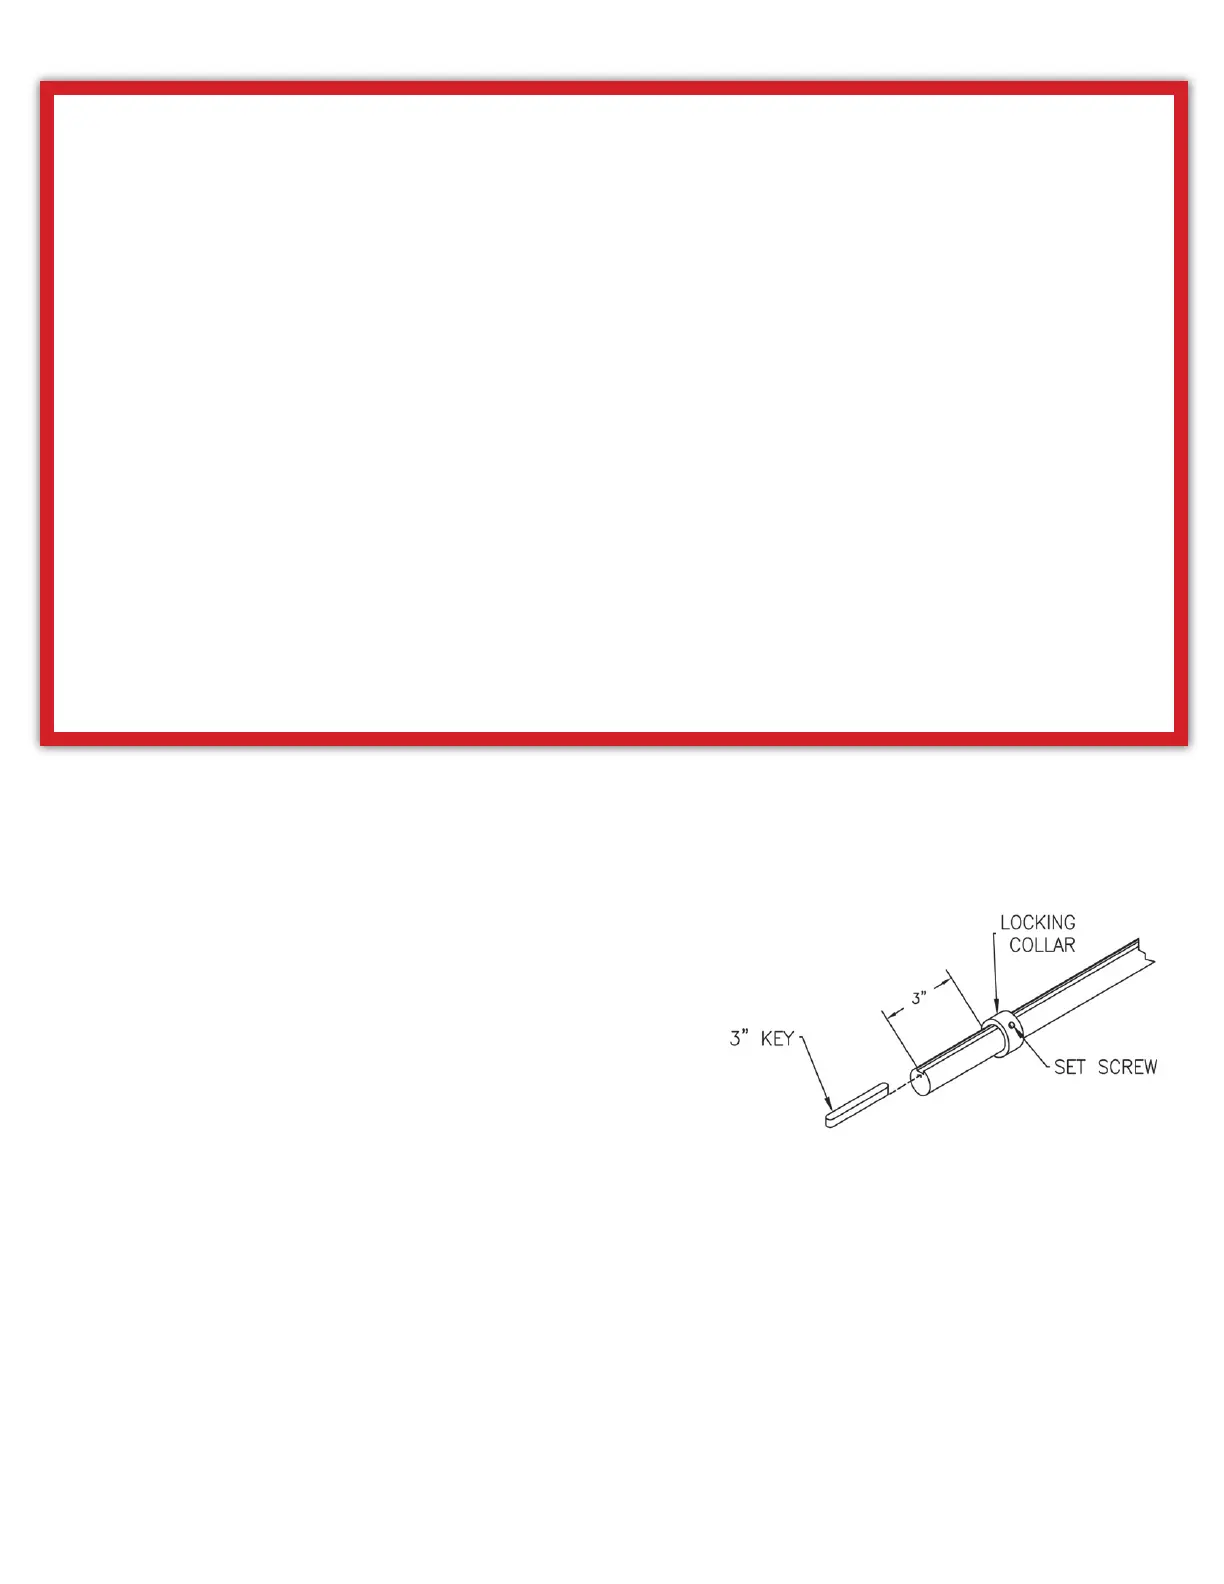
Sha Collar/Key Installation
The Sha Collar serves as an end-stop for the gearbox on the sha to prevent possible damage to the
encoder magnet. It is important that it is securely fastened prior to installation of the operator, and needs to
be mounted in conjunction with the key as shown in Fig: 5.
Adjust the door so that the sha keyway is facing up (you
may have to open/wedge/clamp the door open slightly to
achieve this).
Loosen the Sha Collar set screw and slide it over the sha
approximately 3 ½” from its end.
Insert the 3 inch long key (provided with operator) into the
door sha keyway with one end flush to the end of the sha.
Slide the collar back so that it touches the key, which should still be flush with the sha end on its opposite
side (the key sits in the keyway between the collar and the end of the sha), see Fig: 5.Firmly tighten the
set screw of the collar onto the sha. Fasten the Torque Arm to the gearbox on the opposite side as the
encoder, and at an appropriate position as suggested on Drawing Figs: 4A-F)
Please note that in order to keep this collar as close to the door frame as possible and to
accommodate fastening of the torque arm, you may be required to cut the sha to an appropriate
length.
FIGURE: 5