Do you have a question about the ICP CSA6 and is the answer not in the manual?
Explains the process of evacuating the system and the deep vacuum method for moisture removal.
Details operational sequences, status indicators, and special features like low ambient cooling.
Diagnosing communication failures, pressure switch trips, and control board issues.
Troubleshooting brown-outs, compressor voltage, thermal cutouts, and contactor problems.
Identifying and resolving issues with temperature sensors and their comparison logic.
Guide to interpreting amber LED flash codes for diagnosing system faults.
This document provides installation instructions for the R-410A Split System Air Conditioner models CSA6, HSA6, and TSA6. It emphasizes the importance of reading and understanding all instructions completely before attempting installation.
The manual uses signal words like DANGER, WARNING, CAUTION, and NOTE to indicate different levels of hazard seriousness.
Improper installation, adjustment, alteration, service, maintenance, or use can cause explosion, fire, electrical shock, or other conditions leading to death, personal injury, or property damage. It is crucial to consult a qualified installer, service agency, or distributor for assistance and to use factory-authorized kits or accessories when modifying the product. All safety codes must be followed, including wearing safety glasses, protective clothing, and work gloves. A quenching cloth and fire extinguisher should be available for brazing operations. Local building codes and current editions of the National Electrical Code (NEC) NFPA 70 (or Canadian electrical code CSA 22.1) must be consulted.
To minimize noise from gas pulsations, the unit should be located away from windows, patios, and decks. Ensure vapor and liquid tube diameters are appropriate for unit capacity, and run refrigerant tubes as directly as possible, avoiding unnecessary turns and bends. Leave some slack between the structure and unit to absorb vibration. When passing refrigerant tubes through a wall, seal the opening with RTV or other pliable silicon-based caulk. Avoid direct tubing contact with water pipes, ductwork, floor joists, wall studs, floors, and walls. Refrigerant tubing should not be suspended from joists and studs with rigid wire or straps that directly contact the tubing. Tubing insulation must be pliable and completely surround the vapor tube. If hanger straps are used, they should be 1 inch (25.4 mm) wide, conform to the tubing insulation shape, and be isolated from insulation using metal sleeves.
R-410A refrigerant systems operate at higher pressures than standard R-22 systems, so R-22 service equipment or components must not be used. Specifications require the outdoor unit, indoor unit, refrigerant tubing sets, metering device, and filter drier to be listed in presale literature without deviation.
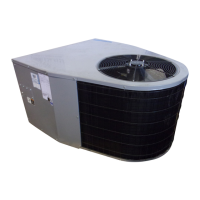
The unit should be unpacked carefully to avoid damage and moved to its final location. Inspect the equipment for shipping damage or incompleteness, filing claims with the shipping company if necessary. The unit rating plate, located on the corner panel, contains essential installation information and should be checked against job specifications.
The unit must be installed on a solid, level mounting pad. If local codes require attachment to the pad, tie-down bolts should be used through knockouts in the unit base pan. For rooftop applications, mount the unit on a level platform or frame above a load-bearing wall, isolating the unit and tubing set from the structure. Supporting members must adequately support the unit and minimize vibration transmission. Rooftop units exposed to winds may require wind baffles. The unit must be level to within ±2° (±3/8 in./ft.) per compressor manufacturer specifications.
Allow sufficient space for airflow, wiring, refrigerant piping, and service. Maintain 30 inches (762 mm) clearance to the service end, 48 inches (1219.2 mm) above the unit, 6 inches (152.4 mm) on one side, and 12 inches (304.8 mm) on all remaining sides for proper airflow. Maintain a distance of 24 inches (609.6 mm) between units and position the unit so water, snow, or ice from the roof or eaves does not fall directly on it. For rooftop applications, the unit should be at least 6 inches (152.4 mm) above the roof surface.
The minimum outdoor operating ambient in cooling mode is 55°F (12.78°C) without low ambient cooling enabled, and the maximum outdoor operating ambient in cooling mode is 125°F (51.67°C).
Relieve pressure and recover all refrigerant before system repair or final unit disposal, using all service ports and opening all flow-control devices. Do not leave the system open to the atmosphere longer than necessary, as POE oil in the compressor is highly susceptible to moisture absorption. Always keep tubing ends sealed during installation. If any refrigerant tubing is buried, provide a 6-inch (152.4 mm) vertical rise at the service valve. Tubing lengths up to 36 inches (914.4 mm) can be buried without special consideration, but not more than 36 inches (914.4 mm).
Outdoor units can be connected to the indoor section using accessory tubing packages or field-supplied refrigerant-grade tubing of correct size and condition. For tubing requirements beyond 80 ft (24.38 m), substantial capacity and performance losses can occur; refer to the Long Line Applications Guideline. There are no buried-line applications greater than 36 inches (914.4 mm). If refrigerant tubes or the indoor coil are exposed to the atmosphere, they must be evacuated to 500 microns to eliminate contamination and moisture.
The outdoor unit contains the correct system refrigerant charge for operation with a factory-approved AHRI-rated indoor unit when connected by 15 ft (4.57 m) of field-supplied or factory-accessory tubing and a factory-supplied filter drier. Check the refrigerant charge for maximum efficiency. Maximum liquid-line size is 3/8-inch OD for all residential applications, including long lines. Always install the factory-supplied liquid-line filter drier; obtain replacements from your distributor or branch.
Certain accessories are required for low-ambient cooling applications (below 55°F / 12.8°C) and long-line applications (over 80 ft / 24.38 m). These include:
For tubing line sets between 80 and 200 ft (24.38 and 60.96 m) and/or 20 ft (6.09 m) vertical differential, refer to the Long Line Applications Guideline.
Units are rated with 25 ft (7.6 m) of lineset.
Installation of a filter drier in the liquid line is required. The filter drier must be wrapped in a heat-sinking material (e.g., a wet cloth) while brazing. Braze 5 inches (127 mm) of liquid tube to the indoor coil, then braze the filter drier to the liquid tube, ensuring the flow arrow points towards the indoor coil. Finally, connect and braze the liquid refrigerant tube to the filter drier.
Connect the vapor tube to the fitting on the outdoor unit vapor service valves. Connect and braze the 3/8-inch coupling (provided with the filter drier) to the liquid service valve, and connect and braze the liquid tubing to the other end of this coupling, using refrigerant-grade tubing. Service valves must be wrapped in a heat-sinking material (e.g., a wet cloth) while brazing. After brazing, leak test all field and factory joints.
The refrigerant tubes and indoor coil should be evacuated using the deep vacuum method (500 microns) or an alternate triple evacuation method. Never use the system compressor as a vacuum pump. Always break a vacuum with dry nitrogen. The deep vacuum method is the most positive way to ensure the system is free of air and liquid water.
Ensure factory tubing on both indoor and outdoor units has not shifted during shipment and that tubes are not rubbing against each other or any sheet metal. Pay attention to feeder tubes, ensuring wire ties are secure and tight.
Before installing, modifying, or servicing the system, the main electrical disconnect switch must be in the OFF position. Lock out and tag the switch with a suitable warning label. Do not supply power to the unit with the compressor terminal box cover removed. Field wiring must comply with local and national fire, safety, and electrical codes, and the voltage to the system must be within the limits shown on the unit rating plate. Contact the local power company for improper voltage. Operation on improper line voltage constitutes abuse and could affect unit reliability. Use copper wire only between the disconnect switch and the unit. Install a branch circuit disconnect of adequate size per NEC to handle the unit starting current, located within sight from and readily accessible from the unit.
Remove the access panel to gain access to unit wiring. Extend wires from the disconnect through the power wiring hole into the unit control box. Connect the ground wire to the ground connection in the control box. Connect power wiring to the contactor.
Route 24-V control wires through the control wiring grommet and connect leads to the control wiring. Use No. 18 AWG color-coded, insulated (35°C minimum) wire. If the thermostat is more than 100 ft (30.48 m) from the unit, use No. 16 AWG color-coded, insulated wire to avoid excessive voltage drop. All wiring must be NEC Class 1 and separated from incoming power leads. Use a furnace transformer, fan coil transformer, or accessory transformer for control power, 24-V/40-VA minimum. Note that available 24-V accessories may exceed the minimum 40-VA power requirement, so determine the total transformer load and increase capacity or split the load with an accessory transformer as required.
Check factory wiring and field wire connections to ensure terminations are secured properly and that wires are not in contact with tubing, sheet metal, etc.
If equipped with a crankcase heater, furnish power to the heater a minimum of 24 hours before starting the unit. To furnish power only to the heater, set the thermostat to OFF and close the electrical disconnect to the outdoor unit. A crankcase heater is required for low-ambient cooling or if refrigerant tubing is longer than 80 ft (24.38 m).
Refer to the individual instructions packaged with kits or accessories when installing.
The Outdoor Air Temperature (OAT) Thermistor is factory installed in the bottom shelf of the control box, locked in place by turning it 90 degrees, with the spherical end of a nib facing the front of the control box. Ensure it is locked in place. The Outdoor Coil Temperature (OCT) Thermistor is factory installed on the liquid tube between the coil assembly and the liquid service valve. Ensure it is securely attached with the clip.
To prevent compressor damage or personal injury, do not overcharge the system with refrigerant, do not operate the unit in a vacuum or at negative pressure, and do not disable the low-pressure switch in scroll compressor applications. Dome temperatures may be hot. Wear safety glasses, protective clothing, and gloves when handling refrigerant, as front-seating service valves are equipped with Schrader valves. Federal regulations require that refrigerant not be vented to the atmosphere; recover during system repair or final unit disposal.
The factory charge amount and desired subcooling are shown on the unit rating plate. The charging method is on the information plate inside the unit. For proper charging, conditions must be favorable: outdoor temperature between 70°F and 100°F (21.11°C and 37.78°C), and indoor temperature between 70°F and 80°F (21.11°C and 26.67°C). For standard refrigerant line lengths (80 ft/24.38 m or less), allow the system to operate in cooling mode for at least 15 minutes. When operating with the Observer Wall Control in communicating mode, ensure indoor airflow is set to "efficiency" during charging. If conditions are favorable, check the system charge by the subcooling method, adjusting slowly and allowing 15 minutes for stabilization. If the indoor temperature is above 80°F (26.67°C) and the outdoor temperature is in the favorable range, adjust the system charge by weight based on line length, and allow the indoor temperature to drop to 80°F (26.67°C) before attempting subcooling. If the indoor temperature is below 70°F (21.11°C) or the outdoor temperature is not in the favorable range, adjust the charge for line set length above or below 15 ft (4.57 m) only. The charge level should then be appropriate for the system to achieve rated capacity. The charge level can be checked later when both indoor and outdoor temperatures are in a more favorable range. For line lengths beyond 80 ft (24.38 m) or greater than 20 ft (6.10 m) vertical separation, refer to the Long Line Applications Guideline for special charging requirements.
The AC control board controls:
When using communicating control, 4 field wires are connected to the factory wires already wired to the DX+DX-C R terminal. The unit is set up for communicating control. When used with a standard non-communicating thermostat, 3 thermostat control wires are recommended to be connected to R, Y, and C. Disconnect factory wires from DX+, DX-, C & R terminals. Connect factory provided wires to R, C, and Y on the control board for 3-wire thermostat control. Connect field 24V wires to factory provided wires now connected to R, C, and Y, and cap both sides or remove unused factory provided wires. If only 2 thermostat control wires are available, units will function, but some control features are lost. The circuit board will be powered down when there is no call for cooling, resulting in:
Turn on power to indoor and outdoor units. The transformer is energized. On a call for cooling, the thermostat makes circuits R-Y and R-G. Circuit R-Y energizes the contactor, starting the outdoor fan motor and compressor. Circuit R-G energizes the indoor unit blower relay, starting the indoor blower motor on high speed. To achieve rated system performance, the indoor unit or thermostat must have a time delay relay circuit. When the thermostat is satisfied, its contacts open, de-energizing the contactor and blower relay. The compressor and motors stop. If the indoor unit has a time-delay relay circuit, the indoor blower will run an additional 90 seconds to increase system efficiency.
The outdoor unit control system has special functions. Cooling Operation: Utilizes either a standard indoor thermostat or Observer™ Communicating Wall Control. With a call for cooling, the outdoor fan and compressor are energized. When cooling demand is satisfied, the compressor and fan shut off. The outdoor fan motor will continue to operate for one minute after the compressor shuts off if the outdoor ambient is greater than or equal to 100°F (37.78°C).
Crankcase Heater Operation: The crankcase heater (when applicable) is energized during the off cycle below 65°F (37.78°C).
Outdoor Fan Motor Operation: The outdoor unit control energizes the outdoor fan whenever the compressor is operating. The outdoor fan remains energized for 15 minutes if a pressure switch or compressor thermal protector opens. The outdoor fan motor will continue to operate for one minute after the compressor shuts off when the outdoor ambient is greater than or equal to 100°F (37.78°C).
Utility curtailment only works when the unit is operating with a non-communicating thermostat. If a utility curtailment interface is applied, the utility relay should be wired in series with the Y input.
When the unit is required to operate below 55°F (12.78°C) to a minimum of 0°F (-17.78°C) outdoor temperature, provisions must be made for low ambient operation. Low ambient applications require accessory kits: Low Ambient Pressure Switch Kit, Evaporator Freeze Thermostat, Hard Start kit, and Crankcase Heater. Support feet are recommended. For low ambient cooling with the Observer Communicating Wall Control, the cooling lockout must be set to "Off" in the Wall Control setup.
When operating in communicating mode, standard thermostat terminals will not function. A terminal labeled "LS" on the AC control board is provided for wiring liquid line solenoids. For communicating mode, wire the solenoid valve kit NASA401LS across LS and C terminals. For non-communicating mode, wire the solenoid valve kit NASA401LS across C and Y terminals.
Systems Communication Failure: If communication between the outdoor unit, control board, and indoor wall control fails, the control will flash an appropriate fault code (Table 3). Check wiring to the wall control, indoor, and outdoor units.
Pressure Switch Protection: The outdoor unit has high- and low-pressure switches. If the control senses an open switch, it de-energizes the compressor contactor, keeps the outdoor fan operating for 15 minutes, and displays the fault code. After a 15-minute delay, if there is still a call for cooling and the LPS or HPS resets, the compressor contactor is energized. If the switch has not closed after 15 minutes, the outdoor fan turns off. If the open switch closes anytime after the 15-minute delay, the unit resumes operation. If the LPS or HPS trips for five consecutive cycles, unit operation is locked out for 4 hours, and the fault code is displayed. For high-pressure switch trips or lockouts, check the refrigerant charge, outdoor fan operation, and outdoor coil for airflow restrictions. For low-pressure switch trips or lockouts, check the refrigerant charge and indoor airflow.
Control Fault: If the outdoor unit control board fails, the control will flash the appropriate fault code. The control board should be replaced.
24V Brown Out Protection: If the control voltage is less than 15.5V for at least 4 seconds, the compressor contactor and fan relay are de-energized. Compressor and fan operation are not allowed until the control voltage is a minimum of 17.5V. The control will flash the appropriate fault code. Verify the control voltage is in the allowable range of 18-30V.
Compressor Voltage Sensing: Input terminals VR and VS on the control board detect compressor voltage status. The control continuously monitors high voltage on the run capacitor. Voltage should be present when the contactor is energized and absent when de-energized.
Compressor Thermal Cutout or Loss of 230V Power: If the control senses compressor voltage after start-up, then it is absent for 10 consecutive seconds while cooling demand exists, it de-energizes the compressor contactor, keeps the outdoor fan operating for 15 minutes (if 230V power is present), and displays the fault code. Possible causes are internal compressor overload trip or loss of high voltage (230V) to the compressor without loss of control voltage. After a 15-minute delay, if there is still a call for cooling, the compressor contactor is energized. If the thermal protector has not reset, the outdoor fan turns off. If the call for cooling continues, the control energizes the compressor contactor every 15 minutes. If the thermal protector closes (at the next 15-minute interval check), the unit resumes operation. If the thermal cutout trips for three consecutive cycles, unit operation is locked out for 4 hours, and the fault code is displayed.
Contactor Shorted Detection: If compressor voltage is sensed when there is no demand for compressor operation, the contactor may be stuck closed. The control will flash the appropriate fault code. Check the contactor and control box wiring.
No 230V at Compressor: If compressor voltage is not sensed when the compressor should be starting, the contactor may be stuck open, or the unit disconnect or circuit breaker may be open. The control will flash the appropriate fault code. Check the contactor, unit disconnect or circuit breaker, and control box wiring.
Temperature Thermistors: Thermistors are electronic devices that sense temperature. As temperature increases, resistance decreases. They are used to sense outdoor air (OAT) and coil temperature (OCT). If the outdoor air or coil thermistor fails, the control will flash the appropriate fault code. The outdoor air thermistor and coil thermistor are factory mounted and should not be relocated.
Thermistor Sensor Comparison: The control continuously monitors and compares the outdoor air temperature sensor and outdoor coil temperature sensor to ensure proper operating conditions. If the outdoor air sensor indicates ≥10°F (≥ −12.22°C) warmer than the coil sensor (or) the outdoor air sensor indicates ≥20°F (≥ -6.67°C) cooler than the coil sensor, the sensors are out of range. If the sensors are out of range, the control will flash the appropriate fault code.
Failed Thermistor Default Operation: Factory defaults are provided in case of outdoor air thermistor and/or coil thermistor failure. The resistance vs. temperature chart (Figure 8) enables technicians to check the outdoor air and outdoor coil thermistors for proper resistance. Unplug the thermistor assembly from the circuit board and measure resistance across each thermistor. For example, if the outdoor temperature is 60°F (15.56°C), the resistance reading across the outdoor air thermistor should be around 16,000 Ohms.
Status Codes: Table 3 shows status codes flashed by the amber status light. Most system problems can be diagnosed by reading these codes. Codes are flashed by a series of short and long flashes. Short flashes are 0.25 seconds ON, and long flashes are 1.0 second ON. Time between flashes is 0.25 seconds. Time between a short flash and the first long flash is 1.0 second. Time between code repeating is 2.5 seconds with the LED OFF. Count the number of short and long flashes to determine the appropriate flash code. Table 3 gives possible causes and actions related to each error.
| Brand | ICP |
|---|---|
| Model | CSA6 |
| Category | Air Conditioner |
| Language | English |