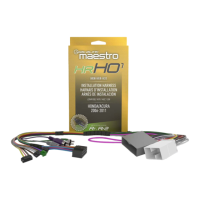
The iDatalink Maestro RR is a sophisticated radio replacement interface designed to seamlessly integrate an aftermarket car radio into your 2015-2017 Chrysler 200. This device is engineered to retain crucial vehicle functionalities, including steering wheel controls, various vehicle settings, and more, ensuring a comprehensive and enhanced driving experience after a radio upgrade. The Maestro RR system, often paired with the iDatalink Maestro K200 Dash Kit, provides a complete solution for upgrading your vehicle's audio system while preserving essential OEM features.
Function Description:
At its core, the iDatalink Maestro RR acts as a bridge between your new aftermarket radio and your vehicle's existing electronic systems. It translates the digital signals from your vehicle's CAN bus (Controller Area Network) into commands that your aftermarket radio can understand, and vice-versa. This bidirectional communication allows for the retention of several factory features that would otherwise be lost with a standard radio replacement.
One of the primary functions of the Maestro RR is the retention of steering wheel controls (SWC). This means you can continue to use the buttons on your steering wheel to control volume, track up/down, source selection, and answer/end calls, depending on the capabilities of your aftermarket radio and the original vehicle configuration. The interface is programmable, allowing for customization of these controls to suit individual preferences.
Beyond SWC, the Maestro RR is designed to retain various vehicle settings. This can include climate control display on the aftermarket radio (if supported), access to vehicle information menus, and potentially other customizable settings that were originally accessed through the factory radio. The specific features retained will depend on the vehicle's original equipment and the capabilities of the aftermarket radio.
For vehicles equipped with factory amplifiers, the Maestro RR ensures proper integration, allowing the aftermarket radio to utilize the existing amplifier for optimal sound quality. It manages the turn-on signal and audio routing to maintain the integrity of the factory audio system.
The system also supports the retention of parking assist features, such as OEM parking sensors, cross-traffic alerts, and lane departure alerts. For these features, an optional accessory like the ACC-SP1 external speaker may be required, especially if the vehicle does not have an OEM amplifier. This speaker ensures that audible chimes and alerts are still heard, preventing the radio from muting during active parking assist events, unless specifically configured otherwise.
The iDatalink Maestro K200 Dash Kit, which often accompanies the Maestro RR, provides a clean and professional installation of the aftermarket radio. It includes the necessary bezels, brackets, and wiring harnesses to ensure a factory-like fit and finish in the dashboard. The dash kit also facilitates the transfer of essential components like the hazard switch from the OEM bezel to the new K200 bezel.
Usage Features:
The installation process for the Maestro RR system involves several key steps, starting with the disassembly of the vehicle's dash. This includes removing the radio bezel, unscrewing and unplugging the factory radio, and in some cases, cutting plastic brackets to accommodate the new dash kit and radio. The K200 Dash Kit assembly involves screwing metal brackets into the plastic surround and clipping them to the back of the K200 bezel. Vents from the OEM radio bezel are also transferred to the K200.
Connecting the Maestro RR involves a series of wiring connections. The aftermarket radio's main harness is connected to the K200 T-harness, matching wire functions for speakers, power, ground, and illumination. Specific connections are made depending on whether the vehicle has a factory amplifier. The factory harness is then connected to the K200 T-harness. Data and audio cables are plugged into the aftermarket radio, with specific instructions for different radio brands (e.g., Pioneer, Alpine) regarding audio input and W/R port usage. Finally, all harnesses are connected to the Maestro RR module.
The Maestro RR module requires firmware programming specific to your vehicle and aftermarket radio. This is a crucial step that ensures proper functionality and retention of features. The programming process typically involves connecting the module to a computer and using iDatalink's web-based programming tool to load the correct firmware. The provided "Maestro RR2 Programmable Outputs Guide" offers additional resources for customizing outputs.
Once installed, the system should be tested thoroughly. This includes checking the functionality of steering wheel controls, verifying that vehicle settings are accessible, and confirming that parking assist chimes and alerts are working correctly.
The system is designed for user-friendly operation post-installation. The retained steering wheel controls allow for intuitive interaction with the new radio, mimicking the factory experience. The integration of vehicle settings means that drivers can continue to manage their car's features through the aftermarket radio's display, providing a centralized control point.
Maintenance Features:
While the iDatalink Maestro RR itself is a robust electronic interface designed for long-term reliability, there are a few maintenance-related aspects to consider, primarily concerning troubleshooting and updates.
Troubleshooting: The provided troubleshooting table is a valuable resource for diagnosing common issues. For example, if gauges do not work or the radio shows an OBD2 error, the solution often involves ensuring the 2-pin connectors of the K200 T-harness are correctly configured and performing a Maestro RR reset. If callers cannot be heard during a phone call, it might indicate an issue with the 4-pin black and white connectors in vehicles with factory amplifiers.
Firmware Updates: The Maestro RR module relies on specific firmware to function correctly with your vehicle and aftermarket radio. If the light on the Maestro is flashing RED ONCE, it indicates no firmware on the module, requiring a re-flash. If it blinks RED TWICE, it suggests an issue with the data cable connection or incorrect radio model/serial number entered during the flash. It is important to ensure that the correct radio model and serial number are entered during the programming process.
Maestro RR Reset Procedure: A simple reset procedure is available to resolve certain issues. This involves turning the key to the OFF position, disconnecting all connectors from the module, pressing and holding the module's programming button while reconnecting all connectors, and then releasing the button once the LED flashes RED rapidly. A solid GREEN LED for 2 seconds indicates a successful reset.
Aftermarket Radio Firmware: It is explicitly stated that to ensure proper operation, the aftermarket radio itself needs to have the latest firmware from its manufacturer. This highlights the interconnectedness of the system; the Maestro RR relies on the aftermarket radio being up-to-date for optimal performance. Users are advised to visit the radio manufacturer's website for any relevant updates.
Technical Assistance: For more complex issues or questions, technical assistance is available via phone and email. Additionally, online support resources, including a forum, are provided, fostering a community where users can seek help and share information.
In summary, the iDatalink Maestro RR is a comprehensive solution for integrating an aftermarket radio into a Chrysler 200, designed for seamless retention of factory features and an enhanced user experience. Its robust design, coupled with clear installation instructions and accessible troubleshooting resources, makes it a reliable choice for vehicle audio upgrades.