- 12 -
The second outlet kit allows your thermostatic mixer to
be connected to a fixed overhead shower
Kit contains
2.5mm A/F Hexagonal Key,
ILV Assembly Clockwise Close,
Instruction leaflet
Important!
Mixer must not be connected to the water supply when
adding the second outlet.
If mixer has been fitted to the wall, it must be removed
to permit access to rear.
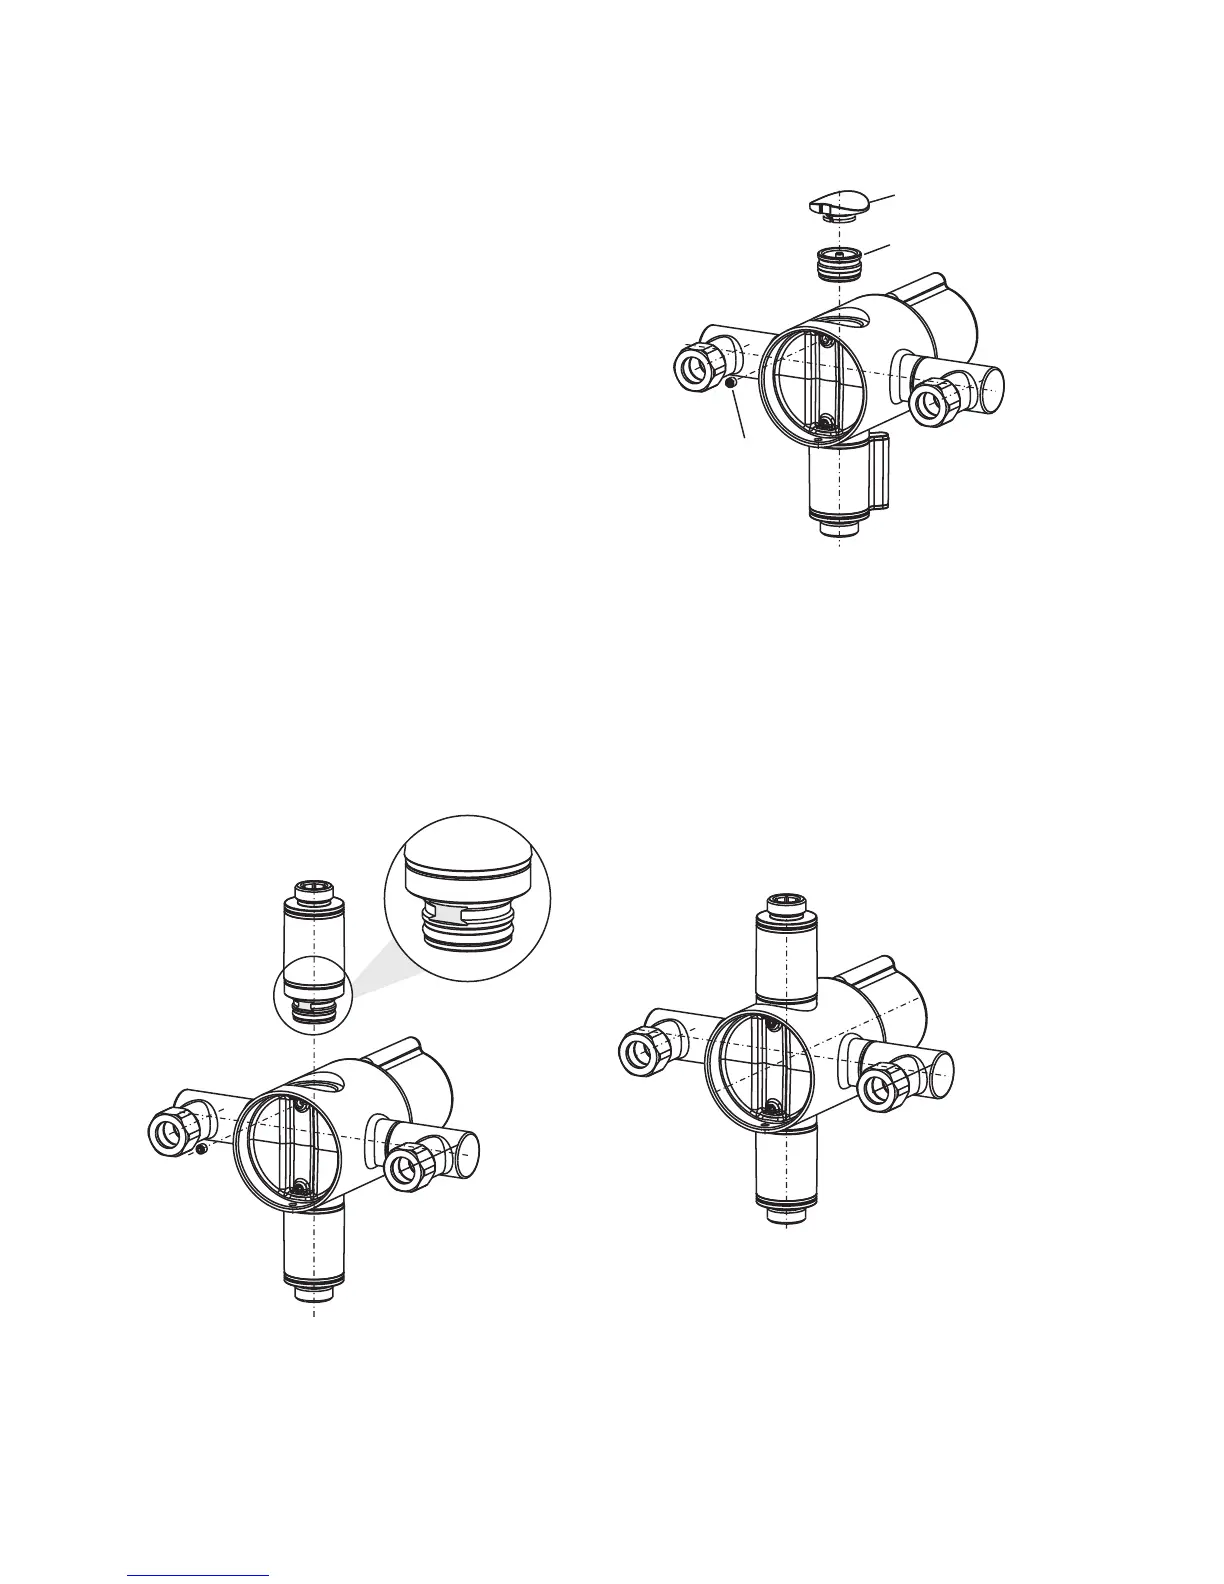
1. Using a small screwdriver carefully remove the
plug cap from the sealing plug at the top of the mixer.
2. Remove the Sealing plug securing grubscrew from
the rear of the mixer with a 2.5mm hexagonal key
(supplied).
3. Remove the sealing plug, using pliers to grip the
central peg.
4. Assemble the second outlet, taking care to align the outlet flat with the securing grub screw
shown.
5. Fit and tighten the securing grub screw against the outlet flat with the 2.5mm hexagonal key
(supplied).
sealing plug
plug cap
sealing plug
securing
grub screw
12
INSTALLING THE OPTIONAL SECOND OUTLET
A5525AA (NOT SUPPLIED)
Figure 15
Figure 17
Figure 16
 Loading...