- 13 -
INSTALLATION
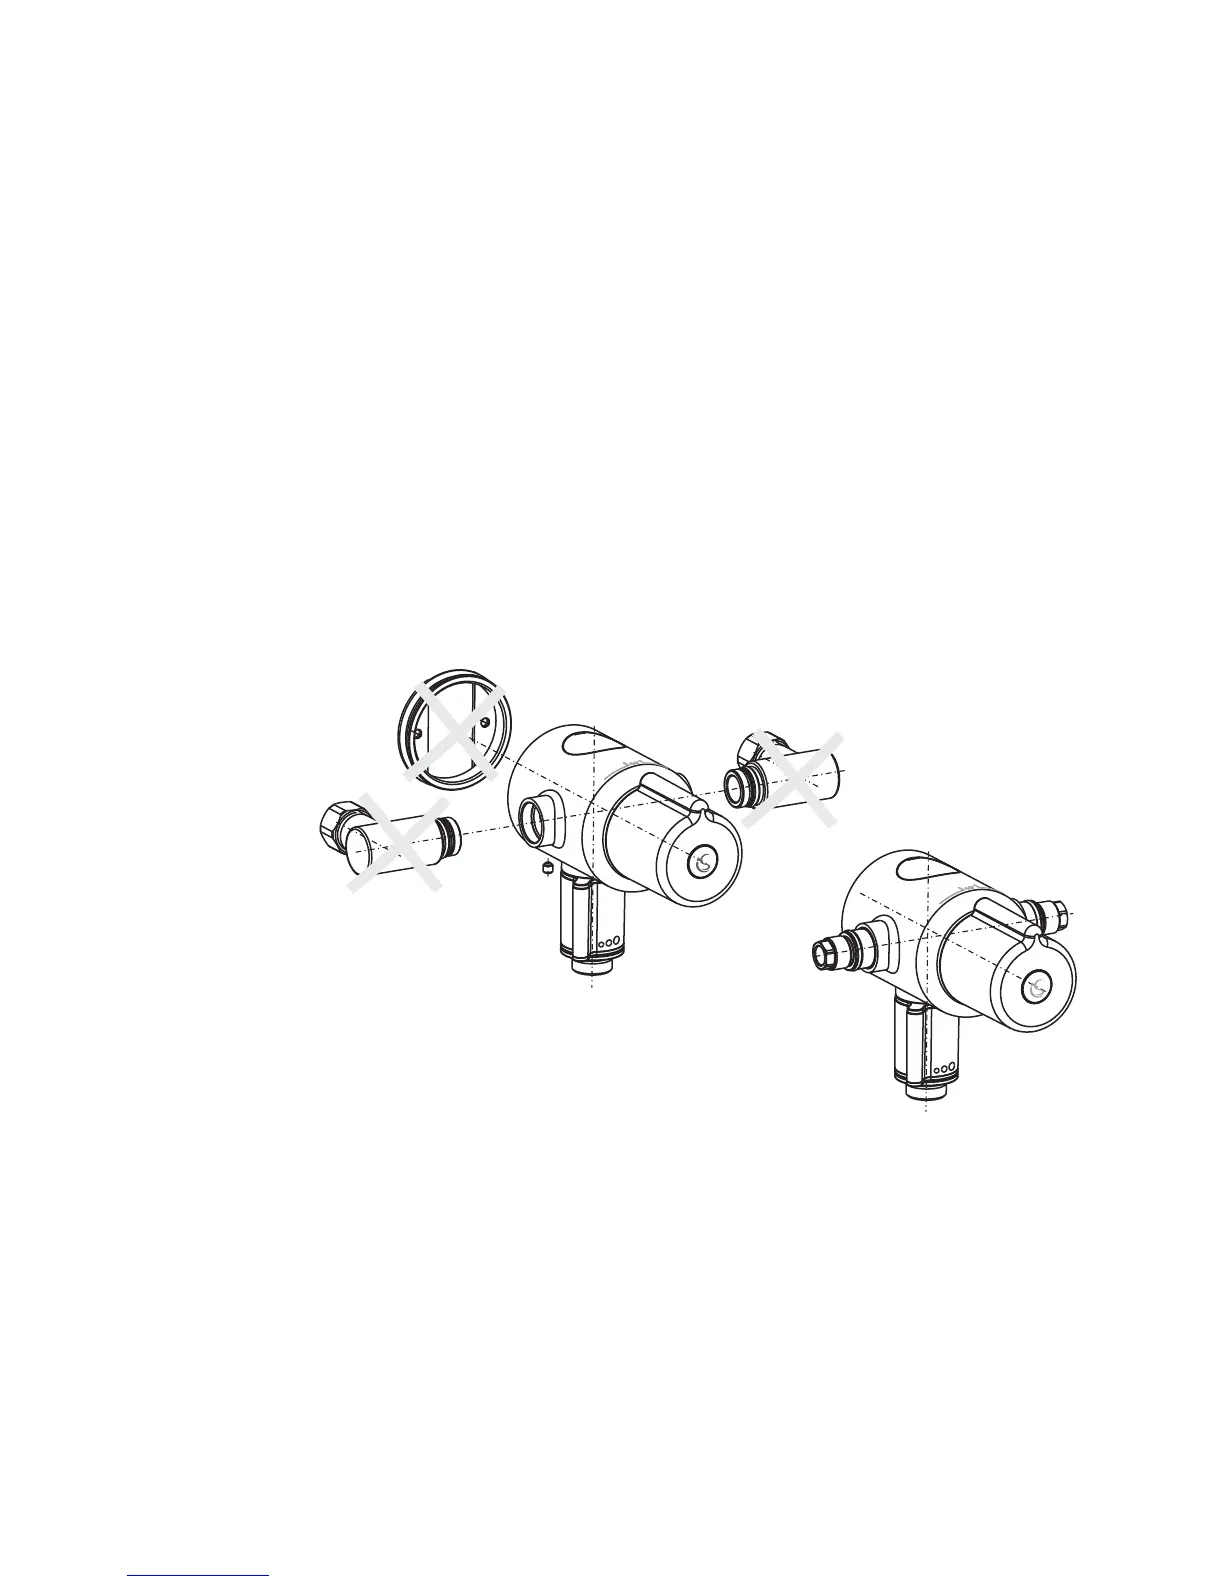
1. Unscrew the original elbows from the mixer body and discard
2. Remove and discard the internal backplate from the mixer by removing the grubscrew with a
2.5mm hexagonal key (supplied).
3. Fit the new adjustable inlet connectors into the
mixer and tighten them using a 14mm A/F Spanner
4. Screw the adjustable inlet elbows onto the connectors and position them at the existing pipework
centre distance. Note! Must be between 147mm and 155mm
5. Draw a centre line on the wall surface between the existing inlet pipework.
6. Using the new adjustable external backplate as a template, mark the position of the backplate
fixing holes.
7. For solid walls drill the holes for the backplate with a 6mm drill and insert the wall plugs (supplied).
For other types of wall structure alternative fixings may be required (not supplied).
8. Secure the new backplate to the wall using the screws (supplied).
9. Align the mixer with the pipework and fit onto the backplate. Note! Make sure that the pipes are
pushed fully into the inlet connectors.
The adjustable inlets each have adjustment of 4mm, allowing your thermostatic mixer to be connected
to pipe centres ranging from 147mm to 155mm
The adjustable external backplate allows for 5mm adjustment from the finished wall surface
13
RETRO FIT INSTALLATION WITH ADJUSTABLE
INLETS PACK - A5526AA (NOT SUPPLIED)
Figure 18
Kit contains:
lAdjustable Inlet Elbows x 2
lExternal Backplate
lAdjustable Inlet Connectors x 2
lCheck valves x 2
lM5x5 Grub Screws x 2
l2.5mm A/F Hexagonal Key
lInstruction leaflet
lWall plugs & fixings x2
Figure 19
 Loading...