۳۷37
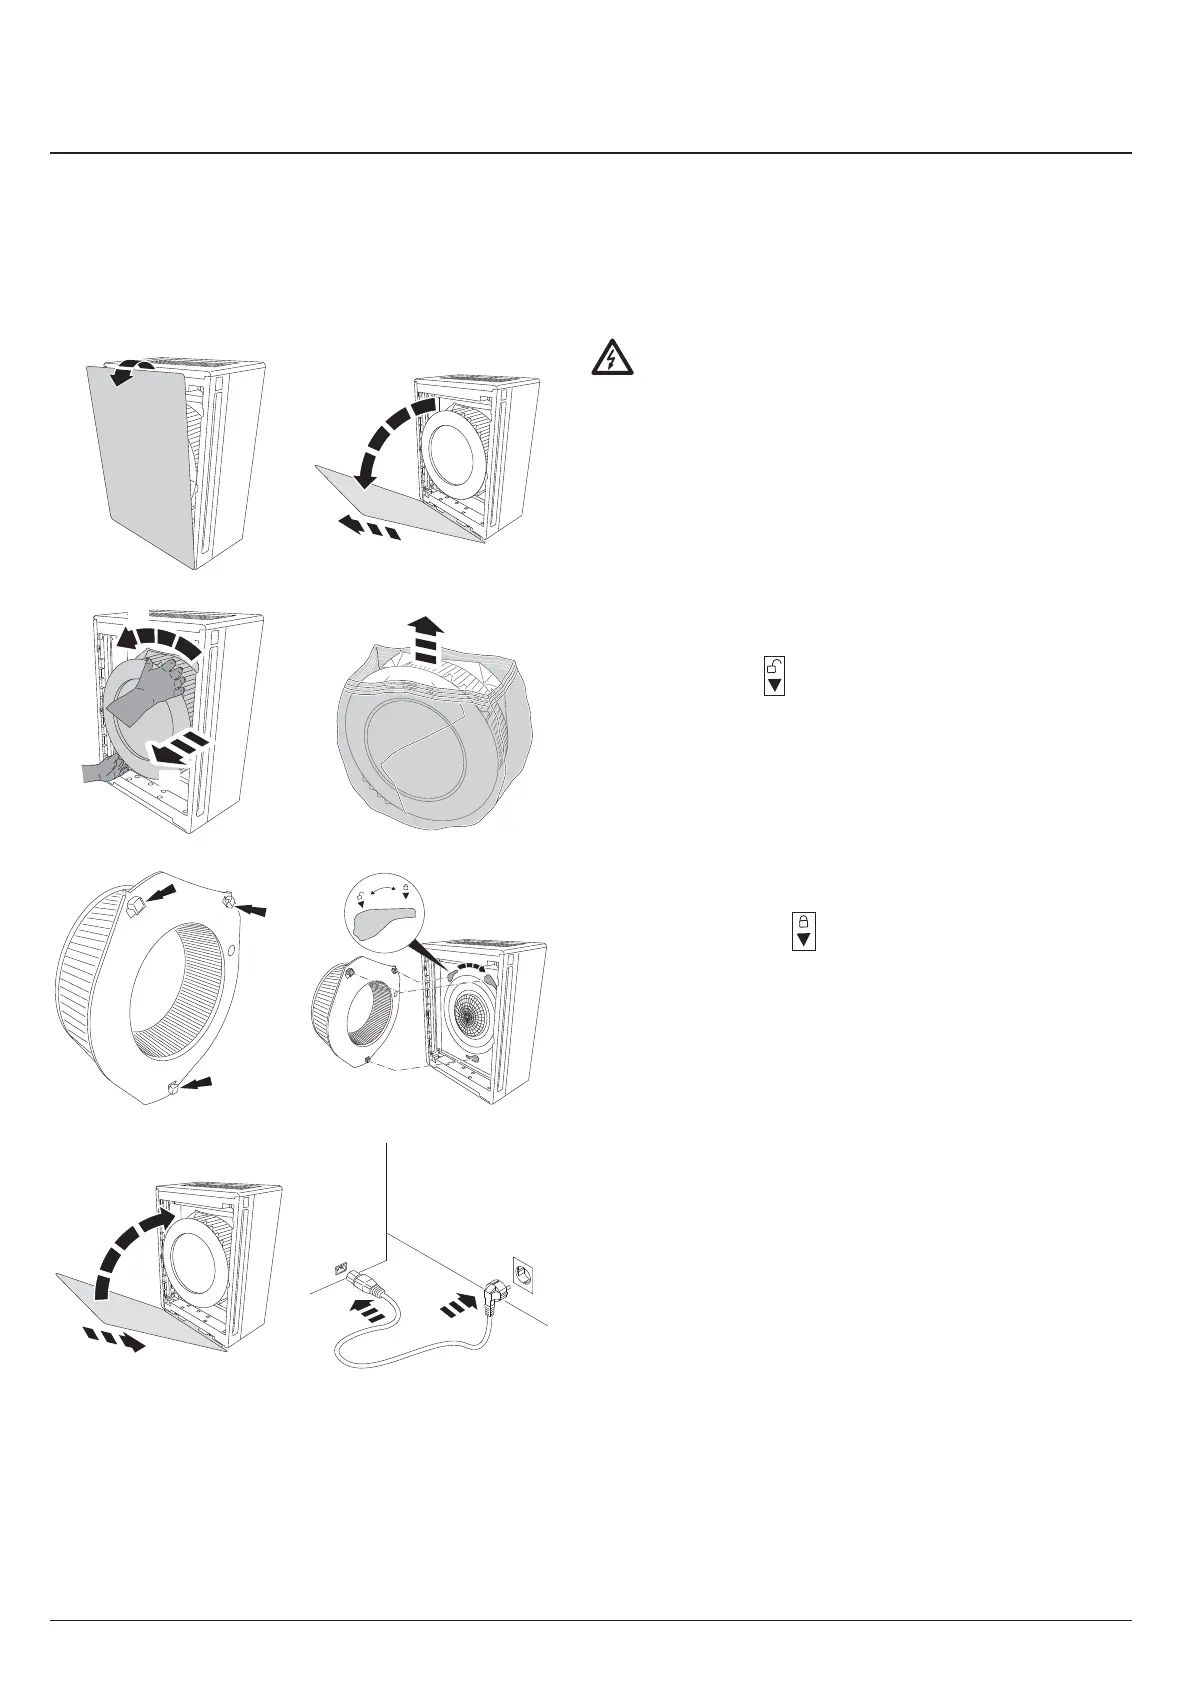
CAUTION: Disconnect the mains plug!
The front panel is hooked in at the bottom in two
places, and kept shut with 4 magnets. Open the
front panel from the top and hold (1.), pivot
downwards (2.) and take off (3.).
Hold the spent fi lter cartridge with both hands
using the recessed grips provided and turn it
anti-clockwise
(4.).
Remove the fi lter cartridge (5.). Remove the
protective fi lm from the new fi lter cartridge (6.).
Insert the new fi lter cartridge with the three tabs
in the notches provided and lock in position by
turning clockwise
(7.).
Hook in the front panel at the bottom fi rst (8.),
then pivot upwards and press shut (9.). Connect
the power cable to the device fi rst (10.), then to
the socket (11.).
Filter replacement (e.g. in accordance with the fi lter replacement indicator F, see page 33)
Note:
Only original IDEAL fi lter cartridges (order from www.ideal.de) may be used. No tools are
required to replace the fi lter cartridge.
Note:
The air purifi er automatically detects that a new IDEAL fi lter cartridge has been inserted
and automatically resets the fi lter replacement indicator.
IDEAL fi lter cartridge Order no. 8741 100
1.
2.
3.
4.
5.
6.
7.
10.
11.
9.
8.