14
Concord CX - Installation
13
CASING ASSEMBLY - continued
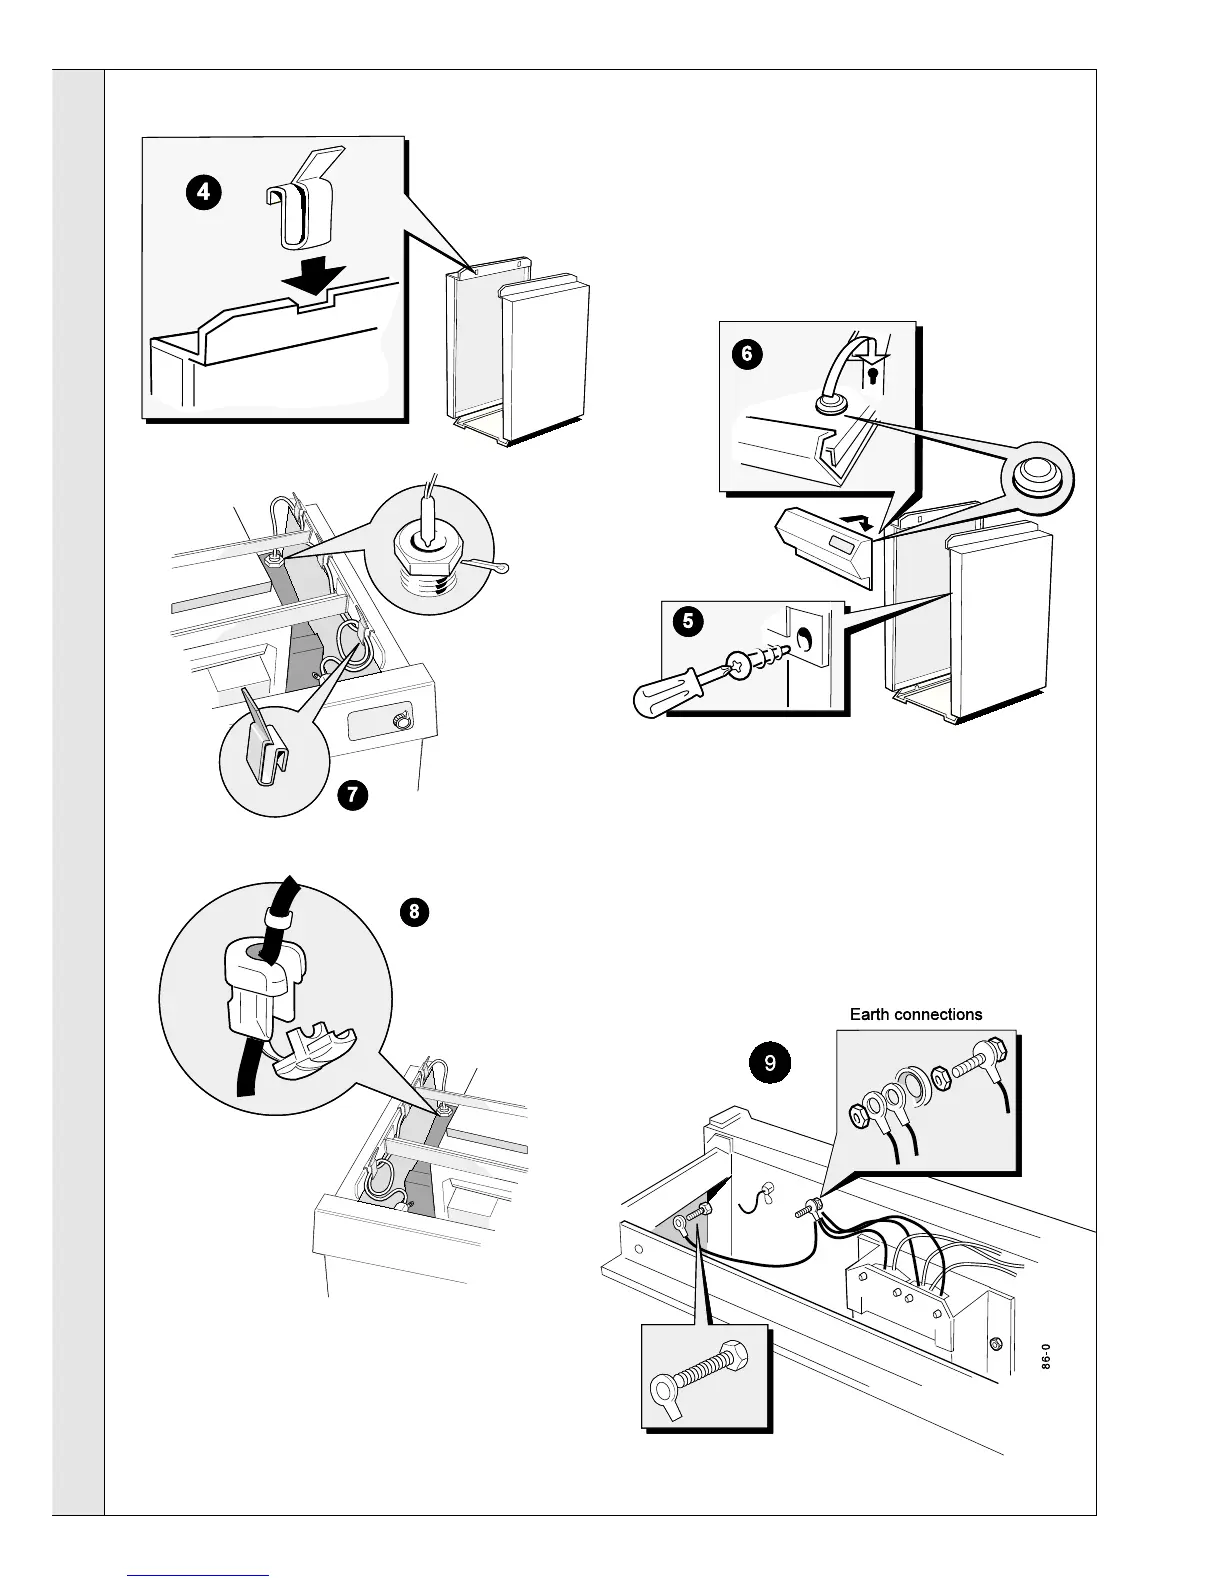
4. Fit 3 clips to the top of each side panel.
5. Fit the spire clips to the side casing panels.
6. Hook on the control box to the side panels.
Screw in self tapping screws at the bottom of the
control box to fix it to the side panels.
INSTALLATION
INSTALLATION
8. Route the temperature sensing probe through the cable
clips provided and into the thermostat pocket adjacent to
the flow connection.
Fit the plastic Heyco bush over the sensor lead at the
line shown and insert it into the thermostat pocket.
Ensure that the Heyco bush is correctly located.
9. Fit earth leads as shown
7. Route the thermostat capillary through the cable clips as
shown. Ensure the phial is correctly seated in the correct
pocket opposite side to the flow connection. Refer to
Frame 9. Secure with the split pin provided.
 Loading...