This document outlines the boot settings and procedures for various IGEL devices, focusing on how to enable booting from USB storage media for the purpose of installing IGEL OS. It covers both general third-party devices and specific IGEL models, detailing the steps required to access BIOS/UEFI settings and configure boot options.
For Third-Party Devices, the document emphasizes the importance of the system supporting booting from USB or DVD. It notes that IGEL OS 11 supports UEFI Secure Boot and provides guidance on enabling it, which typically involves changing the boot mode to UEFI and then activating Secure Boot in the BIOS. Users are advised to consult their device manufacturer's manual for specific instructions on enabling Secure Boot and verifying its status. If IGEL OS fails to boot in UEFI mode, users are encouraged to try legacy/BIOS mode. For older devices or if the installer fails to boot, a legacy installer is available via the IGEL website.
The document also provides general hints for accessing boot device lists or BIOS settings on third-party devices. Common keys for accessing boot device lists include [F12], [F10] (Intel devices), or [F9] (Hewlett-Packard devices). To access BIOS settings, common keys are [Del], [F1], or [F2]. Once in the BIOS, users should activate booting from USB storage media and/or change the boot order. A specific note is included for secured-core PCs, stating that the UEFI boot settings must be changed to "Microsoft 3rd-Party UEFI CA" to start IGEL OS.
For IGEL Devices, detailed step-by-step instructions are provided for several models:
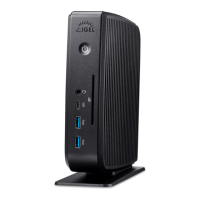
UD7 (H850C and H860C):
- Power up the device while repeatedly pressing the [Del] button.
- Enter the BIOS password if prompted.
- Select "Setup Utility".
- Navigate to the "Boot" tab.
- Set "USB Boot" to "".
- Save settings and exit.
- Connect the USB stick.
- Reboot the device, repeatedly pressing [Del].
- Select "Boot Manager".
- Choose the USB stick as the boot medium and press Enter.
- Proceed with the installation.
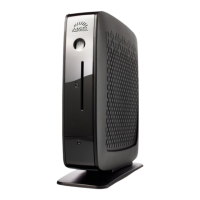
UD6 (H830C):
- Power up the device while repeatedly pressing the [Del] button.
- Select "SCU".
- Enter the BIOS password if prompted.
- Navigate to the "Boot" tab.
- Set "USB Boot" to "".
- Save settings and exit.
- Connect the USB stick.
- Reboot the device, repeatedly pressing [Del].
- Select "Boot Manager".
- Choose the USB stick as the boot medium and press Enter.
- Proceed with the installation.
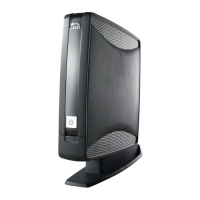
UD5 (H830C):
- Power up the device while repeatedly pressing the [Del] button.
- Enter the BIOS password if prompted.
- Navigate to the "Boot" tab.
- Select "Boot Options Priorities".
- Move the USB stick entry to the first position using the [+] key.
- Save settings and exit.
- Proceed with the installation.
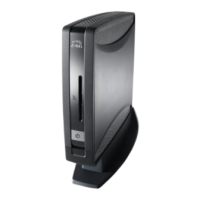
UD3 (M350C):
- Power up the device while repeatedly pressing the [Del] button.
- Enter the BIOS password if prompted.
- Select "Setup Utility".
- Navigate to the "Boot" tab.
- Set "USB Boot" to "".
- Save settings and exit.
- Connect the USB stick.
- Reboot the device, repeatedly pressing [Del].
- Select "Boot Manager".
- Choose the USB stick as the boot medium and press Enter.
- Proceed with the installation.
UD3 (M340C):
- Power up the device while repeatedly pressing the [Del] button.
- Enter the BIOS password if prompted.
- Navigate to the "Boot" tab.
- Set "USB Boot" to "".
- Select "Legacy > Boot Type Order".
- Select "USB" and move it to the first position using the [+] key.
- Save settings and exit.
- Proceed with the installation.
UD2 (M250C):
- Power up the device while repeatedly pressing the [Del] button.
- Select "SCU".
- Enter the BIOS password if prompted.
- Navigate to the "Boot" tab.
- Set "USB Boot" to "".
- Save settings and exit.
- Connect the USB stick.
- Reboot the device, repeatedly pressing [Del].
- Select "Boot Manager".
- Choose the USB stick as the boot medium and press Enter.
- Proceed with the installation.
UD2 (D220):
- Power up the device while repeatedly pressing the [F2] (older devices) or [Del] (newer devices) button.
- Select "SCU".
- Enter the BIOS password if prompted.
- Navigate to the "Boot" tab.
- Set "USB Boot" to "".
- Save settings and exit.
- Connect the USB stick.
- Reboot the device, repeatedly pressing the [F2] or [Del] (newer devices) button.
- Select "Boot Manager".
- Choose the USB stick as the boot medium and press Enter.
- Proceed with the installation.
UD9 (TC215B):
- Power up the device while repeatedly pressing the [F2] button.
- Enter the BIOS password if prompted.
- Navigate to the "Boot" tab.
- Select "Boot Option Priorities".
- Move the USB stick entry to the first position using the [+] key.
- Save settings and exit.
- Proceed with the installation.
The document serves as a comprehensive guide for configuring boot settings across a range of IGEL and third-party devices, ensuring users can successfully boot from USB media to install IGEL OS. It highlights the importance of understanding BIOS/UEFI settings and provides specific key presses and menu navigation for various models.