Do you have a question about the iGenix IG5250 and is the answer not in the manual?
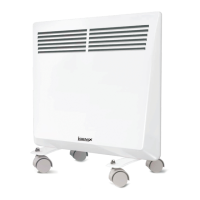
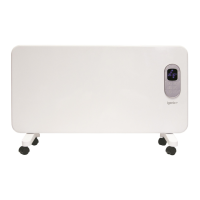
This document serves as a user manual for the Igenix 2kW Convector Heater with Thermostat, covering models IG5200 and IG5250. It provides essential information for safe operation, assembly, maintenance, and troubleshooting of the appliance.
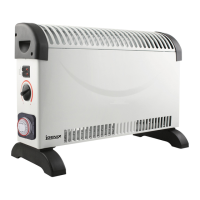
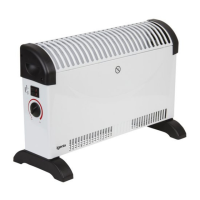
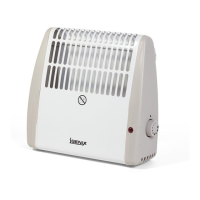
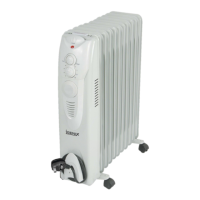
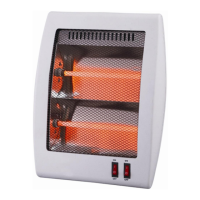
The Igenix convector heater is designed to provide supplementary heating for well-insulated spaces. It operates by drawing in cold air, heating it using internal elements, and then releasing the warm air through outlet grilles, creating convection currents that circulate heat throughout the room. The heater features multiple heat settings, allowing users to select the desired output (750W, 1250W, or 2000W) to suit their comfort needs. An integrated thermostat enables the user to set and maintain a consistent room temperature. Once the desired temperature is reached, the thermostat automatically switches the heating elements on and off to regulate the heat, ensuring energy efficiency and comfort. In its minimum (fully anti-clockwise) position, the thermostat provides frost protection, maintaining the room temperature above freezing.
For model IG5250, an additional feature is a 24-hour timer. This timer allows users to program specific operating periods for the heater within a 24-hour cycle. It has 96 segments, with each segment representing 15 minutes, offering precise control over when the heater turns on and off. The timer includes a 3-position switch: a central clock symbol position for programmed operation, an "I" position for continuous power (timer override), and an "O" position where the timer runs but no power is supplied to the heater. This functionality enhances convenience and allows for automated heating schedules.
Before using the heater, it is crucial to ensure it is placed on a level surface to prevent tipping. The appliance is intended for indoor use only and should not be used as the main form of heating. Users must verify that their electricity supply is rated at 220-240 volts.
Assembly involves attaching the footplates to the base of the heater using the provided screws. Once assembled, the heater should be plugged into a power socket, ensuring it is not sharing a circuit with other high-wattage appliances to avoid overloading.
To operate, the thermostat dial should first be turned fully clockwise to the maximum setting. Then, the heating elements can be activated using the heater switches, which illuminate when on. For maximum heat output, both switches should be engaged. To set the desired room temperature, the thermostat knob is slowly turned anti-clockwise until a click is heard and the lights on the element switches go out, indicating the heater has reached the set temperature. The heater will then automatically maintain this temperature.
For the IG5250 model with the timer, users must first ensure the slider switch is in the central (clock symbol) position. The outer ring of the timer is rotated clockwise until the current time aligns with the arrow pointer. To program heating periods, segments around the outer ring are pulled forward for the desired running times. For continuous operation, the side switch on the timer can be set to the "I" position. If programmed operation is desired again, the switch should be returned to the central (clock) position. It is important that the heater remains plugged in, the element switches are in the "on" position, and the thermostat is appropriately set for the timer to function correctly.
Several safety precautions are highlighted:
Regular cleaning and maintenance are essential for the safe and efficient operation of the heater. Before any cleaning, the heater must be unplugged from the wall and allowed to cool completely. The exterior can be cleaned by wiping it with a damp (not wet) cloth. Abrasive materials or detergents should not be used, and no water should be allowed to enter the heater.
The most common cause of overheating is the accumulation of dust or fluff within the appliance. To prevent this, the grilles should be cleaned regularly using a vacuum cleaner after the heater has cooled down and been unplugged.
There are no user-serviceable parts inside the heater. If the power cord or plug is damaged, it should not be replaced by the user; a qualified person must be consulted to avoid hazards.
For storage, when the heater is not in use for extended periods, it should be protected from dust and stored in a clean, dry place. The original packaging box can be used for this purpose.
The manual also includes a troubleshooting guide for common issues such as the heater not working (checking plug, power switches, and electricity supply) or getting too hot (checking air circulation, heat settings, and blocked vents). For further assistance, customers are directed to contact customer services.
| Thermostat | Adjustable |
|---|---|
| Safety Features | Overheat protection |
| Cool air setting | No |
| Tip-over Protection | Yes |
| Timer | No |
| Remote Control | No |
| Heat Settings | 3 |