EN
B. OUTSIDE BACK EXHAUST (HORIZONTAL DUCT)
C. RECIRCULATING (NON-VENTED DUCTLESS)
Adaptor Must Be
Moved to the Back for
Outside Back Exhaust
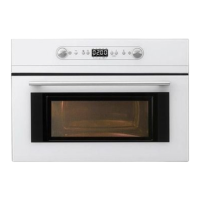
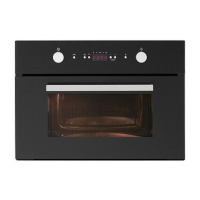
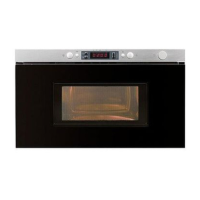
Models are shipped for recirculating exhaust.
Some models have a disposable charcoal filter
installed to help remove smoke and odors.
See page 15
See page 18
NOTE: Read the next two pages only if you plan to vent
your exhaust to the outside. If you plan to recirculate
the air back into the room, proceed to page 18.
A. OUTSIDE TOP EXHAUST (VERTICAL DUCT)
INSTALLATION OVERVIEW
A2. Prepare Top Cabinet
A1. ATTACH THE MOUNTING PLATE TO THE WALL
A3.
Adapting Microwave Blower for
Outside Top Exhaust
A4. Check Damper Operation
A5.
Mount Microwave Oven
A6. Adjust Exhaust Adaptor
A7.
Connect Ductwork
IMPORTANT NOTES:
Attach the plate to the wall using toggle bolts. At least
one wood screw must be used to attach the plate to a wall
stud.
blower plate are securely tightened when they
are reinstalled. This will help to prevent excessive
vibration.
routed and secured, and that the wires are not
pinched.
toggle wings to
3
4
To use toggle bolts:
Spacing for Toggles
Thickness
3/8"
TO
EDG
E
Trim the rea
r
wal
l tem
pla
t
e along
the dotted line.
12"
R
N
E
O
AD
:
A
IT
N
I
D
S
F
V
O
LLO
Y
I
W
MP
T
O
HE
R
TANT
D
IREC
TO
TIO
IN
TE
THE INSTALLAT
ER
ION INS
T
RU
CTI
O
N
N
S
BE
FO
RE PR
O
CEEDING
WITH T
H
IS
S
REAR
EM
PLA
TE
.
Te
mpla
te serv
e
s to p
m
Th
i
s
n
R
ti
e
n
a
g
r
p
W
l
Wa
at
A
l
e
l
a
n
LL T
d to loc
ate the hor
i
z
o
o
s
n
iti
t
o
a
e
t
x
h
h
e
au
b
o
s
t
t
to
m
4"
l
n
e
t.
Mounting
o
t
U
l
u
s
e
ioned
1
ou
.
cc
l
t
e
e
v
l
to
c
h
eck
th
at
th
e
tem
pla
te
i
s
p
os
it
2.
L
a
a
ate
r
a
a
ly
e
nd
r
i
oc
gh
u
t
s
i
d
e
o
.
f t
m
h
ar
e
k
c
e
a
t
n
t
l
e
e
r
a
li
s
n
t
e
o
.
nes
tu
d
on th
e
le
ft
or
i
t t
I
t
n
t
r
n
s im
f
p
e
i
.
r
o
rt
m
M
l
a
y
a
n
n
o
w
u
s
o
tud
se
a
d
t
a
t le
s
as
u
a
p
l,
p
o
o
e
r
v
e
wo
y
o
w
s
d
t
s
of
cr
t
lo
c
e
h
w
m
s
i
o
c
f
u
o
ted
a
the
v
u
l
r
i
i
k
t
d
a
to
gle
di
o
ti
bol
.
t
en
the
l
pa
eigh
c
ed
3.
e
i
l
o
l
m
n
h
o
l
e
r
s
ow
n
t
ar
e
ke
d l
g
o
c
atio
n
on
t
s
s
.Wher
Toggle
tu
r
h
s
p
6"
p
h
o
d
e
e
F
t
h
o
r
er
h
e
a
a
Dr
ti
s
8
o
e
s
fo
o
i
l
s
es
ha
t
do
d,
o
l
i
e
u
p
m
w
o
ith
l
e
a
t
u
w
d
o
, d
r
il
c
5
r
/
t
o
gg
e b
d
ol
i
t
l
a
.
in
3
e
/
1
fo
s
r
l
s
"
w
h
s
.
l
r
t
l
n
t
s
l
INS
T
AL
L
T
HE
MO
UNTIN
G PL
ATE
Plate
4
A
.
T
R
m
S
T
e
DO
I
M
th
E
e
.
NOT
t
5.Re
T
e
HI
v
ie
ov
w
t
h
e
emplate
n
fr
I
o
ns
m
t
r
t
u
h
c
e
t
i
r
o
e
n
a
b
r
o
wal
ok
l.
for
y
our
in
sta
llatio
n si
In
t
s
ua
ta
t
l
i
l
o
a
n
ti
.
o
v
Da
er
r
s
l
i
e
ó
n
vu
e
e
n
lt
a
E
a
s
p
la
a
ñ
h
o
o
l.
ja
pa
r
aco
ns
u
l
tarla
Bolt
24"
Locate
unting
an
d m
ark
holes
to align with holes in the
mo
pl
ate
.
IMP
O
RTANT
LEA
:
LOCA
T
E
AT
LI
N
ST
O
N
E
STUD O
N EI
THER
SI
DE
O
F
TH
E
CENT
E
R E
.
NAL, EV
E
PLATE
N
LY
MARK
T
CA
LE
T
I
B
O
NF
O
R 2 ADDI
M
T
I
O
O
TING
SP
A
CE
D T
HE LO
OGG O
LTS
IN
T
HE
UN
A
REA
.
L
oca
te an
d ma
rk holes to ali
gn with holes
in t
he
mo
n
tin
gp
late.
IMP
u
ORTANT
L
:
T
E AT
R
E
A
S
T O
NE
STUD O
N EI
THER SI
D
E O
F
LOC
A
TH
E
E
LI
CATIO
N
E.
O
R 2 A
DDITIO
U
N
N
A
L,
EV
E
NLY
MARK
T
CENT
HE LO
LEBO
N
F
TING
PL
A
TE
Trim the re
ar wall templat
e alon
gthe do
tt
ed line.
L
TS
IN THE
MO
SP
A
CED
TOG
G
AREA.
Bolt End
3. Place the mounting plate against the wall and insert
the toggle wings into the holes in the wall to mount the
plate.
1. Remove the toggle wings from the bolts.
2. Insert the bolts into the mounting plate through the
holes designated to go into drywall and reattach the
 Loading...