Do you have a question about the IKEA Akurum kitchen and is the answer not in the manual?
Guide and posters outline preparation and installation process step-by-step.
Encouragement and overview of the rewarding project.
Instructions for safely removing existing kitchen cabinets, countertops, and utilities.
Ensuring walls and floors are flat and level for proper cabinet installation.
Measuring and drawing cabinet placement lines on the wall for accurate fitting.
Identifying and planning for necessary re-routing of plumbing, gas, and electrical outlets.
Priming walls, painting, and installing new flooring before cabinet assembly.
Guidance on selecting appropriate screws and anchors for different wall types.
Advice on storing solid wood countertops to allow for temperature adjustment.
Instructions for assembling wall cabinets before attaching doors or shelves.
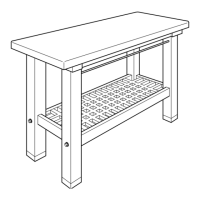
Guidance on assembling base, high cabinets, drawers, and pull-out baskets.
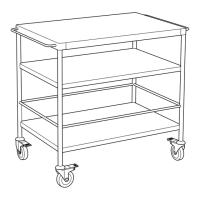
Arranging assembled cabinets for easy access during installation.
Locating wall studs for secure mounting of the suspension rail.
Marking and attaching the suspension rail to the wall at the correct height.
Hanging cabinets onto the suspension rail, starting with corner units.
Adjusting cabinets using shims and hardware to ensure they are level.
Fastening cabinets to the wall and to each other for a stable installation.
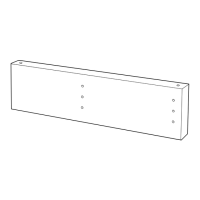
Attaching the support board or rail for base cabinets to the wall.
Installing adjustable legs at the front and back of base cabinets.
Positioning and securing base cabinets to the wall support and each other.
Guidance on mounting tall cabinets, potentially after base cabinets.
Adjusting cabinet legs to ensure all cabinets are level and plumb.
Connecting adjacent base and high cabinets for structural integrity.
Fitting pieces into gaps between cabinets and walls or appliances.
Specific instructions for installing corner cabinet rotating shelves.
Accurately measuring and marking countertop sections for cutting.
Joining countertop sections at corners using butt joints for expansion.
Cutting countertops to size using appropriate tools and techniques.
Precisely cutting out the opening for the kitchen sink in the countertop.
Applying sealant to cut edges of the countertop to prevent moisture damage.
Fitting the kitchen sink into its prepared cutout in the countertop.
Securing the finished countertop onto the base cabinets.
Mounting the faucet and related fittings onto the sink or countertop.
Attaching exterior panels to cabinet frames for a finished look.
Guidance on fitting cabinet lighting, potentially requiring an electrician.
Inserting shelves into cabinets using predrilled holes and supports.
Mounting knobs and handles onto cabinet doors and drawers.
Fitting assembled drawers into their respective cabinet runners.
Installing decorative base trims and mouldings for a complete look.
Fitting decorative strips, possibly for lighting integration.
Mounting decorative cornice mouldings along the top of wall cabinets.
Attaching cabinet doors to their hinges for final alignment.
Securing decorative knobs and handles onto cabinet doors.
Applying protective buffers to prevent doors and drawers from slamming.
Instructions for cleaning and maintaining cabinet surfaces and interiors.
Proper methods for cleaning and maintaining stainless steel sinks.
| Product Type | Kitchen cabinet system |
|---|---|
| Style | Modern |
| Adjustable legs | Yes |
| Material | Particleboard |
| Cabinet Types | Base cabinets, wall cabinets |
| Hardware | Hinges, handles |
| Discontinued | Yes (replaced by SEKTION) |
| Depth | 24 inches (base cabinets) |
| Wall cabinet depth | 12 inches |
| Base cabinet height | 30 inches |
| Color | Various, depending on door style (white, off-white, brown, black, wood effect, stainless steel) |