© Inter IKEA Systems B.V. 2004
N
ow it’s tim
e to install the cou
ntertop and
sink. This poster details the installation
care and m
aintenance of our solid w
ood
countertops.
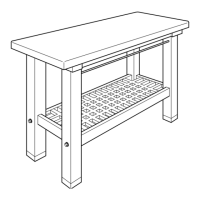
When m
easuring and saw
ing the solid
wood tops throughout this step, w
e sug-
gest placing them
on saw
horses for easiest
handling. O
nce you’ve finished Step 5, it’s
a good idea to hire professionals to con
-
nect the w
ater, gas or electricity, and to
install the oven, dishw
asher and lighting.
U
s
i
n
g y
ou
r
pe
n
c
i
l
an
d
a
s
t
r
ai
g
h
t
ed
g
e,
d
r
aw
a
“
cu
t
”l
i
n
e
i
n
s
i
d
e
th
i
s
l
i
n
e
,
a
cc
or
d
i
n
g
t
o
t
h
e
d
i
r
e
c
t
i
on
s
t
h
at
c
a
me
w
i
t
h
y
ou
r
s
i
n
k
.
3
.
S
a
w
the
c
o
u
nt
e
rt
o
p
I
f
y
ou
’r
e
s
a
wi
n
g
by
h
an
d
,
w
e
r
ec
om-
m
en
d u
s
i
ng a
f
i
n
e-
t
oo
t
h
ed
h
a
n
d
s
a
w
f
o
r
c
on
t
r
ol
.
T
o av
oi
d
s
p
l
i
n
t
er
i
n
g
t
h
e
c
ou
n
-
t
e
r
to
p
,t
ap
e
ov
e
r
t
he
a
r
ea t
o b
e c
u
t
.
I
f
y
o
u
’
re u
s
i
n
g
a c
i
rc
u
l
ar
s
aw
,
t
ur
n
t
h
e
c
o
u
n
t
e
r f
ac
e dow
n
a
n
d
c
l
a
m
p
a
s
t
r
ai
g
h
t
-
ed
g
e
i
n
p
l
ace
t
o g
u
i
de
t
h
e sa
w
a
l
on
g
t
h
e
cut
l
i
n
e
.
F
i
n
i
s
h
t
h
e c
u
t
ed
g
e
w
i
t
h
yo
u
r
f
i
l
e
.
2.
M
e
asu
r
e
t
h
e
c
o
u
n
t
er
M
ea
s
u
r
e t
h
e
c
ou
n
t
er
f
ro
m
t
h
e e
n
d
of
t
h
e b
a
s
e c
ab
i
n
e
t
out
,
al
l
owi
n
g
f
o
r
t
h
e
c
ov
er
p
ane
l
pl
u
s
a
1
/
2
”
ove
rh
an
g
.
M
ark
w
i
t
h
a p
en
c
i
l
o
n
t
h
e
f
i
n
i
s
h
ed
s
i
d
e i
f
y
ou
’l
l
b
e
u
s
i
n
g
a h
an
d
s
a
w
an
d
o
n
t
h
e
un
de
rs
i
d
e
i
f
us
i
n
g
a p
o
w
er
s
a
w
.
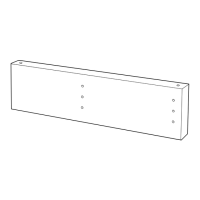
9.
S
e
c
u
re
th
e
c
o
u
n
t
e
rt
o
p
Y
ou
r
c
ou
n
t
e
r
t
o
p
s
h
oul
d
b
e
s
ec
u
r
ed a
s
s
h
own
u
s
i
n
g
t
he
h
a
r
d
w
are
p
r
ov
i
d
ed.
T
h
e
s
l
ot
te
d
b
r
ac
k
e
t
s
al
l
ow
t
h
e c
o
u
n
-
t
er
o
p
t
o
ex
pa
n
d a
n
d c
on
t
r
a
ct
n
or
m
al
l
y.
S
et
c
o
un
t
e
r
t
o
p
s
i
n
pl
ac
e,
a
l
l
owi
n
g
t
h
e
s
ame
g
a
p
s
a
s
w
h
en
yo
u
m
eas
u
re
d
.
L
oc
a
t
e
at
t
ac
h
me
n
t
poi
n
t
s
a
t
r
eg
ul
ar
i
n
te
rv
a
l
s
a
n
d
d
ri
l
l
p
i
l
ot
h
ol
e
s
be
f
o
re
s
ecu
r
i
n
g t
h
e
t
op
.
8
.
In
st
a
l
l
t
h
e
sin
k
Li
f
t
o
f
f
t
h
e
c
o
unt
er
t
op
an
d
t
u
rn
i
t
u
p
s
i
d
e
d
o
wn
,p
l
a
c
i
n
g
i
t
b
ac
k
on y
ou
r
s
a
w
h
or
s
e
s
.
I
n
s
t
al
l
t
h
e
s
i
nk
a
c
c
or
d
i
n
g
t
o
t
h
e
s
i
n
k
m
an
u
f
act
u
r
er
’
s
i
n
st
r
u
c
t
io
n
s
.
7
.
T
r
i
m
t
he
c
ab
ine
t
t
o
p r
ails
F
i
t
t
h
e c
o
u
n
t
ert
o
p b
a
c
k
i
n
t
o p
l
a
c
e o
n
t
h
e
bas
e c
abi
n
et
.
C
h
ec
k
t
h
a
t
t
h
e
s
i
nk
h
ol
e i
s
n
ot
o
bs
tr
u
c
t
ed
by
t
h
e t
o
p
f
r
a
m
e
r
ai
l
s
o
f
t
h
e
ba
s
e ca
b
i
n
e
t
.
I
f
i
t
i
s
,
yo
u
’
l
l
n
e
e
d
t
o t
ri
m t
h
e rai
l
s
s
o t
h
a
t
t
h
e s
i
n
k
wi
l
l
f
i
t
p
r
ope
rl
y.
6
.
S
eal
the
si
nk
c
ut
o
u
t
T
o p
r
ev
e
n
t
m
oi
s
t
u
r
e
f
rom
p
en
etr
a
t
i
n
g
t
h
e
c
ou
n
t
er
t
op
,
a
p
p
l
y
a
pol
yu
re
th
an
e
s
ea
l
a
l
o
n
g
t
h
e
c
u
t
ed
g
es
w
i
t
h
a p
a
i
n
t
-
b
r
u
s
h
.
5.
S
aw
t
h
e
sin
k
h
o
le
P
l
ace
t
h
e
c
o
u
n
t
er
t
op
o
n
s
a
w
h
o
r
s
es
.
D
r
i
l
l
a
1
/
2
”
h
ol
e
f
or
t
h
e j
i
gsa
w
bl
ade
a
t
al
l
f
ou
r
c
or
n
er
s
o
f
t
h
e cu
t
l
i
ne.
Fo
l
l
o
w
i
n
g
th
i
s
s
am
e cu
t
l
i
n
e,
s
a
w
t
h
e
ho
l
e f
or
th
e
s
i
n
k
u
n
i
t
.
11
.
P
r
e
p
are
w
oo
d
c
o
u
nt
e
rt
o
p
f
o
r
u
se
Y
ou
r
so
l
i
d
w
oo
d
c
o
u
n
t
e
r
t
op
f
rom
I
K
EA
w
as
p
r
e
t
re
a
t
ed
at
t
h
e f
a
c
t
or
y
t
o
c
on
d
i
-
t
i
on
an
d p
r
ot
ec
t
i
t u
n
t
i
l
i
n
s
t
al
l
at
i
on
.
T
o
p
rep
a
re
i
t
f
or
u
s
e
,
s
an
d
t
h
e
s
u
r
f
a
c
e
w
i
t
h
a f
i
n
e
s
an
d
p
a
p
er a
n
d f
i
n
i
s
h
i
t
w
i
t
h
I
K
EA
B
EH
AN
D
L
A a
ppr
ov
ed
w
oo
d-
bl
ock
o
i
l
.
1
0.
Ins
t
a
ll the
fa
u
c
e
t
I
f
y
o
u
r s
i
n
k
i
s
no
t
p
re
-d
ri
l
l
ed
f
o
r
t
h
e
f
a
uc
et
o
r ot
h
er f
i
t
t
i
n
g
s
,
y
o
u
´
l
l
n
e
ed
t
o
c
u
t
t
h
e n
ec
e
s
s
ar
y
h
o
l
es
i
n
t
h
e
s
i
nk
.
T
a
p
e
an
d
m
a
r
k
a
p
l
ac
e fo
r
ea
ch
o
f th
e
f
i
tt
i
n
g
s
.
D
r
i
l
l
al
l
ho
l
es
w
i
t
h
t
h
e
ai
d
o
f
t
h
e
F
I
X
A
t
o
o
l
a
nd
i
ns
t
al
l
t
h
e
f
a
u
c
e
t
an
d
f
i
t
t
i
n
g
s
f
ol
l
ow
i
n
g
t
h
e m
an
u
f
ac
t
ur
e
r
´
s
i
n
s
t
r
u
ction
s
.
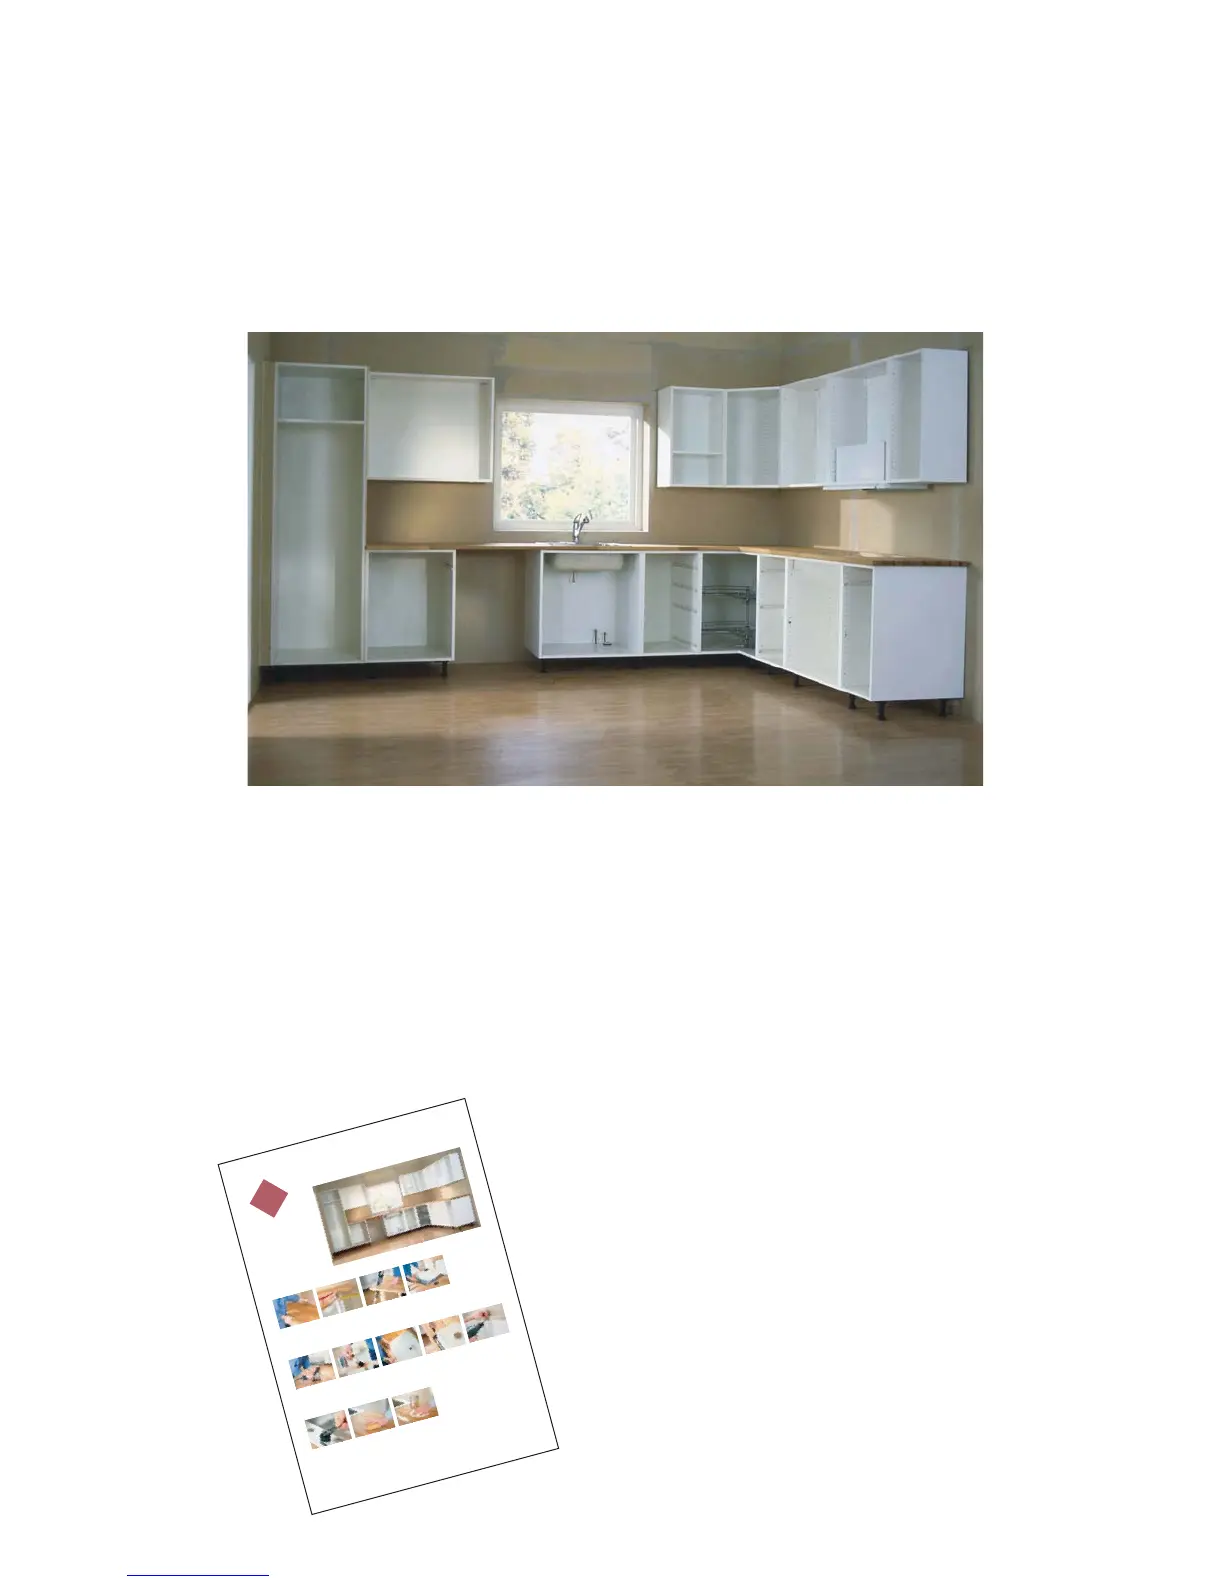
Step 5. Install the countertop
W
h
en
y
o
u’
v
e c
om
p
l
e
t
e
d
S
t
ep
5
,t
h
e c
ou
n
t
e
rt
o
ps
a
n
d
s
i
n
k
w
i
l
l
be
i
n p
l
ac
e.
©
In
t
e
r
I
K
E
A
Sy
s
te
m
s B.
V.
20
0
4
.
Hang these
instructions on
the wall so you’ll
have your
hands free
1
2.
A
ss
u
r
e
lo
n
g
-
t
e
rm
b
e
au
ty
S
an
d
a
n
d
o
i
l
y
ou
r
c
ou
n
t
e
rop
r
eg
u
l
a
r
l
y
f
or
l
on
g
-
t
e
rm
b
eau
t
y
a
n
d
p
r
ot
e
c
t
i
on
.
St
ai
ns
a
n
d
m
i
n
or
d
am
ag
e c
a
n
be
r
e
mo
v
ed
u
s
i
n
g
f
i
n
e s
an
d
p
ap
er
.W
i
p
e t
h
e
s
an
d
ed
s
u
rf
a
c
e c
l
ea
n
an
d
re-
o
i
l
t
h
e
a
f
f
ecte
d
ar
ea.
1
.
P
o
sit
io
n t
he
c
o
u
nte
r
to
p
La
y
t
h
e c
ou
nt
er
t
op
o
n
t
o
p
o
f
th
e ba
s
e
c
ab
i
n
e
t
s
,a
l
l
ow
i
n
g
1
/
8
”
a
t
t
h
e
b
ack
wa
l
l
,
an
d
a
s
m
al
l
er
s
p
ace
a
g
a
i
n
s
t
t
h
e
s
i
d
e
w
a
l
l
or
h
i
g
h
c
abi
n
e
t
.If
yo
u
’r
e i
n
s
t
a
l
l
i
n
g
t
o
ps
i
n
an
“
L
”s
h
a
p
e,
t
h
e
t
w
o
s
ec
t
i
o
n
s
mus
t
m
e
et
i
n
a
b
u
t
t
j
oi
n
t
.(
D
o
n
o
t
m
ak
e
a
ng
l
e
o
r
m
i
t
r
e
-c
u
t
j
oi
n
t
s
.)
T
h
e
s
e
ste
p
s
al
l
o
w t
h
e
c
o
u
n
te
r t
o
u
n
d
er
g
o
n
o
r
m
a
l
exp
a
n
s
i
o
n
an
d
c
o
n
t
ra
c
t
i
o
n.
4
.
M
ar
k
a
sp
o
t
f
o
r
t
h
e
s
i
nk
W
i
t
h
t
he
c
ou
nt
er
t
o
p i
n
pl
ac
e,
t
ra
c
e t
h
e
i
n
s
i
d
e o
f
t
h
e
bas
e c
a
bi
n
e
t
on
t
h
e
u
n
d
e
r
-
s
i
de
o
f
t
h
e c
ou
n
t
er
t
op.
T
h
i
s
h
el
p
s
a
s
s
u
r
e
t
h
a
t
t
h
e
s
i
n
k
c
u
t
o
u
t
w
i
l
l
b
e
a
l
i
gn
ed
c
or
re
c
t
l
y.
T
h
en,
p
l
a
c
e t
h
e
s
i
n
k
u
p
s
i
d
e do
wn
o
n
t
h
e u
n
d
ers
i
d
e o
f
t
h
e
c
o
u
n
t
e
rto
p
,
p
os
i
t
i
on
i
ng
i
t
co
r
rec
t
l
y
s
i
d
e
t
o s
i
d
e
an
d
f
ro
n
t
t
o
ba
ck
.
T
r
ac
e a
r
ou
n
d
t
h
e
e
d
g
e
of
t
he
s
i
n
k
w
i
t
h
a
p
e
n
c
i
l
.
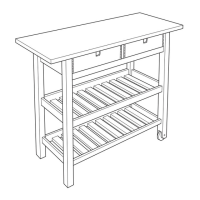
The base for your new kitchen is now in place.
Now it’s time to turn your attention to the coun-
tertops and sink. In addition to the solid wood
countertops detailed in this step, IKEA also
offers a wide range in laminate countertops.
Solid wood countertops
The Step 5 poster details the installation, care
and maintenance of these durable solid wood
countertops.
• Measuring countertop lengths
• Making a corner seam
• Sawing the countertop
• Cutting a hole for the sink
• Sealing cut edges
• Installing the sink
• Installing the countertop
• Installing the tap
Bringing in the professionals
Your new kitchen is beginning to take shape!
At this point, you’ll probably need to hire a pro-
fessional to connect water, gas or electricity and
to install the dishwasher, oven and lighting.
Step 5. Install the
countertop
Hang the
poster on
the wall
for Step 5
8