9
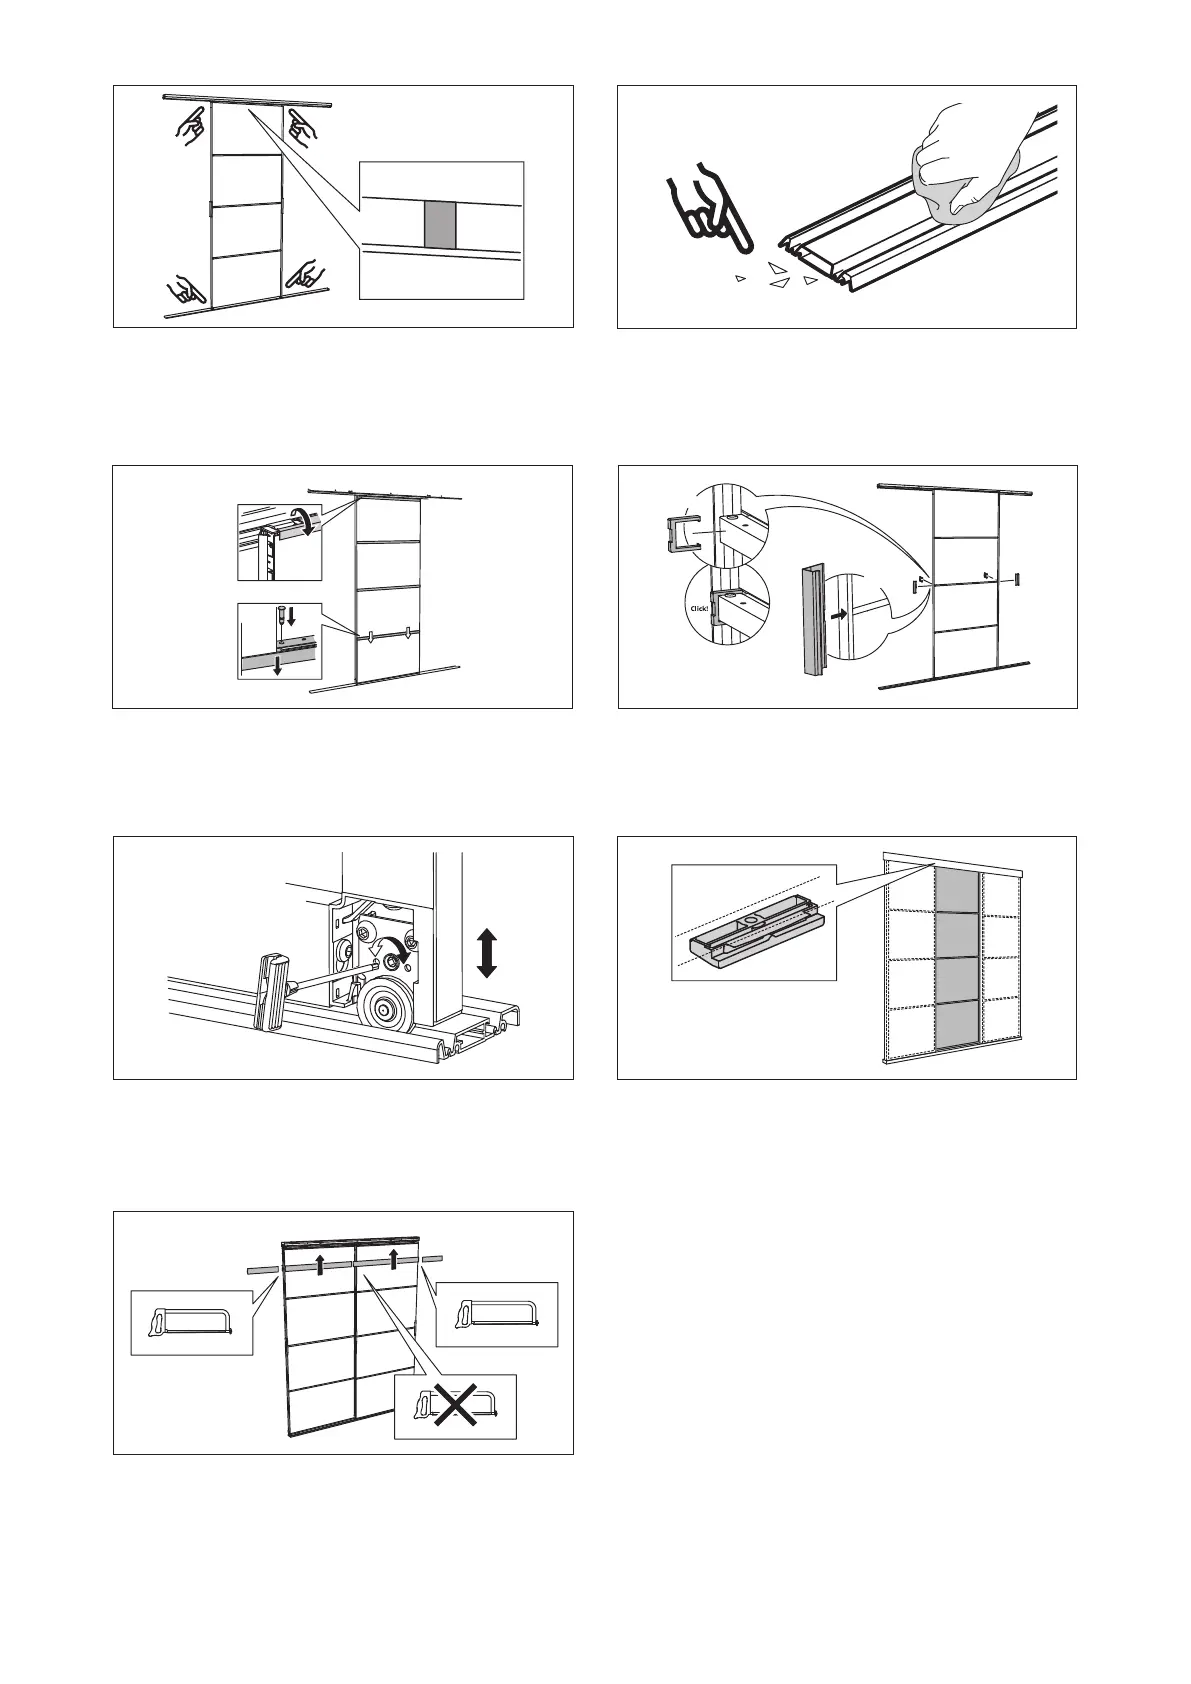
Door assembly
Door has two symmetrical side rails, bottom rail and top rail, marked with tape.
Wheel tting is placed in the bottom and guide tting in the top. Click in the hori-
zontal bars on the side rails and spared them out so they match the height just
above the llers. Guide pins with wings shall be placed to match activator between
doors.
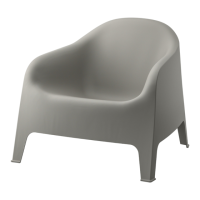
Door llers
Door llers are centred between the door side rails. Make sure that the panel is
inside the gasket ange. Never leave the ller without mounting the horizontal bar
or the top lid closed for the top ller. Plastic pin in the bar clicks in is to secure that
it can’t be released.
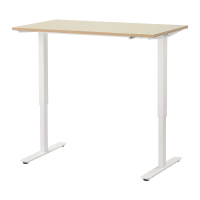
Door handle
Door handle click into the door side rail. To get it into the correct position, the cut
out on the handle should match the plastic clip mounted on the backside of the
middle bar. This prevents the handle from moving vertically and makes all handles
match in height.
Mount door/clean oor rail
Clean the oor rail before mounting as dust can get stuck on the wheels. This
should be done regularly to maintain a nice sliding of the doors. Follow the layout
with activator/soft closing. Guide pins with wings shall be connected to activator/
soft closing between doors.
Home position middle doors
When a door has its closed position in the middle and not to a wall, you mount the
home position. Home position is working together with the door guide and activa-
tor. Home position has a wing nut that grips into the aluminium track during assem-
bly. Adjust by releasing the screw, slide to new position and tight the screw.
Top cover
Top cover is symmetric and clicked on the ceiling rail on both sides. If you are con-
necting two top rails, make sure the cut end is towards the wall.
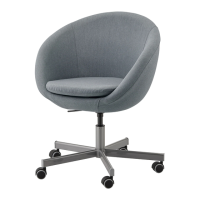
Adjust door/activate soft close
By adjusting the wheel tting’s height, you can adjust the gap between the doors
and the door/wall. Release the two screws and turn the adjustment between the
screws. You have +/-2 mm on each wheel.
Soft closing is activated by moving the door all the way to the wall. You will hear a
click and after that the soft closing should work.
2x
2x
2