8
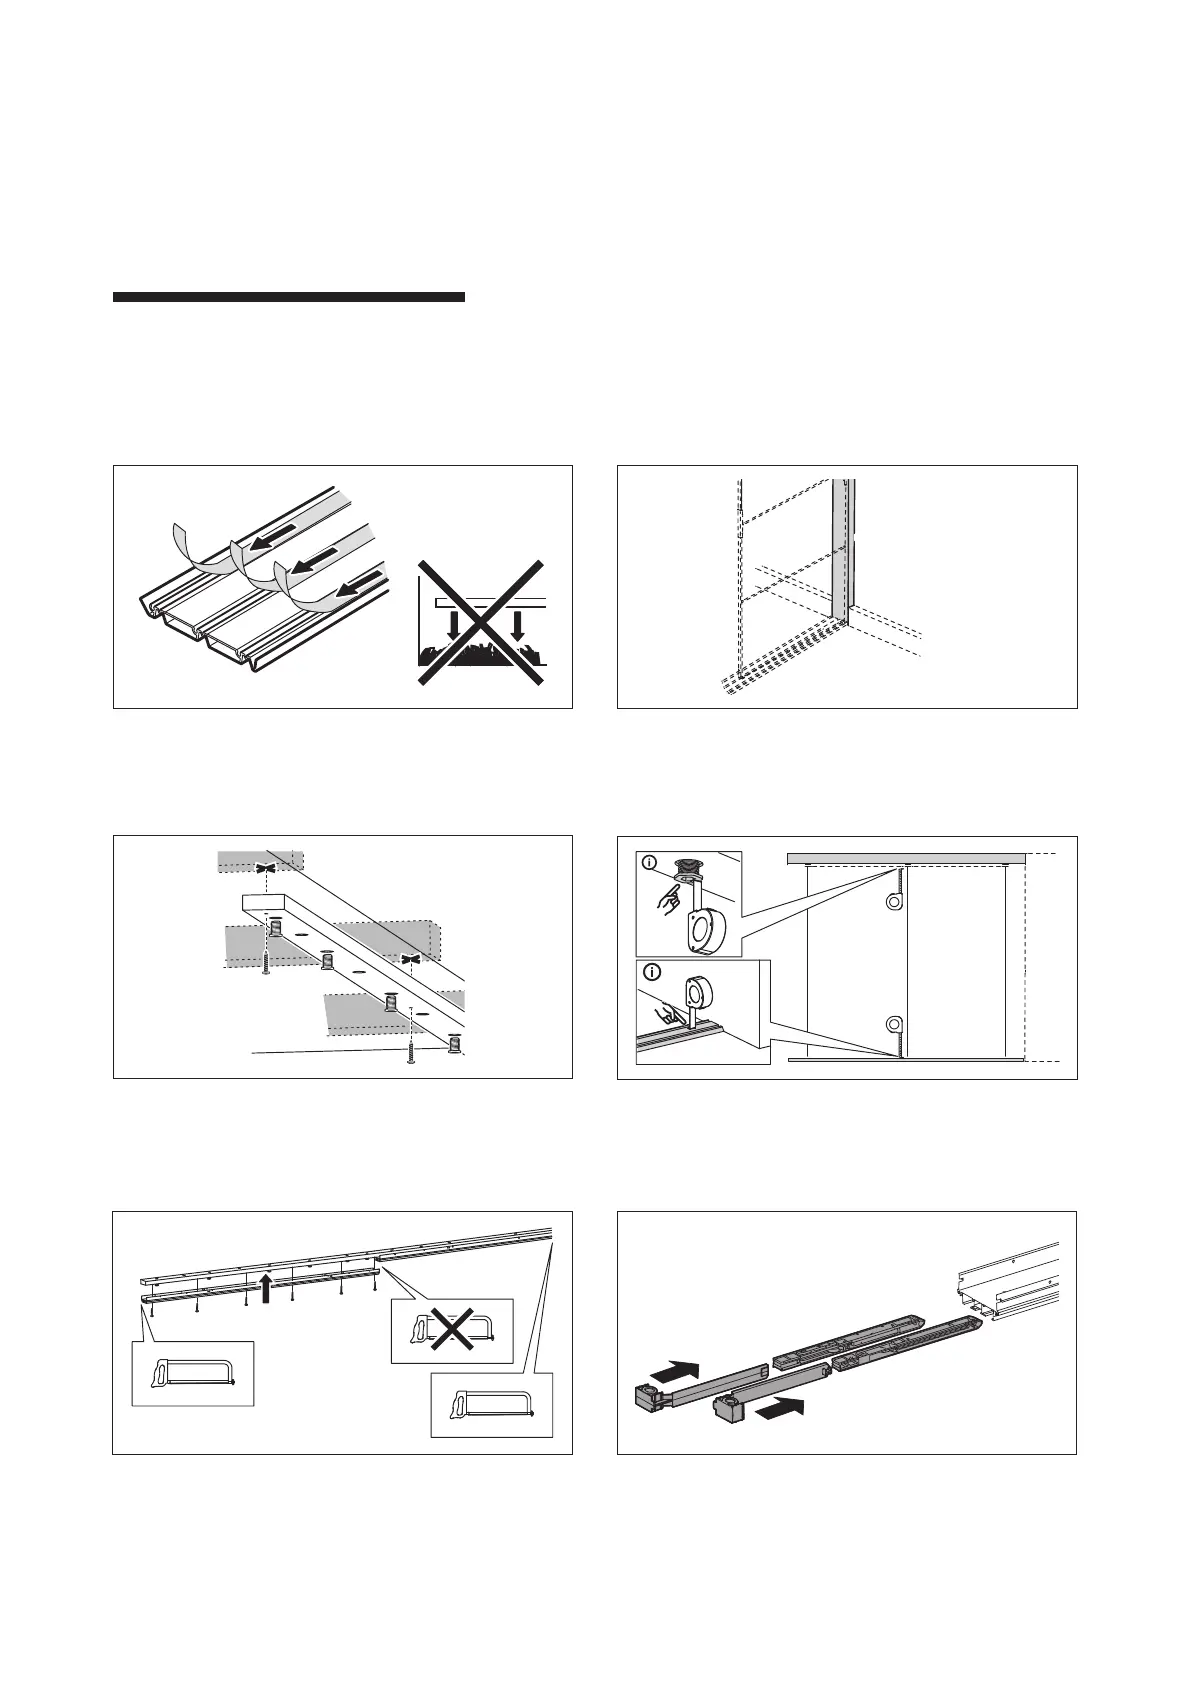
Wood beam
Since your ceiling will support the weight of your sliding door, start by nding safe
xing points for the wood beam. If you are connecting two wood beams, make sure
that the front sides are in line with each other’s. A ange screw is pre-mounted in
every second hole. In some cases when you have cut the desired length, you need
to move one ange screw so there is one on each side of the aluminium rail joint.
Wood beam has a front side on the 3-track rail but is symmetric on the 2-track. Have
screws with you as these are not included by IKEA.
Adjust ange screw
In the assemble instruction you will nd the measure H between the top of the oor
rail to the ange on the ange screw. We recommend using the top cover as a ruler
for the ne tuning to align them.
Floor rail
The oor rail is provided with double glue tape which works on solid ooring. Avoid
using the oor rail on rugs, as it will not stay xed properly. The system can be
adjusted if the oor is uneven (0-2mm per 1m). Floor rail has a front side so make
sure it is positioned correctly. If you are connecting two oor rails, make sure the cut
end is facing the wall.
Stop bar
The wall or the stop bar will be the closing surface for the sliding door. In both al-
ternatives it is important to have a straight and levelled closing surface. The system
can be adjusted if the wall is uneven (0-3mm per 1m).
Here are some general tips to have in mind before
you start assembling SKYTTA sliding doors. These
tips are for all the solutions, and for more specic
tips depending on the solution that is applicable to
your room, please see the following pages and the
Assembly Instructions.
To think about
H H H
Ceiling rail
Ceiling rail can stay temporarily in place with screws, but we recommend that you
don’t stop holding it up. Screws should be mounted from below and from the front
symmetrical in at least every second hole. Ceiling rail has a frontside on the 3-track
rail but is symmetric on the 2-track. If you are connecting two ceiling rails, make
sure the cut end is toward the wall. The rails should be aligned so be careful when
tighten the screws close to the joint.
Soft close
Soft close and soft-closing activators must be mounted into the rail before the
last ceiling rail is mounted. You need to place the parts according to your layout
from the planning tool. The doors placed closest to the wall have two soft-closing
mechanisms and end activator. Doors in the middle have one soft closing and one
activator.