Mounting the Unit to a Wall
11
Caution: The wall mounting accessories are suitable for wooden wall only.
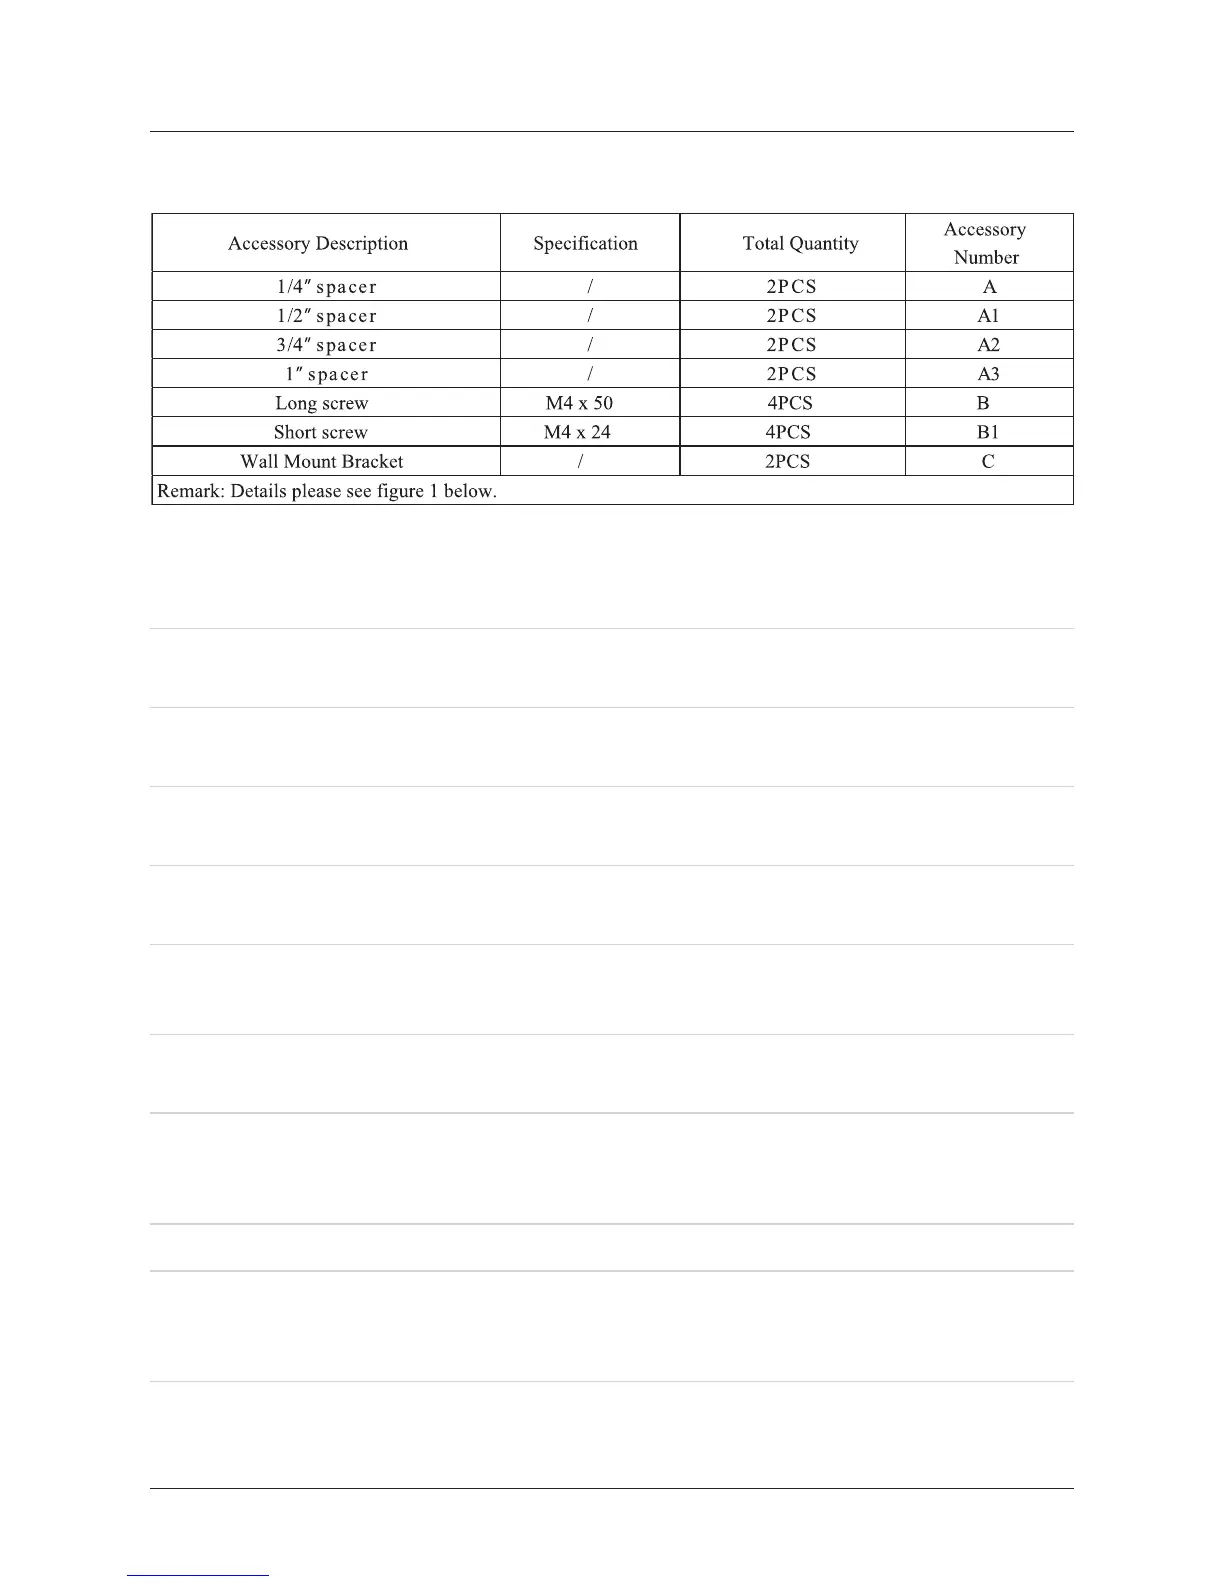
1. Mounting accessories in packing box of the unit are as follows:
2. Screw combination must be any one of following cases:
Two short screws for mounting of wall bracket without any spacer, details see
gure 2 below.
Two long screws for mounting of wall bracket without 1/4” spacer, details see
gure 3 below.
Two long screws for mounting of wall bracket without 1/2” spacer, details see
gure 4 below.
Two long screws for mounting of wall bracket without 3/4” spacer, details see
gure 5 below.
Two long screws for mounting of wall bracket without 1” spacer, details see gure
6 below.
I.
II.
III.
IV.
V.
Step 1. Decide whether or not to use spacers behind the wall mount brackets.
Step 2. Locate 2 studs in the wooden wall. Most houses have the studs spaced on 16
inch centers. Details see gure 7.
Step 3. Screw the wall mount brackets, or spacer and lling pieces into two parallel
studs using two screw in each wall mount bracket. Details see gure 8 and
any one of gures 2 to 6.
Step 4. Be sure that the wall mount brackets are level with each other.
Step 5. Hang the unit onto the secured wall mount brackets. To ensure a reliable and
sturdy installation, please consult a professional installer before mounting the
unit to a wall.
3. Mounting steps:
Moreover, the spacers can be used in combination to adjust unit’s distance from the
wall in order to match a mounted Flat-Panel TV. When using the 1/4”, 1/2”, 3/4”, 1”
spacers, longer screws must be purchased.