1| Prep and insert SM fiber into the splicer using clamps or proper fiber holders.
2| Select “MOTOR CALIBRATION” with the button.
3| If an error message is displayed after testing, immediately contact UCLSWIFT.
4| End the calibration by pressing .
6.6
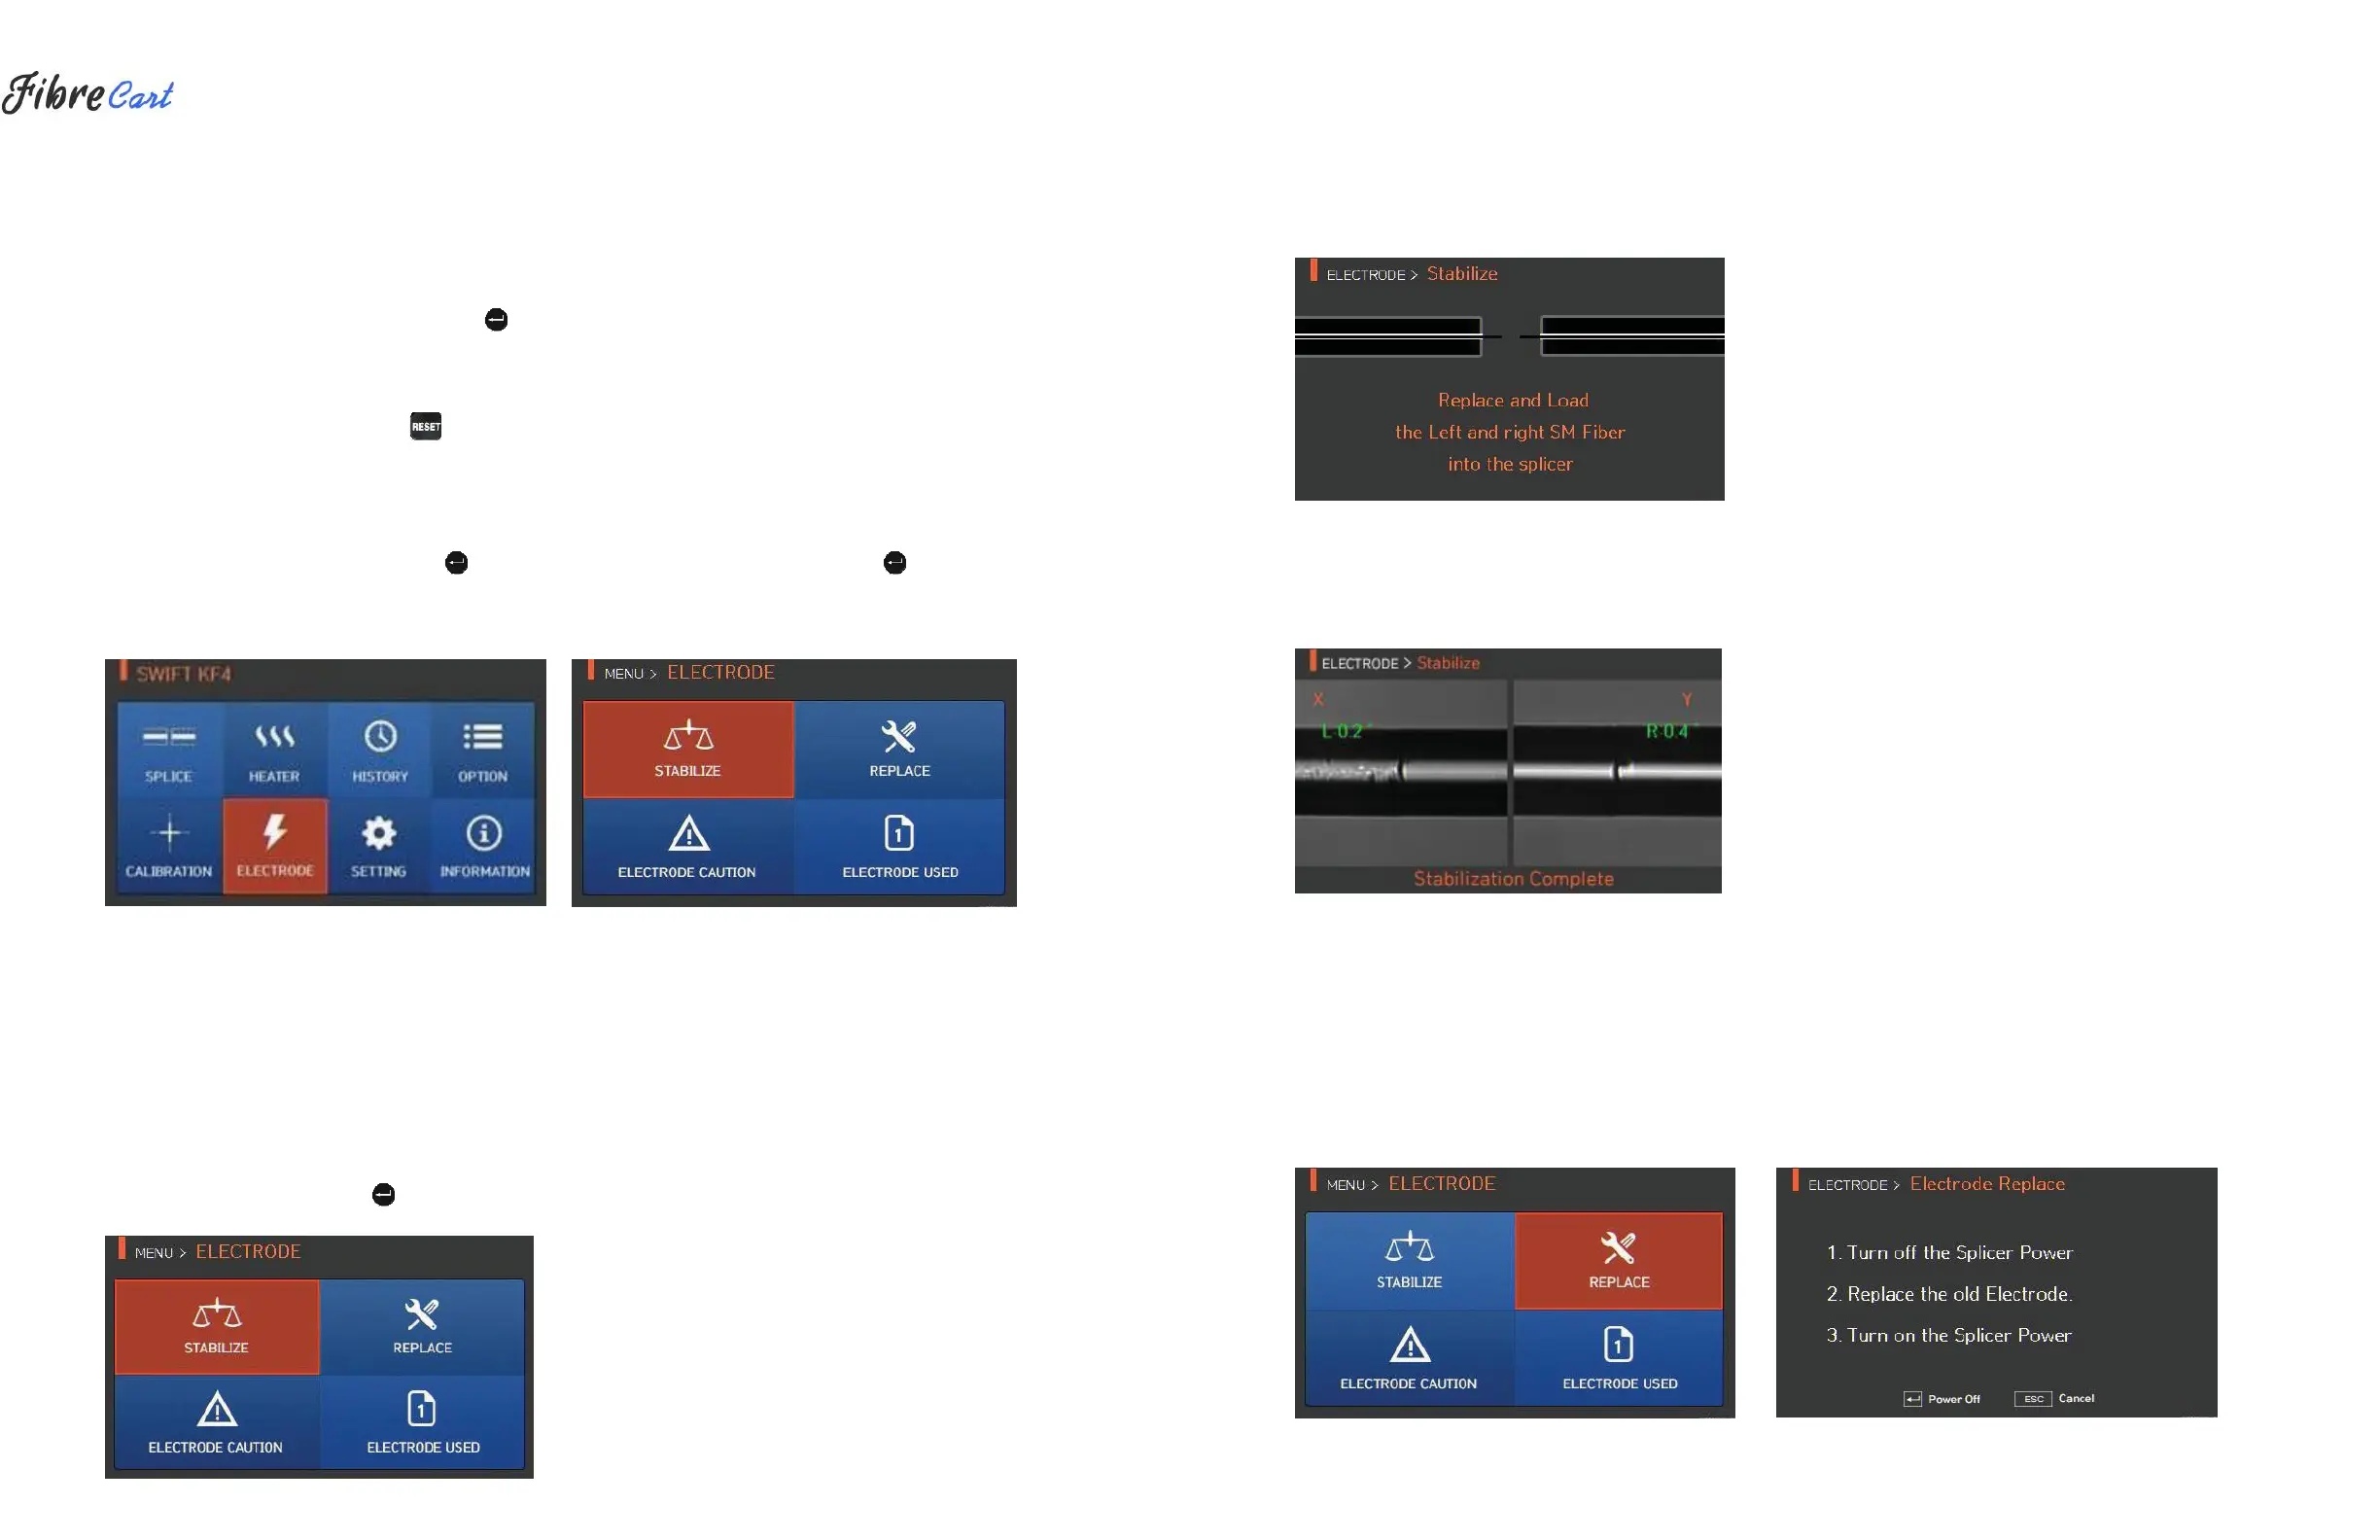
| ELECTRODES
To display the electrodes mode, press and then select “ELECTRODE” menu with the button. The splicer
should be regularly cleaned due to electrode abrasion and precipitation of silica oxide. This menu is related to
checking electrode-use count and electrode exchange. There are four submenus.
6.6.1
ELECTRODE STABILIZATION
Arcing can sometimes become unstable due to surroundings and consequently splice loss may increase.
Because it takes a long time to stabilize arcing when the splicer is located at low or high elevation, it is
particularly important to wait for the electrodes inside to be stabilized. In particular, stabilizing should be
conducted after replacing the electrodes.
1| Prep and insert SM fiber into the splicer using clamps or proper fiber holders.
2| Select “STABILIZE” with the button.
3| Press “OK”
4| Arc is conducted 30 times in a row for electrode stabilizing.
5| When stabilizing is finished, the splicer displays the screen below.
6| After stabilizing the electrodes, arc calibration should be conducted again.
6.6.2
REPLACING ELECTRODES
It is recommended to replace electrodes when the number of arcs reaches 4000. When it exceeds the preset
number of times for replacement, a message about an electrode replacement is displayed.