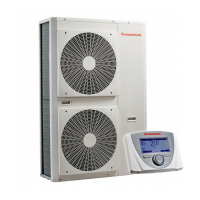
1-15
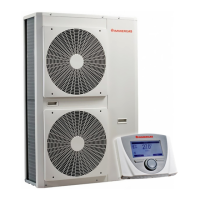
1-14
12
INSTALLERUSER
MAINTENANCE TECHNICIAN
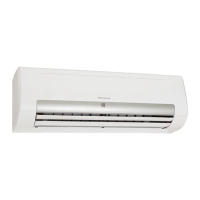
1.9 REMOTE PANEL INSTALLATION
OPERATIONS.
1) Separate the xing template from the body
of the remote panel using a screwdriver as a
lever in the relative recess (Fig. 1-15). Install
the remote panel away from heat sources and
in a suitable position to detect the room tem-
perature correctly.
2) Install the remote panel using the openings on
its rear part directly onto the wall or on a recess
box using the relative supplied screws.
3) Connect the remote panel to the electronic
management clamps, as indicated in the dia-
gram (Fig. 3-1 and 3-2).
e connection is made using wires with a
minimum section of 0.50 mm
2
and maximum
section of 1.5 mm
2
and with a maximum length
of 50 metres.
N.B.: for correct installation, prepare a dedicated
line to connect the remote control according
to the Standards in force regarding electrical
systems. If this is not possible, interference due
to other electric cables could cause malfunc-
tioning of the remote control itself.
1.8 REMOTE PANEL MAIN DIMENSIONS.
4) Fix the body of the remote control to the
mount template, engaging it with pressure.
5) Aer the device has been powered, wait about
30 seconds before regulation so that commu-
nication between remote panel and the device
has established.
 Loading...