33
3-17
1
2
3.5 COMMISSIONING.
• e test must be performed only aer com-
pleting installation.
• Please check the following points before test-
ing.
• e unit must be installed properly.
• Pipes and electrical cables must be connected
properly.
• Pipes pressure test.
• e condensate drain works properly.
• ermal insulation was done properly.
• Earthing was done properly.
• e supply voltage is the same as the design
voltage for the fan coil.
• e unit’s air inlet and outlet are not ob-
structed.
• e fan coil has been pre-heated with volt-
age.
Operating test
Use the remote control to set the fan coil in
cooling mode and check the following points,
as indicated in the part on use in this manual.
If there is any malfunction, resolve it using the
instructions in the “Troubleshooting support”
section in this manual.
• Check that the unit switches on and o prop-
erly from the remote control.
• Check that all keys on the remote control
work.
• Check that the deectors or ns move prop-
erly.
• Check that the internal temperature is prop-
erly regulated.
• Check that the indicators on the receiver
work properly.
• Check that the manual key works properly.
• Check that the condensate drains regularly.
• Check whether there are vibrations or
strange noises during operation.
• Check that the heating capacity is adequate.
• Check for water leaks.
OPERATING RANGE
For safe and ecient operation, use the sys-
tem with the following temperatures.
Room temper-
ature
Inlet water
temperature
Cooling 17°C ÷ 32°C 3°C ÷ 20°C
Heating
(without
cooling)
0°C ÷ 30°C 30°C ÷ 70°C
Temperature
Mode
Note: use of the fan coil outside the above con-
ditions could cause anomalies and malfunctions
of the device.
Note: if the relative humidity of the environment
is higher, condensation may form on the surface
of the fan coil. Close doors and windows.
Note: for optimal performance, use the device
within the temperature range indicated.
Note: water system operating pressure: Max:
1.6MPa, Min: 0.15MPa.
ENERGY SAVING TIPS
Read below for energy-ecient operation.
• Adust the ow grid appropriately and avoid
direct air ow on users.
• Adjust the room temperature appropriately.
Avoid excessive heating or cooling.
• Block direct sunlight during cooling opera-
tions with curtains or blinds.
• Ventilate the environment frequently. Pro-
longed use requires special attention to ven-
tilation.
• Keep doors and windows closed. If doors and
windows stay open, the air will escape from
the room and reduce the heating or cooling
eect.
• Do not place objects next to the unit’s air
inlet and outlet to prevent the eects from
falling or stopping the device.
• Do not place objects next to the unit’s air
inlet and outlet to prevent the eects from
falling or stopping the device.
• Set the timer.
• In case of long downtime, remove the batter-
ies from the remote control. When the sup-
ply voltage is connected, a small amount of
energy is used up even if the fan coil is not
working. Disconnect the supply voltage to
save energy.
• Keep the indoor unit and the remotecontrol
at least 1 m away from televisions, radios,
stereos, and other similar devices. Failure to
comply with the above may result in static or
distorted images.
• Clean the air lter at least once every fort-
night to prevent the dirt inside from reduc-
ing cooling or heating eciency.
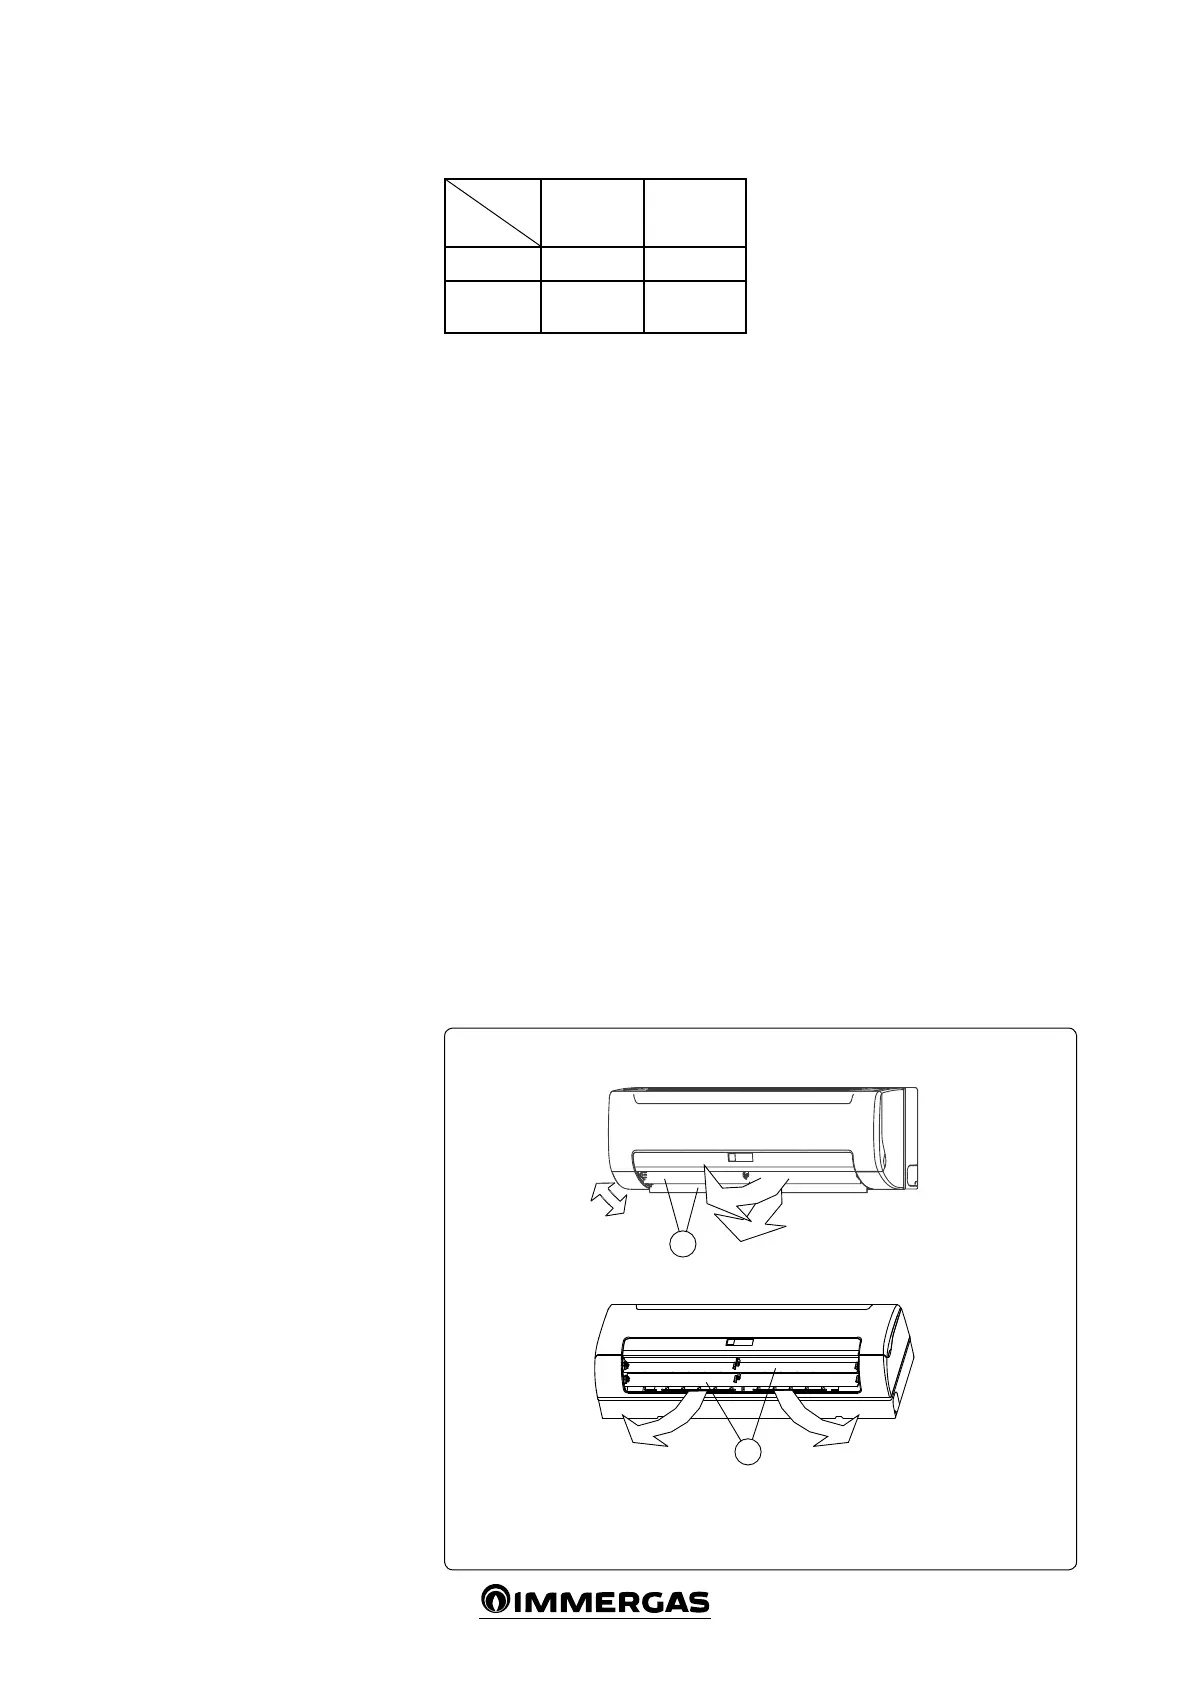
ADJUSTING THE AIR FLOW DIRECTION
When the unit is working, the ow grid can be
adjusted to change the ow direction and make
the room temperature more homogeneous. is
way, room comfort will also increase.
- Adjust the horizontal air jet (Fig. 3-17).
Use the remote control to adjust the horizon-
tal air deector.
- Adjust the air jet in the vertical position.
Open the horizontal air deector and man-
ually adjust in the vertical position.
Front panel
Key:
1 - Horizontal air deector
2 - Vertical air deector