7
9941443 R04 - 2017-2024 Indian Motorcycle (Full-Size) Service Manual
© Copyright
7.63
IINNNNEERR FFAAIIRRIINNGG IINNSSTTAALLLLAATTIIOONN -- ((CCHHIIEEFFTTAAIINN //
RROOAADDMMAASSTTEERR))
CAUTION
During installation of the inner fairing, pay close
attention to harness routing and connector
orientation. Always route electrical wiring the same
way as it was removed to avoid damaging wires and
connectors.
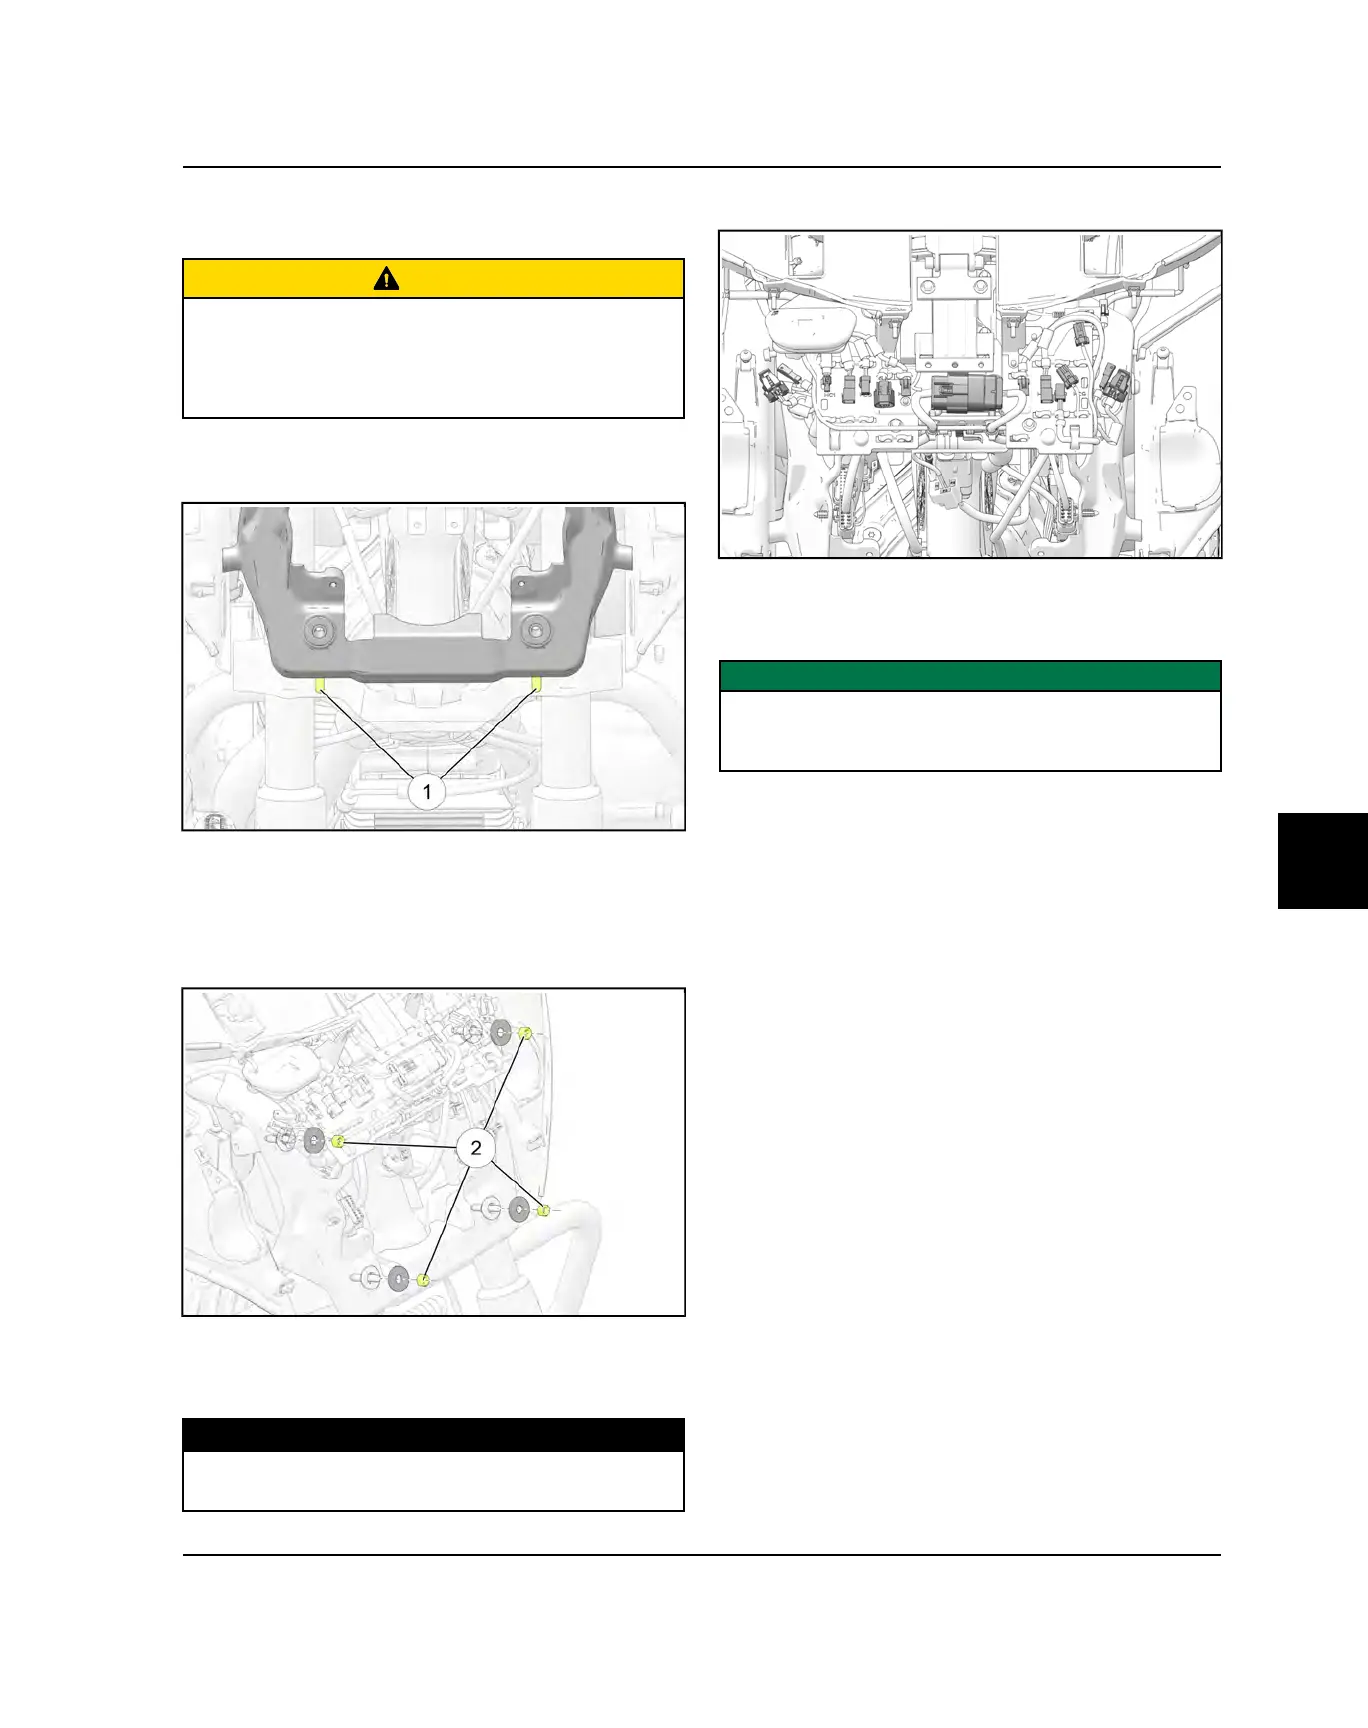
1. Rest the inner fairing assembly on the lower
mounting studs
q
and tilt forward.
2. Carefully route all loose wires through the access
hole in the inner fairing mount.
3. Install the inner fairing assembly on the four triple
clamp studs
w
and install washers and nuts finger
tight.
4. Verify that no wires or connectors have been
pinched between the inner fairing and the triple
clamp and torque mounting nuts to specifications.
TORQUE
Inner Fairing Mounting Nuts:
12 ft-lbs (16 N·m)
5. Connect all multi plugs in harness holder bracket.
6. Paying attention to the natural form of the wiring
harness, reconnect all of the multi-plugs between
the chassis and inner faring.
IMPORTANT
Pay attention to index marks placed on connectors
during disassembly when reconnecting as some of
them are interchangeable.
7. Install the outer fairing assembly. See Outer Fairing
Installation - (Chieftain / Roadmaster) page 7.64
8. Install the instrument cluster. See Ride Command
System Installation page 7.68
FRAME / BODY











 To Next Page