page 6
IDEX 400 SATA - Installation & Operation
insTallaTion insTrUCTions
These instructions assume the computer is setup for SATA only ( no IDE drives ).
Static Caution:
Before removing any parts from protective static bags ensure that you have taken proper precautions to prevent damage
from static. A static strap should be worn at all times.
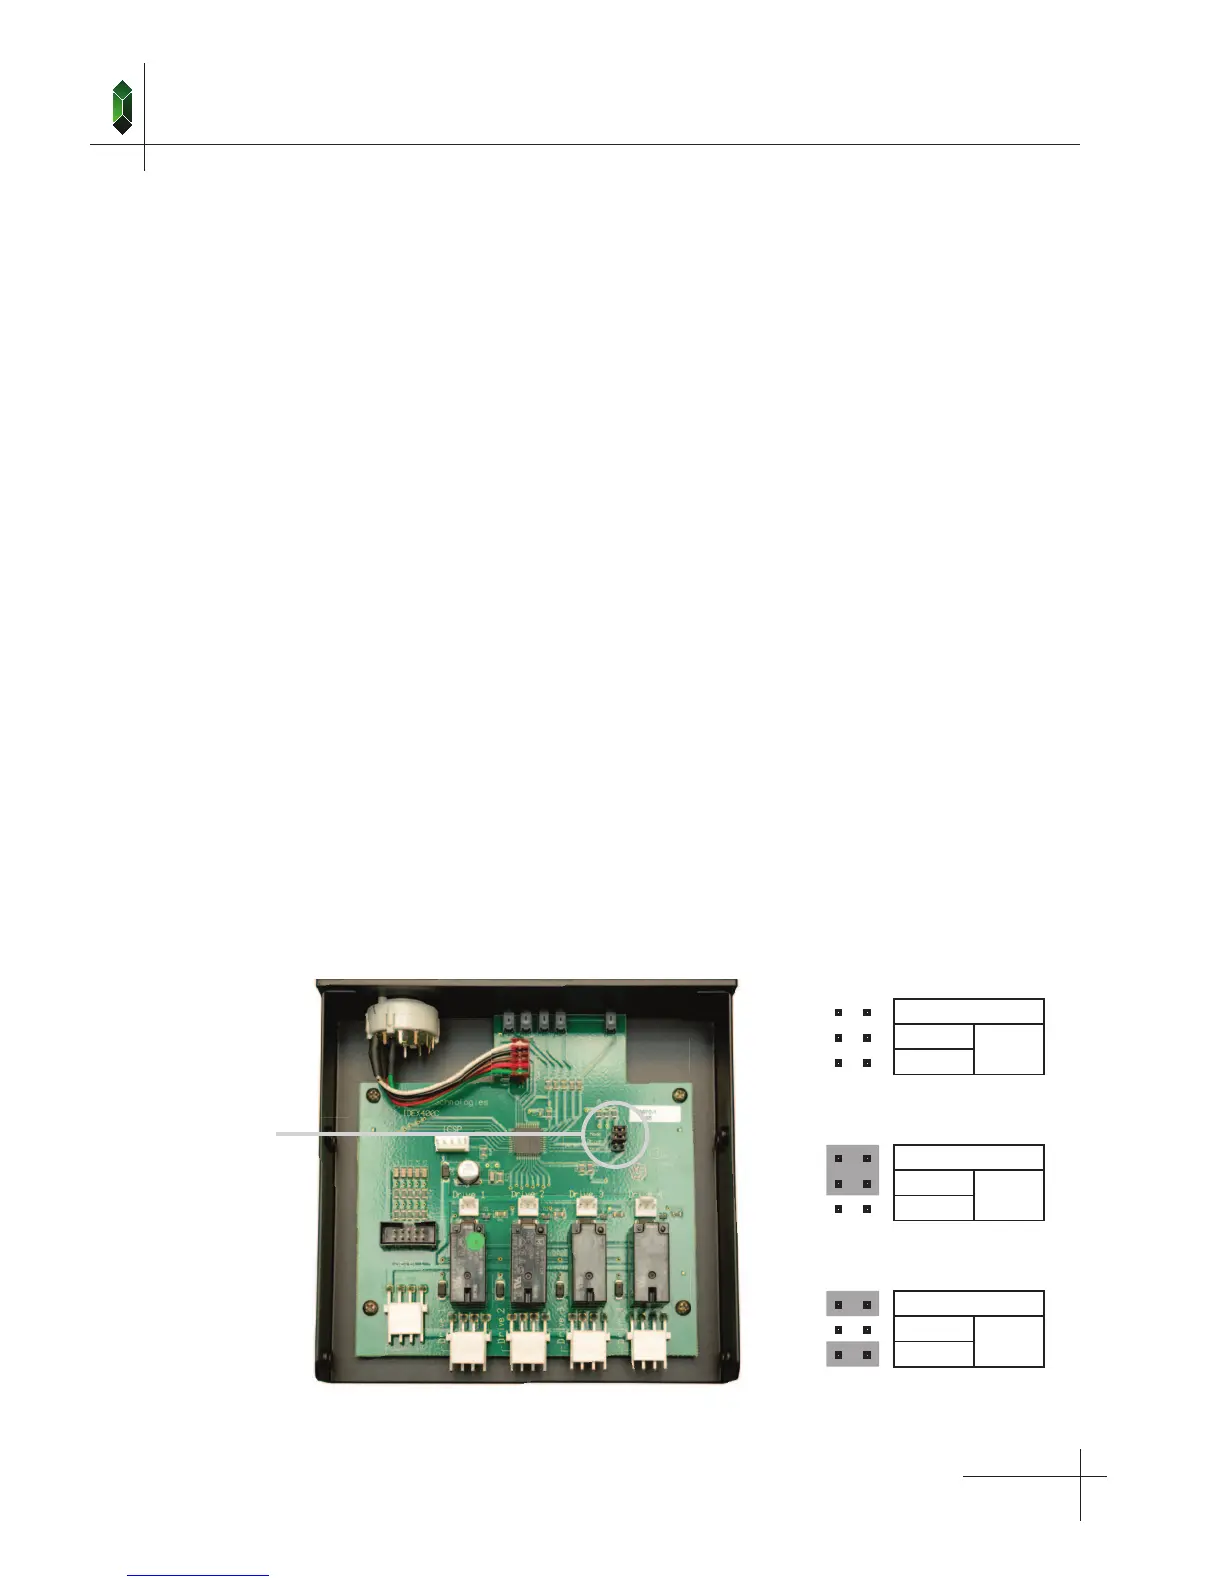
1. Set IDEX 400 Jumpers
If you are using the IDEX 400 as a stand alone unit ( in “Local Mode”, no Master Selector ) remove all jumpers.
The “Master Mode” jumper setting allows the IDEX 400 to be controlled remotely by a Master Selector. The “Local” and
“Drive 1” default jumpers determine what the drive selector will do, if an invalid signal from the Master Selector is detected.
This could occur if the Master Selector is faulty or if the cable from the Master Selector is disconnected. If no jumper is
placed on the “Local” or “Drive 1” positions, no drive will be selected.
Master Mode
This mode is used when the drive selector is being controlled by a remote Master Selector.
In this mode the IDEX 400 will activate the drive set by the Master Selector. If the signal from the
Master Selector is not valid the logic will activate the “Default Drive”. “Master Mode” is set by placing
one jumper on the “Master Mode” position as shown.
Local When the jumper is place on this position, the drive is selected by the IDEX 400 and will be
activated if there is a problem with the signal from the Master Selector.
Drive 1 When the jumper is place on this position, “Drive 1” will be activated if there is a problem with the
signal from the Master Selector.
Jumper Pins
■ ■
Master Mode
■ ■
Drive 1
Default
■ ■
Local
■ ■
Master Mode
■ ■
Drive 1
Default
■ ■
Local
■ ■
Master Mode
■ ■
Drive 1
Default
■ ■
Local
Master Mode:
Drive 1
Local Mode
Master Mode:
Local Select