page 8
IDEX 400 SATA - Installation & Operation
7. Connect SATA Data Cables To Hard Drives
Connect SATA data cable #1 to hard drive #1, then connect SATA Data Cable #1 to motherboard.
Repeat as required for each additional drive.
8. Connect Power Cables To Hard Drives
Connect Hard Drive Power Cable #1 to hard drive #1.
Repeat as required for each additional drive.
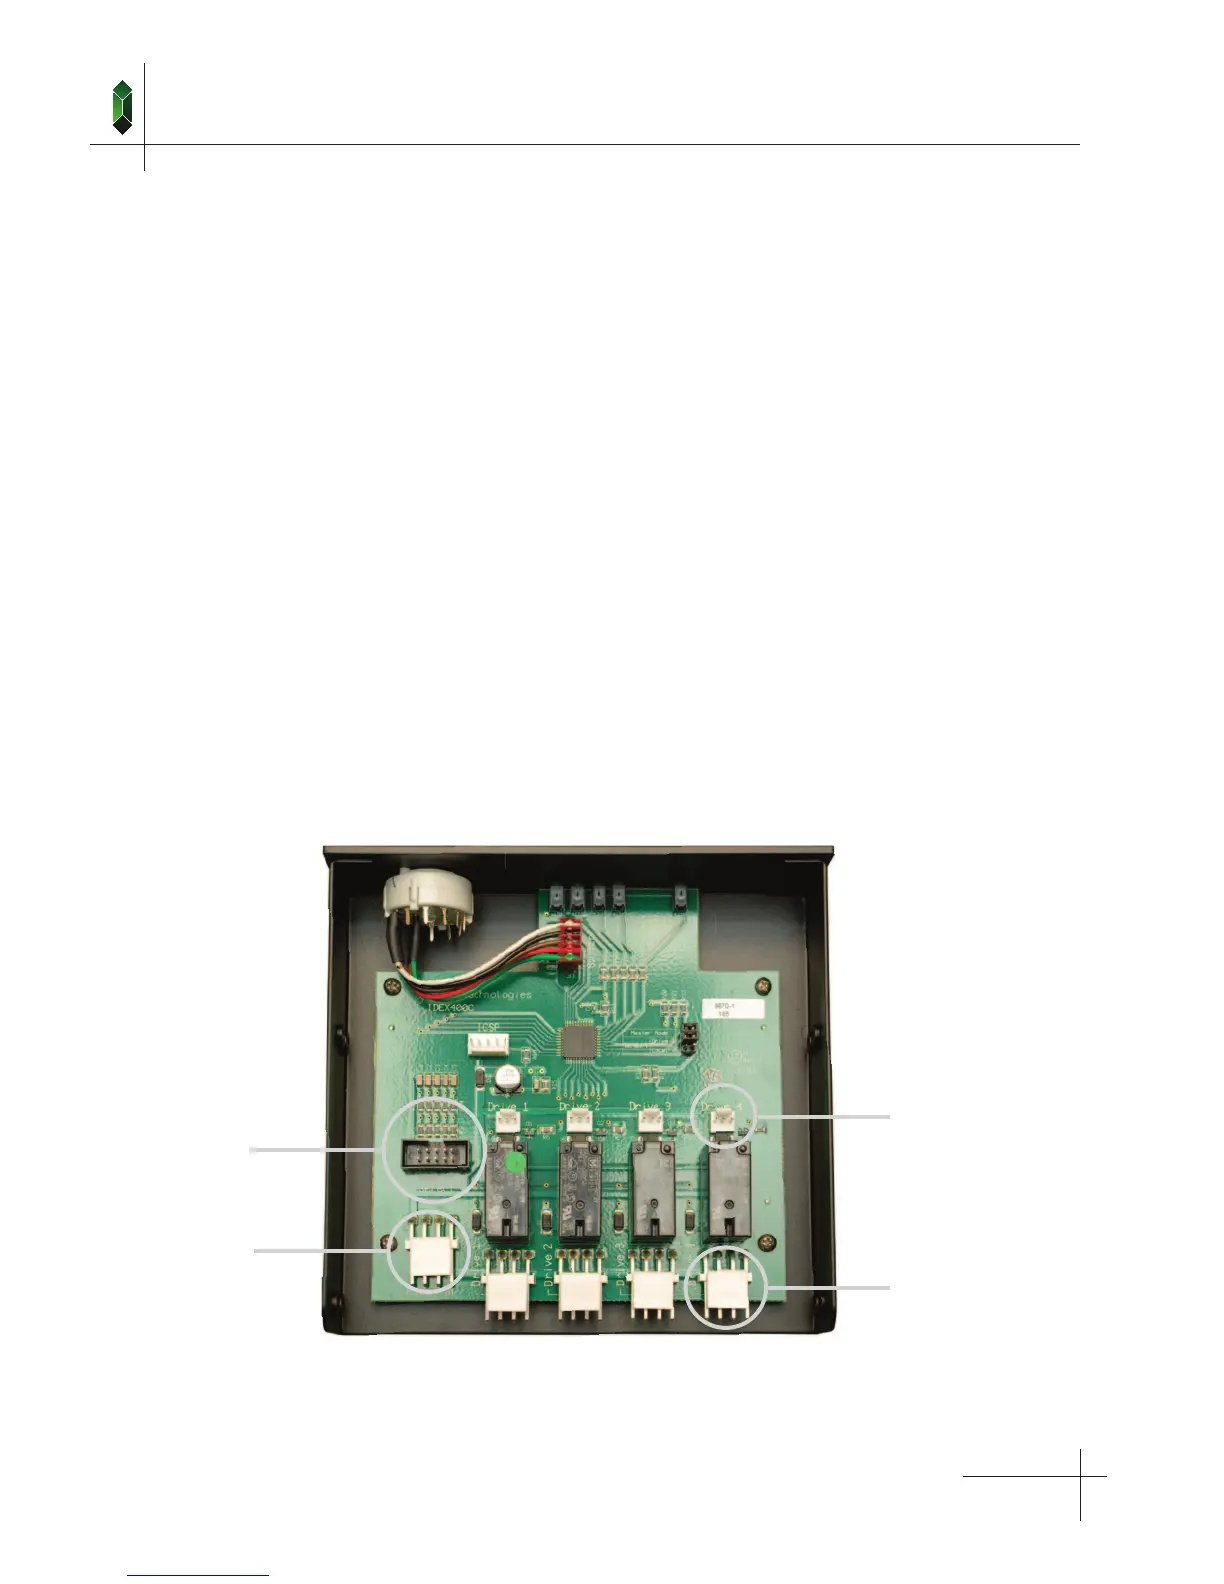
9. Connect Power Cables To Drive Selector
Position the drive selector at the front of the PC so that it is ready to slide in to the drive bay.
Connect the IDEX Power Cable and Hard Drive Power Cables to their respective connectors on the switch.
• Connect the internal PC power cable to the IDEX 400 “Power In Connector”
• Connect hard drive power cable #1 to the “Drive Power Out Connector #1”
• Connect hard drive power cable #2 to the “Drive Power Out Connector #2”
• Continue for “Drive 3” and “Drive 4”
• (If present) Connect the jumper cable to the “Master Selector Connector” ( note “Pin 1” orientation )
IDEX Power
In Connector
Bus Switch
Control Connector
( Not Used With SATA )
Master
Selector
Connector
Drive Power
Out Connector