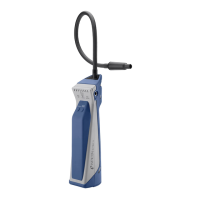
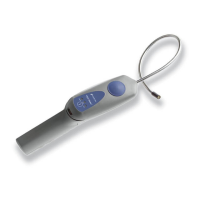
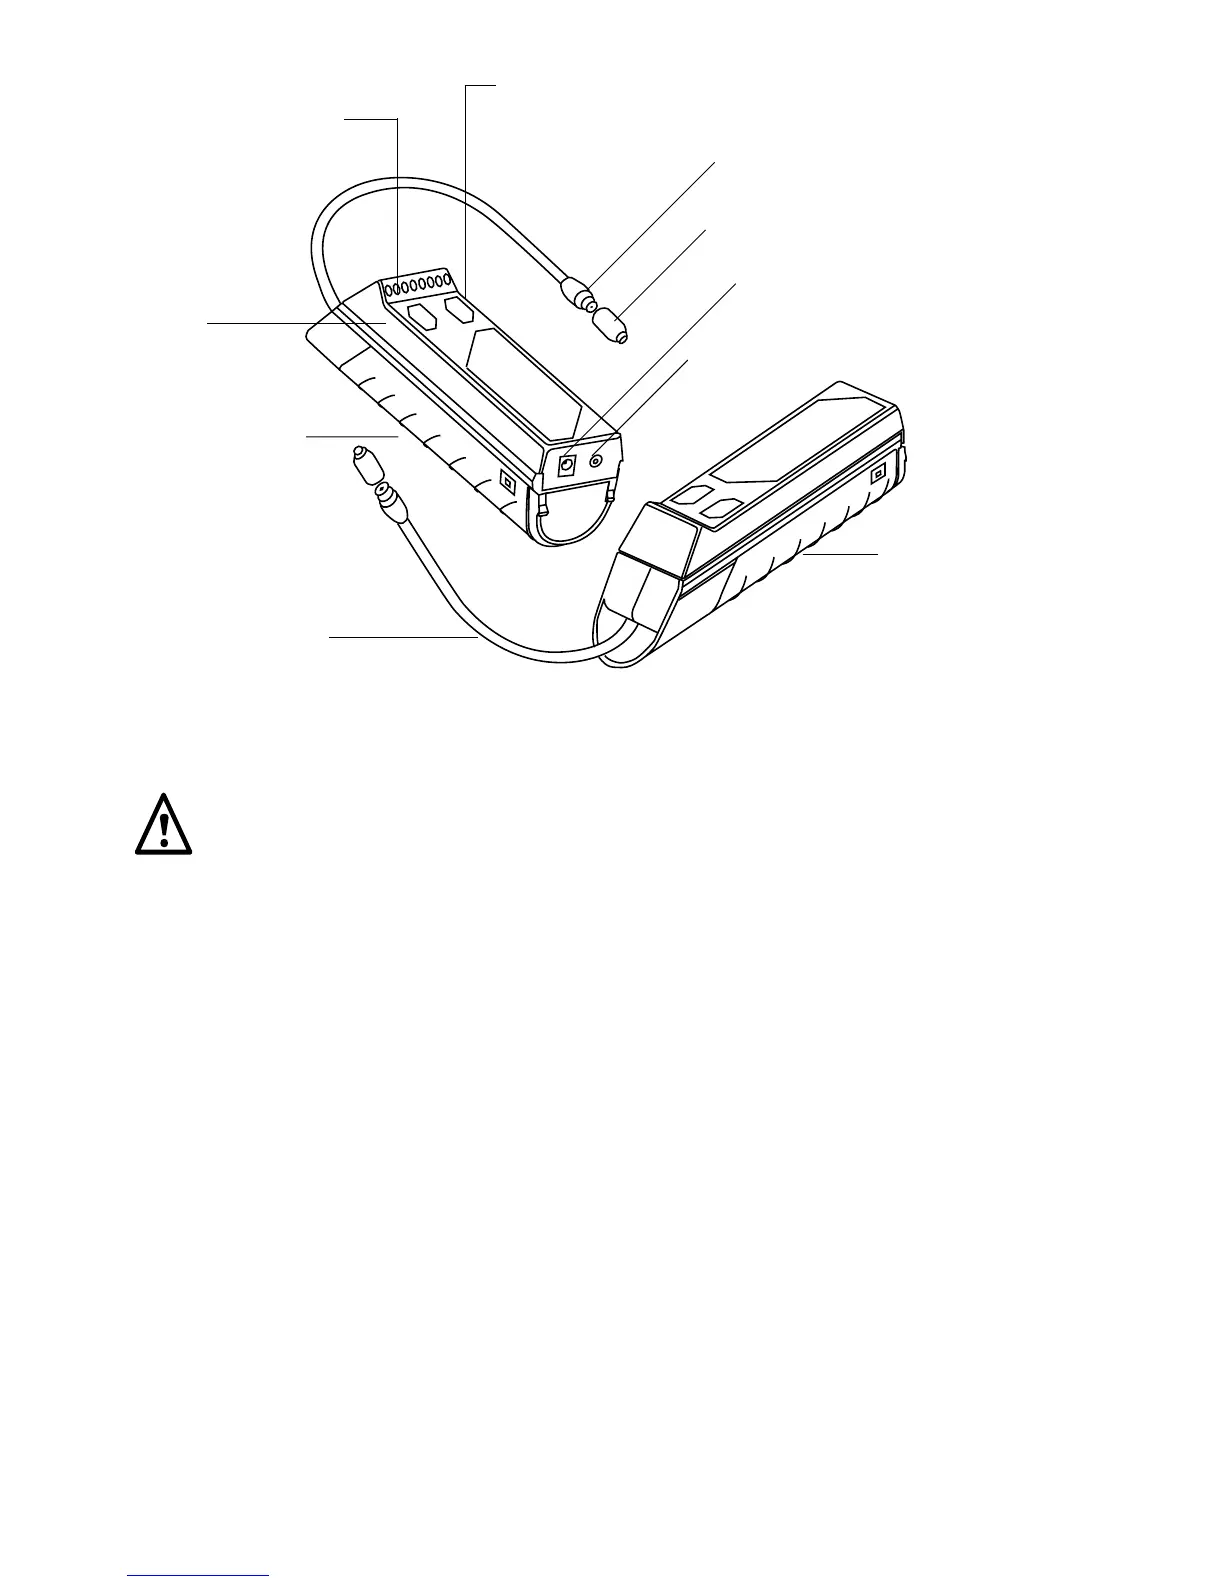
4
Green LED’s
Yellow LED’s
On/Off
switch
Rubberized
grip
Flexible probe
High/Low sensitivity switch
Power-cell
compartment
Power jack
Headphone jack
Heated-diode sensor
Tip protector
Getting Started
WARNING:
DO NOT OPERATE THIS INSTRUMENT IN THE
PRESENCE OF GASOLINE, NATURAL GAS, PROPANE, OR IN
OTHER COMBUSTIVE ATMOSPHERES.
Installing the Sensor
The D-TEK Refrigerant Leak Detector is shipped with the heated-
diode sensor packed separately. The sensor is located in the foil
protective package along with a desiccant capsule to keep it dry.
Installation of the sensor in the tip of the leak detector is required
before use. The steps for installation are:
• Locate the end of the leak detector probe and unscrew (counter-
clockwise) the tip protector. The three sockets are for the leads
of the D-TEK sensor to fit into.
• Remove the sensor from the foil protective package. The sensor
is the small metal “can” with a hole in the top.