32
14 Recording and using Presets
Presets are a huge programming aid and a quick way to recall previously stored positions. Additionally,
presets will be used as a reference if you used them in later programming. Cues, which have been
programmed using a preset, will automatically update their contents if you update the preset later on.
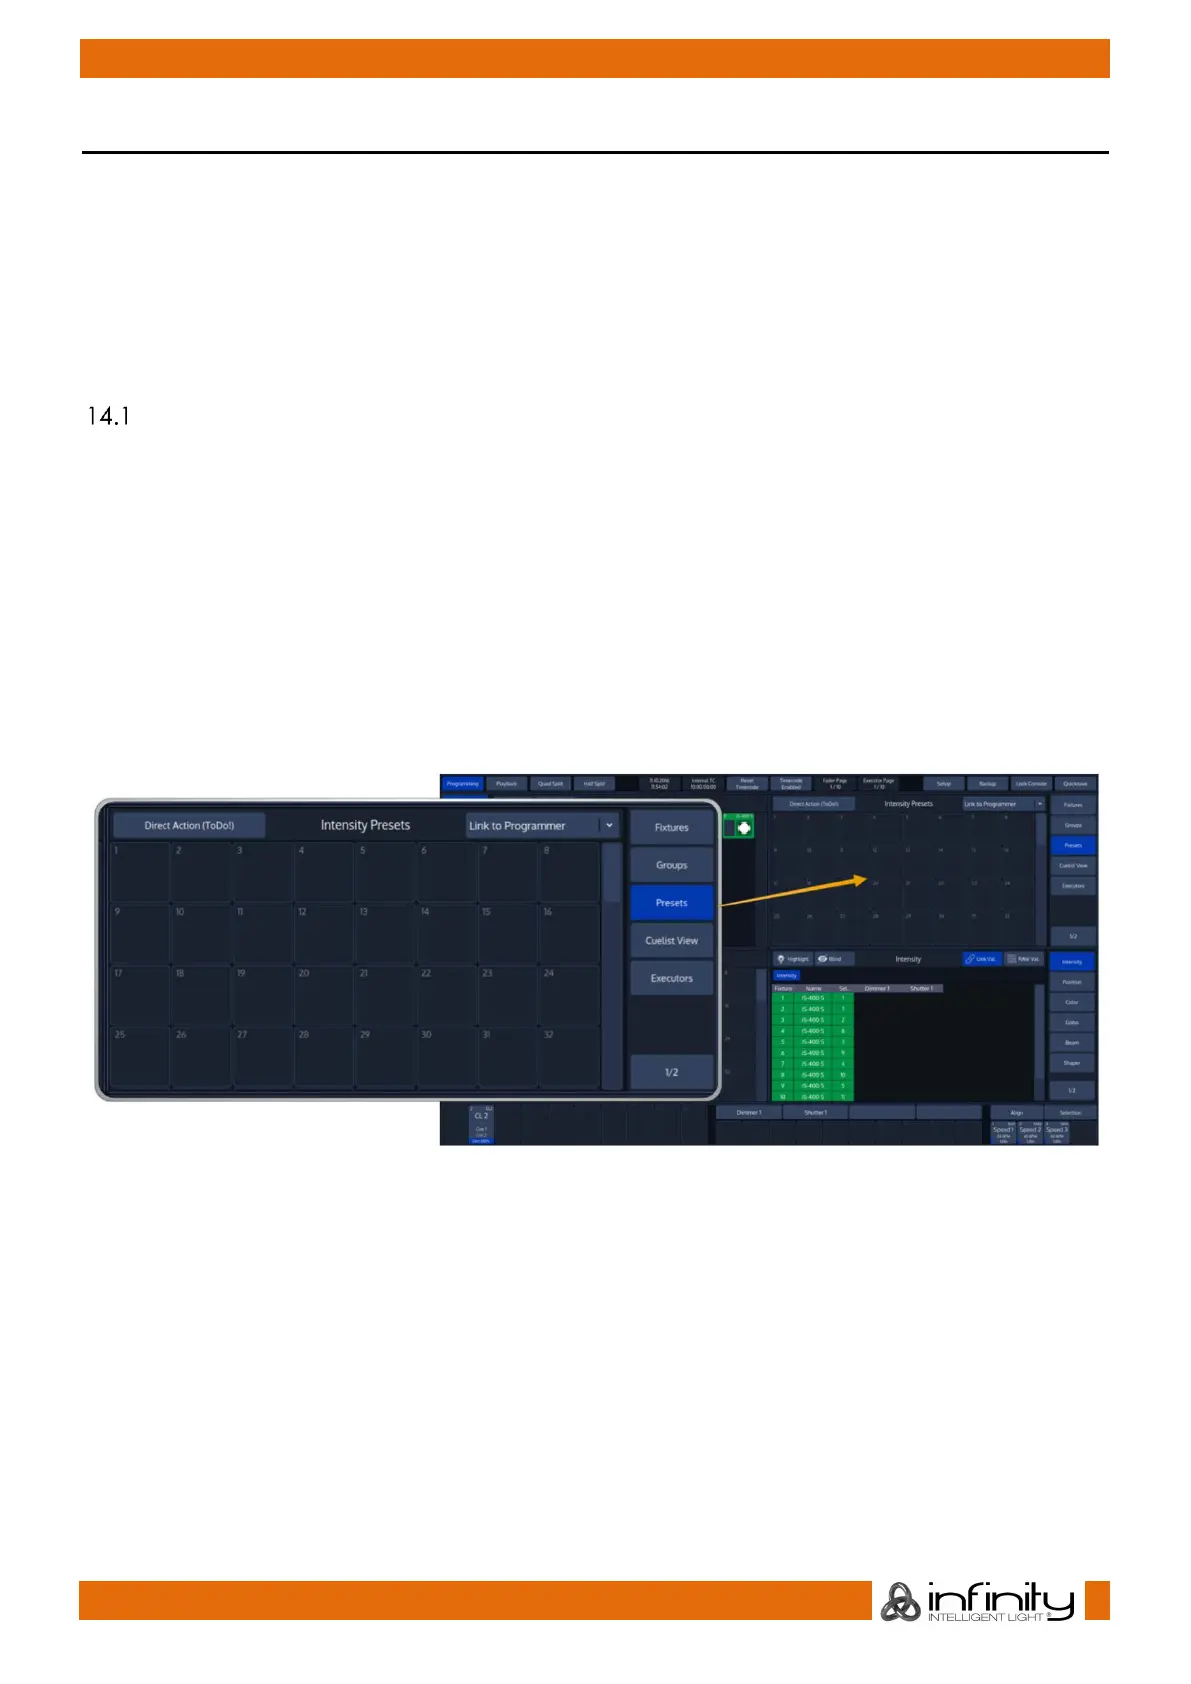
Similar to fixtures and groups, presets may be found in the split widget side menu by pressing the Presets
button.
By default, the preset widget will only show presets of the attribute group that is selected in the
programmer. However you may change this behaviour by clicking into the little dropdown menu in the
widgets title bar.
Recording Presets
If you record a preset into any of these preset pools within the preset widget, the console will only record
values for the appropriate attribute group. This way, Position Presets only contain position information,
and Color Presets only contain color information.
In case you would like to store a preset that contains parameters spread across different parameter
groups, record an “All” Preset.
14.1.1 Record a Preset using the Preset Split Widget
Once you have made a look you would like to store as a preset, Press the [Rec] key found in the
programming section of the frontpanel and select an empty item from a Preset Split Widget.
Please note Chimp will only store values that have been touched – so if you recorded a color preset for
one fixture, this particular preset may not be recalled using a different fixture.
The record toolbar contains a button called Name It! – If this button is active, the console will
automatically ask for a name after you stored the Item.
If you decide to turn this function off, you may label any item by pressing the [Name] key on the faceplate
of the console. The commandline will read “Name”. Now select the Item you would like to label.