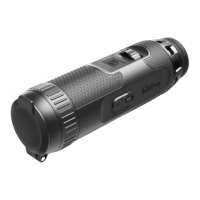
InfiRay Outdoor • EYE III Series • User Manual www.infirayoutdoor.com
All rights reserved and shall not be copied and distributed in any form without written permission. - 8 -
⚫ Never use a damaged or modified charger.
⚫ Don’t leave battery unattended when charging. Don’t leave the device
with a charger connected to the mains longer than over 24 hours after
full charge.
⚫ Do not expose the battery to high temperature or to a naked flame.
⚫ Don’t connect external device with a current consumption that exceed
permitted levels.
⚫ The battery is short circuit protected. However, any situation that may
cause short-circuiting should be avoided.
⚫ Don’t dismantle the battery from the device.
⚫ The battery capacity may decrease when using the battery in negative
temperature, that is normal, not a defect.
⚫ Avoid using the battery at the temperature above the temperature
shown in the table, this may decrease the battery’s life.
⚫ If the thermal imaging monocular is not used for a long time, recharge
the device every 2 months at least and charge to 40%-50% power, then
store the device in a dry and ventilated environment.
⚫ Partial charging the battery is necessary if the battery is planned to be
idled for long time. Avid fully charged or discharged.
⚫ Keep the battery out of the reach of children.
8 Operation
⚫ Open the lens cap (9) to power on the device, and the startup logo will
be displayed on the device screen in 1 second. Also, the EYE III will be
powered on with a long press of the Controller (3) for 3s.
⚫ When an infrared image is displayed in the eyepiece, the thermal
imaging monocular enters the operating status.
⚫ Rotate the diopter adjustment knob (2) to adjust the resolution of the
icon on the display. The diopter adjustment knob is used to adjust the
eyepiece diopter for users with different degrees of myopia.
⚫ Shortcut menu: On the home screen, press the Controller (3) to
open the shortcut menu, and set the image mode ( ), scene mode
( ), screen brightness ( ), and image sharpness ( ). Rotate
the Controller (3) to switch between different functions on the shortcut
menu, and press the Controller (3) to set parameters.
⚫ Main menu: On the home screen, press and hold the Controller (3) to
enter the main menu interface for more functions. Rotate the Controller
(3) to switch between different functions on the main menu, and press
the Controller (3) to select the option.
⚫ Photographing / Video recording: On the home screen, briefly press

 Loading...