Copyright ©2021, Infoblox, Inc. All rights reserved.
1.
2.
Hard Disk Drive Replacement
The Infoblox 2205 Series appliances ship with four hot-swappable hard disk drives configured in a RAID (Redundant Array of Independent Disks) 10 array.
The appliances are designed to provide continuous operation in the event of a failed disk. Hot-swapping a disk drive is a simple process that does not
require issuing commands or a Grid Manager operation.
When you replace a failed disk, you must replace it with an Infoblox supplied disk. To ensure that you receive the correct replacement disk, report the disk
type or part number of the failed disk. The appliance also displays the disk type in the panel of the Grid Manager. Installing disks that are Detailed Status
not qualified and shipped from Infoblox could cause failures in the appliance.
You can access the disk drives from the front of the appliance. Each disk drive weighs about 2 pounds (.90 kg).
You can remove or replace a defective drive without interrupting appliance operations or network services. To remove a disk drive:
Identify and verify the failed drive through the Grid Manager, the front panel LCD, or the CLI.
If the activity light is green or blinking green, ensure that you have identified the correct drive. Conditions may exist where a drive gradually fails
and continues to show green in the activity light.
Caution: Never remove a correctly functioning drive in a live system. If a disk drive fails, remove the failed disk only. NEVER remove two or more disks at
once. Removing more than one disk at a time can cause a complete failure of the appliance and require an RMA (Return Material Authorization). All
replacement drives must complete the rebuilding process before you can remove another drive. You can log in to the Grid Manager and check the status
of the disk drives.
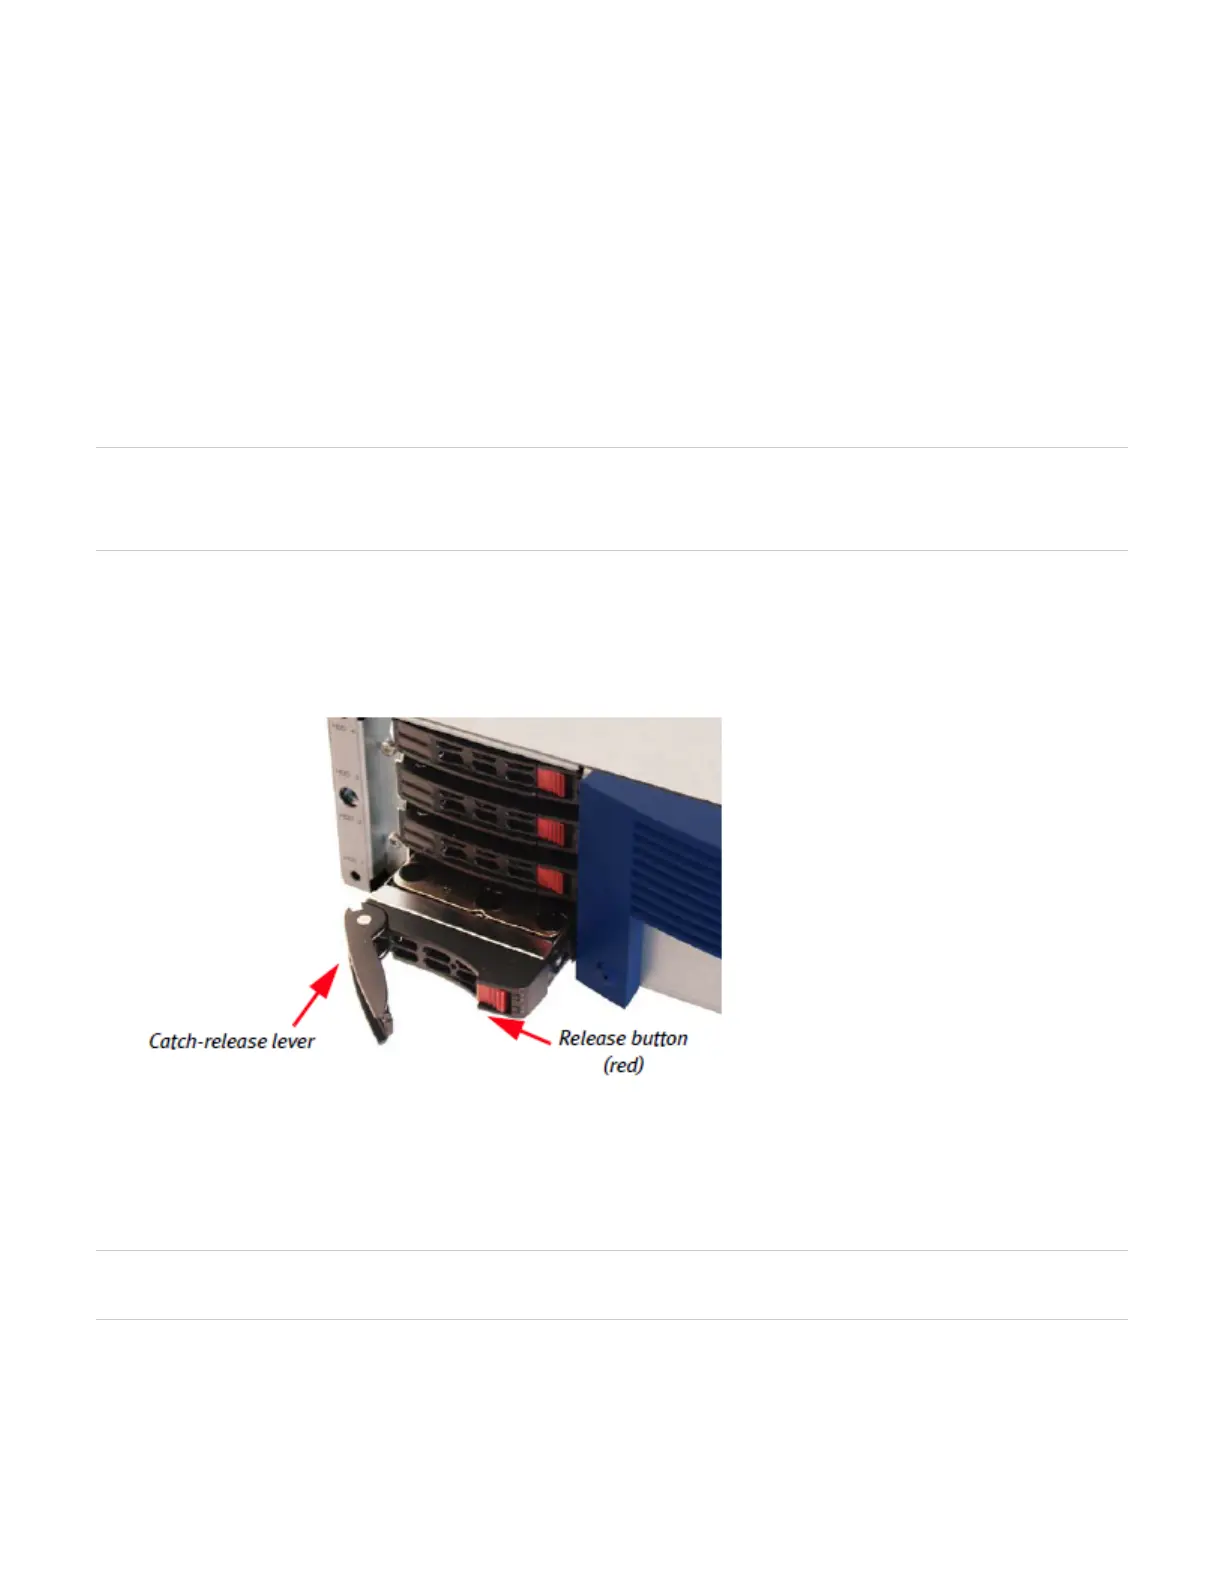
3. Press the release button to release the catch-release lever.
4. Use the catch-release lever to pull the disk about two cm (one inch) to disengage contact, as indicated in . Figure 14
5. Wait about 30 seconds for the disk to completely stop spinning.
Figure 14 Pull the catch-release lever to remove hard drive
6. Remove the disk, extract it from its carrier and handle it with care. Do not drop the disk or ship it loosely in a carton.
7. Securely mount the replacement disk in the drive carrier and replace the carrier in the system.
8. Push the lever down to lock the disk drive in place. The LED next to the disk drive lights up.
9. The disk drive automatically goes into rebuild mode.
Note: IP settings and basic network configurations, such as the gateway address, netmask, Grid secret and Grid name, are saved and restored when you
replace a failed disk drive.
Disk Array Guidelines
Infoblox designs the disk array to be completely self managed. No maintenance procedures are required for a normally functioning disk array. Mishandling
the disk array can cause an unrecoverable error and result in a failed appliance. Infoblox recommends that you observe the following guidelines: