D
danielle04Aug 17, 2025
How to flip image on InFocus IN119HDx Projector?
- Vvalerie09Aug 17, 2025
To flip the image on your InFocus Projector, turn off Ceiling Mount in the Basic menu.
How to flip image on InFocus IN119HDx Projector?
To flip the image on your InFocus Projector, turn off Ceiling Mount in the Basic menu.
How to fix fuzzy or cropped image on InFocus IN119HDx?
To fix a fuzzy or cropped image on your InFocus Projector, change the computer's "Resolution" setting to match the projector's resolution (Windows 7: Control Panel > Display > Screen Resolution). This setting change process varies per operating system.
How to center the image on InFocus Projector?
To center the image on the screen with your InFocus Projector, move the projector, adjust its height, and adjust the horizontal or vertical position in Advanced Menu > Image > PC... menu.
How to make InFocus IN119HDx image sharper?
To make the image sharper on your InFocus Projector, adjust the Sharpness in the Basic Menu.
How to square the image on InFocus IN119HDx Projector?
To square the image on your InFocus Projector, adjust the Keystone on the keypad.
Why only laptop background appears on InFocus IN119HDx?
If only your laptop’s background appears and not the Desktop icons on your InFocus Projector, change the Multiple Display setting to "Duplicate these displays" (Windows 7: Control Panel > Display > Screen Resolution). This setting change process varies per operating system.
How to correct reversed image on InFocus Projector?
To correct a reversed image on your InFocus Projector, turn off Rear Project in Advanced Menu > Setup > Image Setup... menu.
What to do if my InFocus IN119HDx Projector says “Signal out of range”?
If your InFocus Projector displays “Signal out of range”, press the Auto Image button on the remote. You may also need to adjust the computer refresh rate (Windows 7: Control Panel > Display > Screen Resolution > Advanced Settings > Adapter tab). This varies per operating system. Setting a different resolution on your computer might also help.
How to fix InFocus IN119HDx Projector with no start up screen?
To fix an InFocus Projector with no start-up screen, plug the power cord into the projector and press the Power button.
How to fit image to 4:3 or 16:9 screen on InFocus IN119HDx Projector?
To fit the image to a 4:3 or 16:9 screen on your InFocus Projector, change the aspect ratio to 4:3 or 16:9 in Basic Menu > Aspect Ratio menu.
Confirms projector's adherence to EU directives and applicable norms.
Outlines FCC compliance, potential interference, and operating conditions for US users.
States adherence to Canadian ICES-003 standards for digital devices.
Mentions CMETus and notes other country-specific approvals.
Essential safety measures for projector placement, ventilation, and use.
Critical warnings regarding the high-pressure mercury lamp and safe disposal.
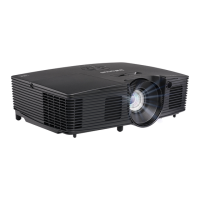
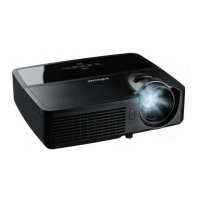
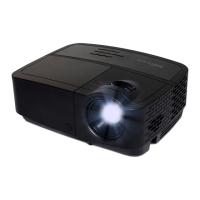
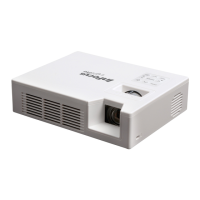
Overview of projector models, features, and compatibility.
Guidance on accessing the latest technical specifications online.
Information on standard and optional accessories.
Instructions for warranty activation and product updates via registration.
Detailed diagram and description of all input/output ports on the projector.
Lists available ports for computer and video sources like VGA, HDMI, and S-Video.
Guidelines for projector placement, including distance and angle to the screen.
Tables showing projected image dimensions based on screen size and throw ratio.
Steps for connecting computers via VGA or HDMI interfaces.
Details on audio connections and monitor out for dual display.
Procedure to power on the projector and display content from a connected source.
How to enable a laptop's external video output for projection.
Using projector feet and positioning for proper image alignment.
How to adjust the zoom and focus for image clarity.
Correcting trapezoidal distortion for a geometrically square image.
Adjusting contrast and brightness using the basic menu.
How to connect sources like VCRs, DVD players, and cameras.
Instructions for connecting via HDMI and composite video interfaces.
Steps for connecting using VGA or component video inputs.
How to connect using the S-Video port.
Connecting audio sources to the projector speakers.
Procedures for turning off the projector and completing the power-down sequence.
Using status indicator lights to diagnose and resolve common setup problems.
Solutions for a blank screen or "Signal out of range" messages.
Addressing issues like only laptop background showing.
Solutions for fuzzy or cropped images and duplicate display settings.
Fixing images that are fuzzy, cropped, or not centered on the screen.
Correcting non-square images and adjusting aspect ratios for 4:3 or 16:9 screens.
How to fix upside-down or reversed images and adjust projected colors.
Solutions for the projector not turning on or overheating.
Addressing "Replace lamp" messages and procedures.
How to install batteries, operate the remote, and its key functions.
Tips for resolving issues with remote control functionality.
Connecting audio sources and using the projector's built-in speakers.
Steps to resolve issues with no audio output from the projector.
Overview of the functions of the physical buttons on the projector keypad.
Adjusting settings like Keystone, Contrast, Brightness, and Aspect Ratio for computer input.
Overview of features that enhance presentations, like Custom key and Auto Off Time.
Adjusting video image settings like Keystone, Contrast, Color, and Sharpness.
Configuring settings for rear projection, ceiling mount, and power-up sources.
How to open, navigate, and exit the projector's On-Screen Display (OSD) menus.
Detailed explanation of settings available in the Basic Menu, including Aspect Ratio, Brightness, and Volume.
Explanation of advanced settings for Image, 3D Control, Color, PC, and Video.
Configuring audio inputs, digital zoom, magnify level, and ceiling mount.
Customizing remote key functions, blank screen, and keypad lock.
Managing programmed dimming, lamp low power, language, and menu transparency.
Setting up PIN protection and managing power saving modes and auto-on.
Configuring auto source, power-up source, and startup screen behavior.
Configuring auto off timer and high altitude mode for optimal performance.
Accessing source info, projector info, resetting lamp hours, and factory reset.
Proper procedures for cleaning the projector lens using specific materials.
Instructions for using a cable lock system to secure the projector.
Steps for replacing the projector lamp module and resetting the lamp hour timer.
Critical warnings about lamp handling, potential rupture, and mercury content.
| Aspect Ratio | 16:9 |
|---|---|
| Projection Technology | DLP |
| Resolution | 1920x1080 (Full HD) |
| Lamp Life | Up to 15, 000 hours |
| Connectivity | HDMI, VGA, RS232, Audio in/out |
| Zoom Ratio | 1.1:1 |
| HDMI | Yes |
| Projection Size | 30-300 inches |
| Keystone Correction | ±40° vertical |
| Connectors | VGA, HDMI, RS232, Audio in, Audio out |