EasyManua.ls Logo

Ingenico iWL 250 series User Manual

Ingenico iWL 250 series
5 pages
To Next Page IconTo Next Page
Page #1 background imageLoading...
Page #1 background image
Ingenico iWL 250 series Set-Up Guide
Page 1 of 5
CONNECTING/INITIALIZING THE TERMINAL
Connect power and Ethernet cables into terminal base
Place terminal on base
Terminal will begin associating.
When Parameter needed appears:
Press F
Press 0 -Telium Manager
Press 3 - Initialization
Press 2 -Hardware
Press 3 - Cradle Set-up
Press 1 - Association
Press 1 -New Base
When complete -Association Successful / Base Update
appears and Bluetooth indicator (B) will be blue
Press Cancel
INTERNET SETUP
Press F
Press 0 -Telium Manager
Press 3 -Initialization
Press 2 Hardware
Press 2 -Ethernet Setup
Press 1 -Boot Proto
Press 2 DHCP
The LAN Status indictor should be green for Static
LOADING & CHANGING THE PAPER ROLL
Pull tab on paper roll cover to release and open cover
Place the paper roll in the compartment as shown
SETTING ADMIN PASSWORD
Press ADMIN to access the Admin menu
Press 3 for SET-UP
Press 3 for SYSTEM SET-UP
Enter default Admin password 000000, press OK
Enter new Admin password
Confirm new Admin password
The Ingenico iWL250 is a wireless terminal with dial back-up.
It supports WIFI connectivity with Rogers, Telus and Bell
Menu Layout
To power on/off remove from base and
simulataneously hold down the yellow
and .,#* buttons.
The Ingenico iWL 250 menu functions
are arranged in two menus: Transaction
and Administration.
To access letters on the numeric keypad,
double click the letter key quickly until
the desired number appears.
Use yellow button to go back one step
and red button to cancel.
Terminal / Keypad Layout
Terminal Base
Merchant Router
Question and Answer IconNeed help?

Do you have a question about the Ingenico iWL 250 series and is the answer not in the manual?

Ingenico iWL 250 series Specifications

General IconGeneral
Card ReaderNFC
ConnectivityBluetooth
Printerthermal printer
Power Supply5V DC
Operating Temperature0°C
Storage Temperature-20°C to 70°C
Supported CardsVisa, MasterCard, American Express, Discover

Summary

Connecting and Initializing the Terminal

Terminal Association and Setup

Steps for associating the terminal with the base and initial setup.

Terminal and Keypad Layout

Keypad and Display Elements Overview

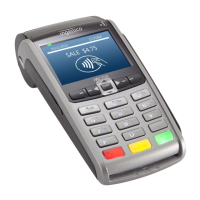
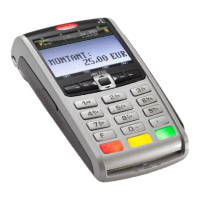
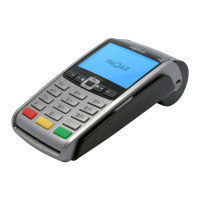
Overview of the terminal's keypad and screen indicators for status.

Internet Setup

Network Configuration Steps

Procedure for configuring the terminal for internet connectivity.

Loading and Changing the Paper Roll

Paper Roll Replacement Procedure

Instructions on how to load and change the paper roll in the terminal.

Setting Admin Password

Admin Password Configuration

Steps to access and set the administrative password for the terminal.

Menu Layout

Powering On/Off and Menu Navigation

How to power the terminal on/off and navigate its menus.

System Set-up

Terminal Date and Communication Mode

Configuring terminal date, time, and main communication mode.

Dial-Up Configuration

Settings for dial-up communication, including prefix and baud rate.

Ethernet and Wi-Fi Access Point Setup

Configuring Ethernet connection and wireless access points.

IP and DNS Configuration

Setting up IP addresses, DNS, subnet masks, and gateway addresses.

Communication to Host Set-up

Host Communication Parameters

Steps to set up communication with the host, including Terminal ID.

Validate Host Configuration

Verifying host communication parameters like IP address and port number.

Printer Set-up

Receipt Printing Options

Configuring receipt copies, pause, and declined/void receipt printing.

Receipt Footer Configuration

Setting up text for the first and second receipt footer lines.

Terminal Functions and Options Set-up

Tip and Cash Back Options

Configuring tip options and cash back functionality.

Clerk and Transaction Options

Setting up clerk options, fraud validation, and surcharge fees.

Terminal Settings

Configuring invoice number, language, application mode, and backlight.

Changing Merchant and Admin Passwords

Password Management

Procedure for changing merchant and administrator passwords.

Enable Password to Restrict Terminal Functions

Access Control for Reports and Transactions

Setting passwords to restrict access to reports, transactions, and settings.

Printing Reports

Printing Various Reports

Instructions for printing terminal setup, clerk, batch, and summary reports.

CT-Payment Host Parameter Downloads

Downloading DLL Parameters

Steps to download and update DLL parameters for host connectivity.

Key Exchange Process

Performing a key exchange to authenticate terminal communication.

Updating EMV Parameters

Downloading and updating EMV key parameters for secure transactions.

CT-Payment Key Exchange

Encryption Key Update

Process to connect to the host and update encryption keys.

Training Mode

Using Training Mode

Instructions for entering and exiting training mode for testing.

Replacing the Wireless SIM Card

SIM Card Replacement Procedure

Steps for powering off the terminal and replacing the SIM card.

Related product manuals