03540598_ed12 17
12A
12A
12B
12
12B
(Dwg. TPD1161)
7. Support the Intermediate Gear Case on a bench and position it
in a copper-faced vise so that the Intermediate Pinion (17B) is
secured in the jaws of the vise. Tighten the vise only enough to
hold the Intermediate Pinion securely.
8. Loosen the Intermediate Pinion Retaining Screw (17D) 1.5 turns
only. Do not remove.
WARNING
If the Intermediate Gear Case is not supported on a bench and if
the Intermediate Pinion Retaining Screw is completely removed,
the Intermediate Gear Case and components could fall causing
injury. Refer to Dwg. TPD1739.
13
26
Loosen 1-1/2 turns
only. Do not remove.
(Dwg. TPD1739)
9. Remove the Intermediate Gear Case Assembly from the vise and
remove the Intermediate Pinion. Remove the Rear Gear Case
O-Ring and Front Gear Case O-Ring from the Intermediate Gear
Case.
10. Remove the Carrier / Ring Gear (17A).
11. Remove Seal (16).
12. Remove Bearing (17C) by pressing from front of Intermediate
Gear Case. Refer to Dwg. TPD1743.
17A
17C
14
13
15
17
(Dwg. TPD1743)
13. Remove the Cap Screws (24) from the Idler Gear Frame (18) and
remove the Idler Gear Frame from the front of the Motor Housing.
If the Idler Gear Frame will not come out of the Motor
Housing easily, use a wooden dowel to tap the Idler Gear
Frame from inside the rear of the Motor Housing.
14. If the Gear Frame Bearing (23) needs to be replaced, press it o of
the shaft of the Idler Gear Frame.
15. Press the Idler Gear Shafts (22) out of the Gear Frame and remove
the Idler Gears (19).
16. Press one of the Idler Gear Bearings (20) out of the Idler Gear,
remove the Spacer (21), and press out the other Idler Gear
Bearing. Repeat this process for the other two Idler Gears. Refer to
Dwg. TPD1741.
20
20
24
18
24
23
22
21
19
(Dwg. TPD1741)
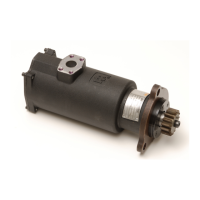
Disassembly of the Drive Housing
Pre-Engaged Models:
1. Grasp the Drive Pinion (63) in a copper-faced vise with the Starter
supported on the workbench.
2. Remove the Drive Pinion Retaining Screw (61).
NOTICE
Models ending in R25, R31 and R51 have a left-hand thread.
Models ending in L26, L32 and L52 have a right-hand thread.
3. Remove the Starter from the vise.
4. Remove the Drive Pinion Washer (62) and the Drive Pinion.
5. Slide the Pinion Spring Sleeve (64) and the Pinion Spring (65) o
the Drive Shaft.
6. Using an impact wrench with a 5/16” (8 mm) x 8” (203 mm) long
hex inserted into the end of the Drive Shaft, unscrew the Drive
Gear Screw (34).
7. Unscrew and remove the Drive Housing Cap.
8. Tap the Drive Housing (40) with a plastic hammer to help
dislodge it from the Gear Case (28).
WARNING
Failure to follow this procedure could result in injury to
personnel.
9. Place the Drive Housing in an arbor press, piston end up. Apply
a load to the Piston (54) using the arbor press to compress the
Piston Return Spring (59) before removing the Bulkhead
Retainer (45).
10. Using a screwdriver, remove the Bulkhead Retainer. Use the arbor
press. Do not use compressed air to load the piston.
CAUTION
Make sure the tension of the spring pushes the Bulkhead
out of the Drive Housing before removing the Drive Housing
from the arbor press.
11. Remove the Bulkhead (46) from the Piston.
12. Remove the Outer Bulkhead Ring (47) and the Inner Bulkhead
Ring (48).
13. Slide the Drive Shaft (57) from the Drive Housing.
14. Pull the Piston Return Spring (59) o the Drive Shaft.
NOTICE
Do not remove the Front Drive Shaft Bearing (42) or the Drive
Housing Seal (43) unless replacement is necessary and new
parts are available. The Bearing and/or the Seal will always be
damaged when removed from the Drive Housing.
 Loading...