16 03540598_ed12
Maintenance, Disassembly / Assembly Instructions
WARNING
Always wear eye protection when operating or performing maintenance on this tool.
Always turn o the air supply and disconnect the air supply hose before installing, removing or adjusting any accessory on this tool or
before performing any maintenance on this tool.
Lubrication
Each time a Series ST900 Starter is disassembled for maintenance or
repair, lubricate the starter as follows:
For Models with Inertia Drive
NOTICE
On models with inertia drive, do not lubricate the threaded area
of the Drive Shaft as it could collect dirt and foreign material
which will prevent e cient operation.
For Models with Pre-Engaged Drive
1. Lubricate the inside diameter of the Drive Shaft (57) with
Ingersoll Rand No. 130 Grease.
2. Lubricate the Pinion end of the Drive Shaft with Ingersoll Rand
No. 11 Grease.
3. Wipe a thin lm of Ingersoll Rand No. 130 Grease in the bore of
the Drive Housing (40).
4. Roll the Piston Return Spring (59) in Ingersoll Rand No. 130
Grease.
5. Coat the outside of the Piston (54) with Ingersoll Rand No. 130
Grease.
6. Lubricate the Drive Gear (29) with 8 oz. (240 ml) of
Ingersoll Rand No. 130 Grease.
For All Models (refer to Lubrication and Torque drawing)
1. Lubricate the O-Rings with O-Ring lubricant.
2. Add 175 ml (approximately 1/3 pint) of Dexron®** II Automatic
Transmission Fluid through the side plug hole in the Motor
Housing (8).
3. Add 15 ml of Dexron®** II Automatic Transmission Fluid to
exhaust pipe plug hole (see page 6 left end view).
Disassembly
General Instructions
1. Do not disassemble the starter any further than necessary to
replace worn or damaged parts.
2. When grasping a part in a vise, always use leather-covered or
copper-covered vise jaws to protect the surface of the part and
help prevent distortion. This is particularly true of threaded
members.
3. Do not remove any part which is a press t in or on a
subassembly unless the removal of that part is necessary for
replacement or repairs.
4. Always have a complete set of seals and O-Rings on hand before
starting any overhaul of a Series ST900 Turbine Starter. Never
reuse old seals or gaskets.
5. Always mark adjacent parts on the Housing Exhaust Cover (1),
Motor Housing (8), Intermediate Gear Case (13), Gear Case (28)
and Drive Housing (40) so these members can be located in the
same relative position when the Starter is reassembled.
6. Never wash inertia drive models in a solvent.
7. Do not press any needle bearing from a part unless you have a
new needle bearing on hand for installation. Needle bearings are
always damaged during the removal process.
Disassembly of the Exhaust Elbow, Motor Assembly,
and Motor Housing and Intermediate Gear Case.
1. If replacing the Motor Assembly (12), remove both Housing
Plugs (10) and drain the oil from the gearing before beginning
disassembly of the Starter.
NOTICE
Removing Exhaust Cover Pipe prior to dislodging Housing
Exhaust allows easier disassembly.
2. Using an 8 mm hex-head wrench, unscrew and remove the
Starter Assembly Cap Screws (6) and washers (7).
3. Pull the Housing Exhaust Elbow (1) from the Motor Housing (8)
to dislodge the Housing Exhaust Elbow, rotate it until the ears
clear the Motor Housing. Using a plastic hammer, tap the ears
alternately until the Housing Exhaust Elbow can be removed from
the Motor Housing. Refer to Dwg. TPD1736.
1
8
7
6
(Dwg. TPD1736)
4. To disassemble the Housing Exhaust Elbow and components,
refer to Dwg. TPA1451-3.
5. Tap the Motor Housing with a plastic hammer to dislodge it from
the Intermediate Gear Case (13). Refer to Dwg. TPD1737.
8
13
Plastic
Hammer
(Dwg. TPD1737)
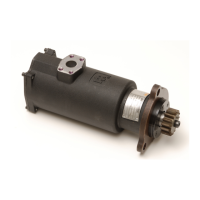
6. Grasp the rear of the Motor Assembly (12) and pull it from the
rear of the Motor Housing. Refer to Dwg. TPD1161.
 Loading...