3
and material boxes from below. unscrew two screws that fixate X-
axis guide block, then remove X-
axis fixing block.
9) Repeat step 8 to remove Y-axis
fixing block fixed on front side
panel.
10) Turn off power, push printhead
out enough space by moving it
leftward, repeat same method to
remove right-side Y axis fixing
block;
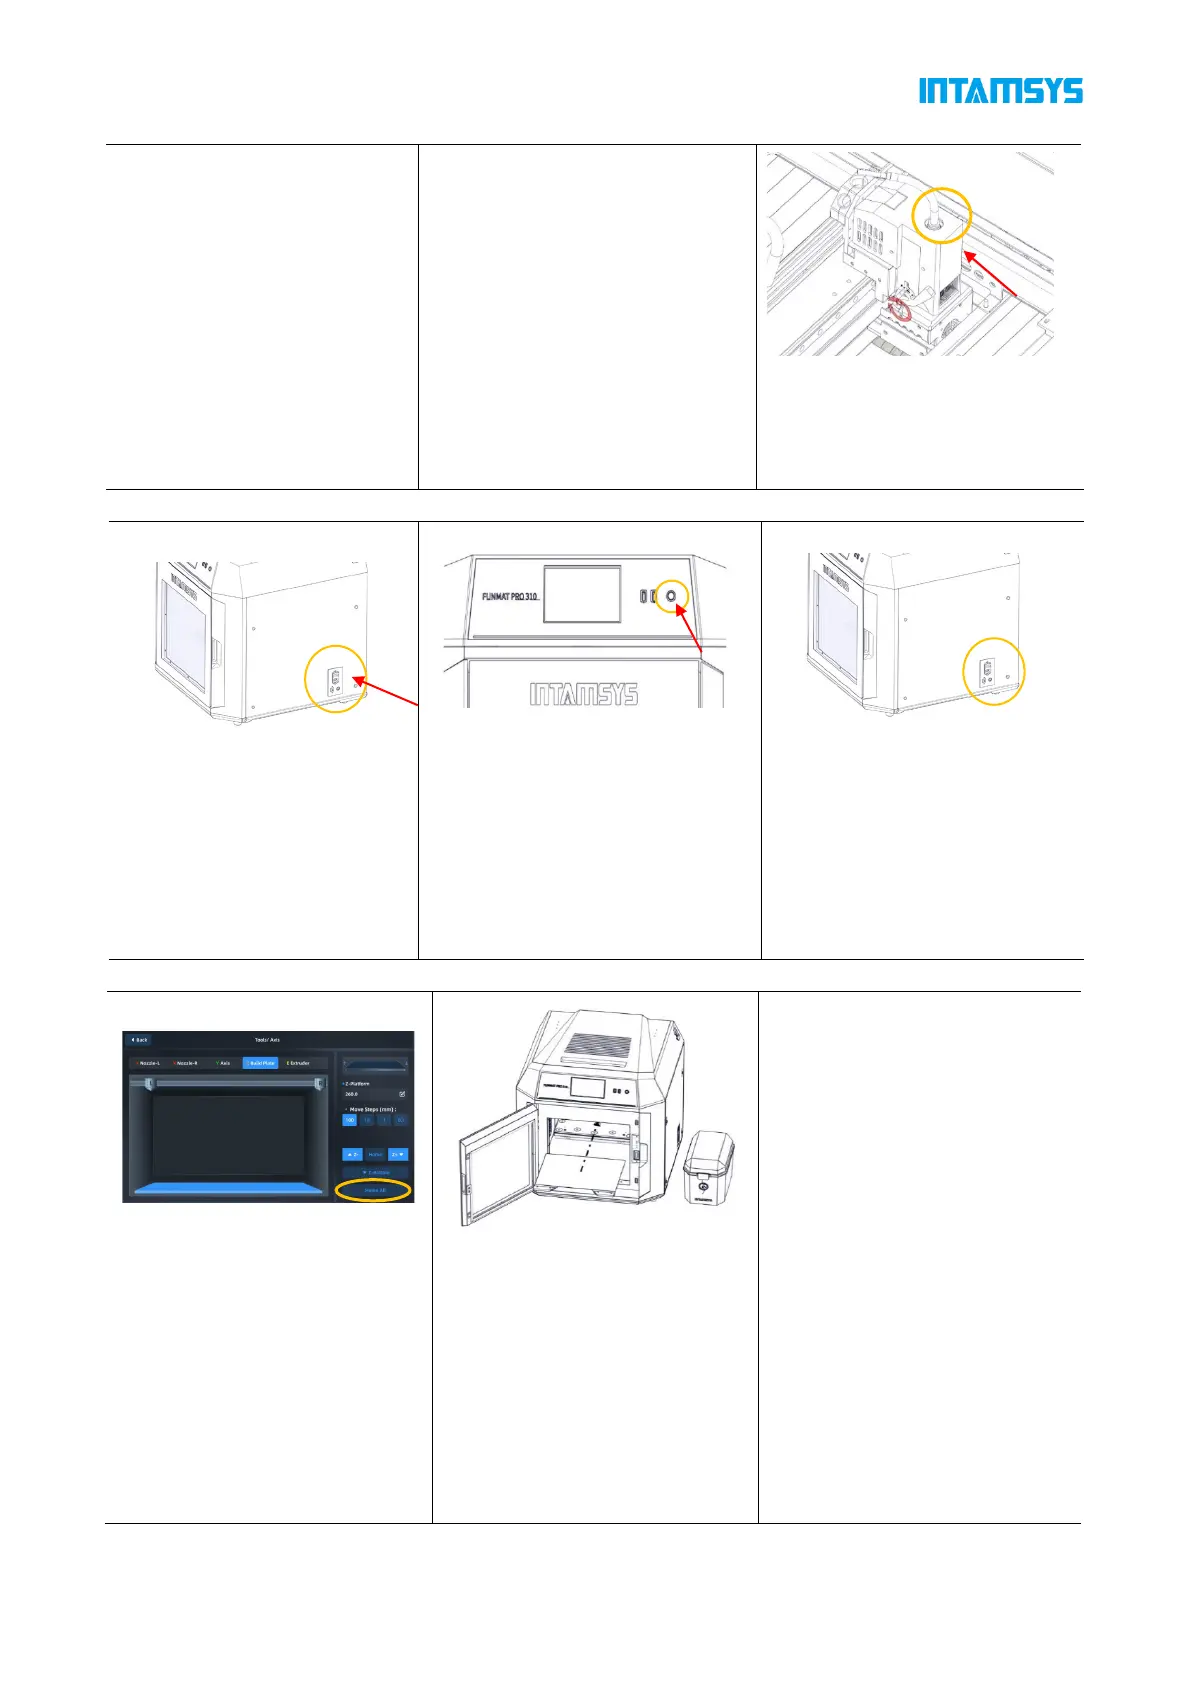
12) Rotate the pressure rods on
both sides of the nozzle, fix the
nozzle and connect the nozzle
cable
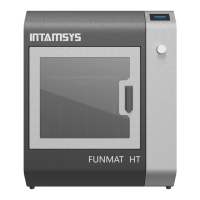
1) The power plug is located at
lower right corner of machine;
connect power cord (two types
available: 110V or 220V), and
turn on power switch next to
printer's power socket so that it
is set at ON(I);
2) Then open front start-stop
switch located at right side of
screen, the indicator light will turn
on while operating screen enters
startup interface, printer starts
booting up;
3) To power off the printer:
Press the power button located
on the front of the printer. Note
that this action only shuts down
the printer. To fully disconnect
the printer, the main power
switch must be turned to the Off.
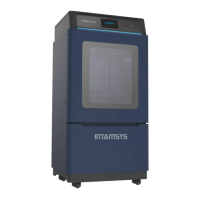
Installation of Printing Build Plate
1) Enter "Tools" interface, click
"Home All" button (make sure
that there are no other sundries
in chamber before operation);
2) After selecting the "Z Build
Plate" option in the upper part,
click "Z-Bottom" to move the
buildplate to the bottom of the
chamber;
3) Flatly adsorb the printing build
plate above the magnetic
platform along the guide grooves
on both sides of the platform, as
shown in the figure.