4
Material loading
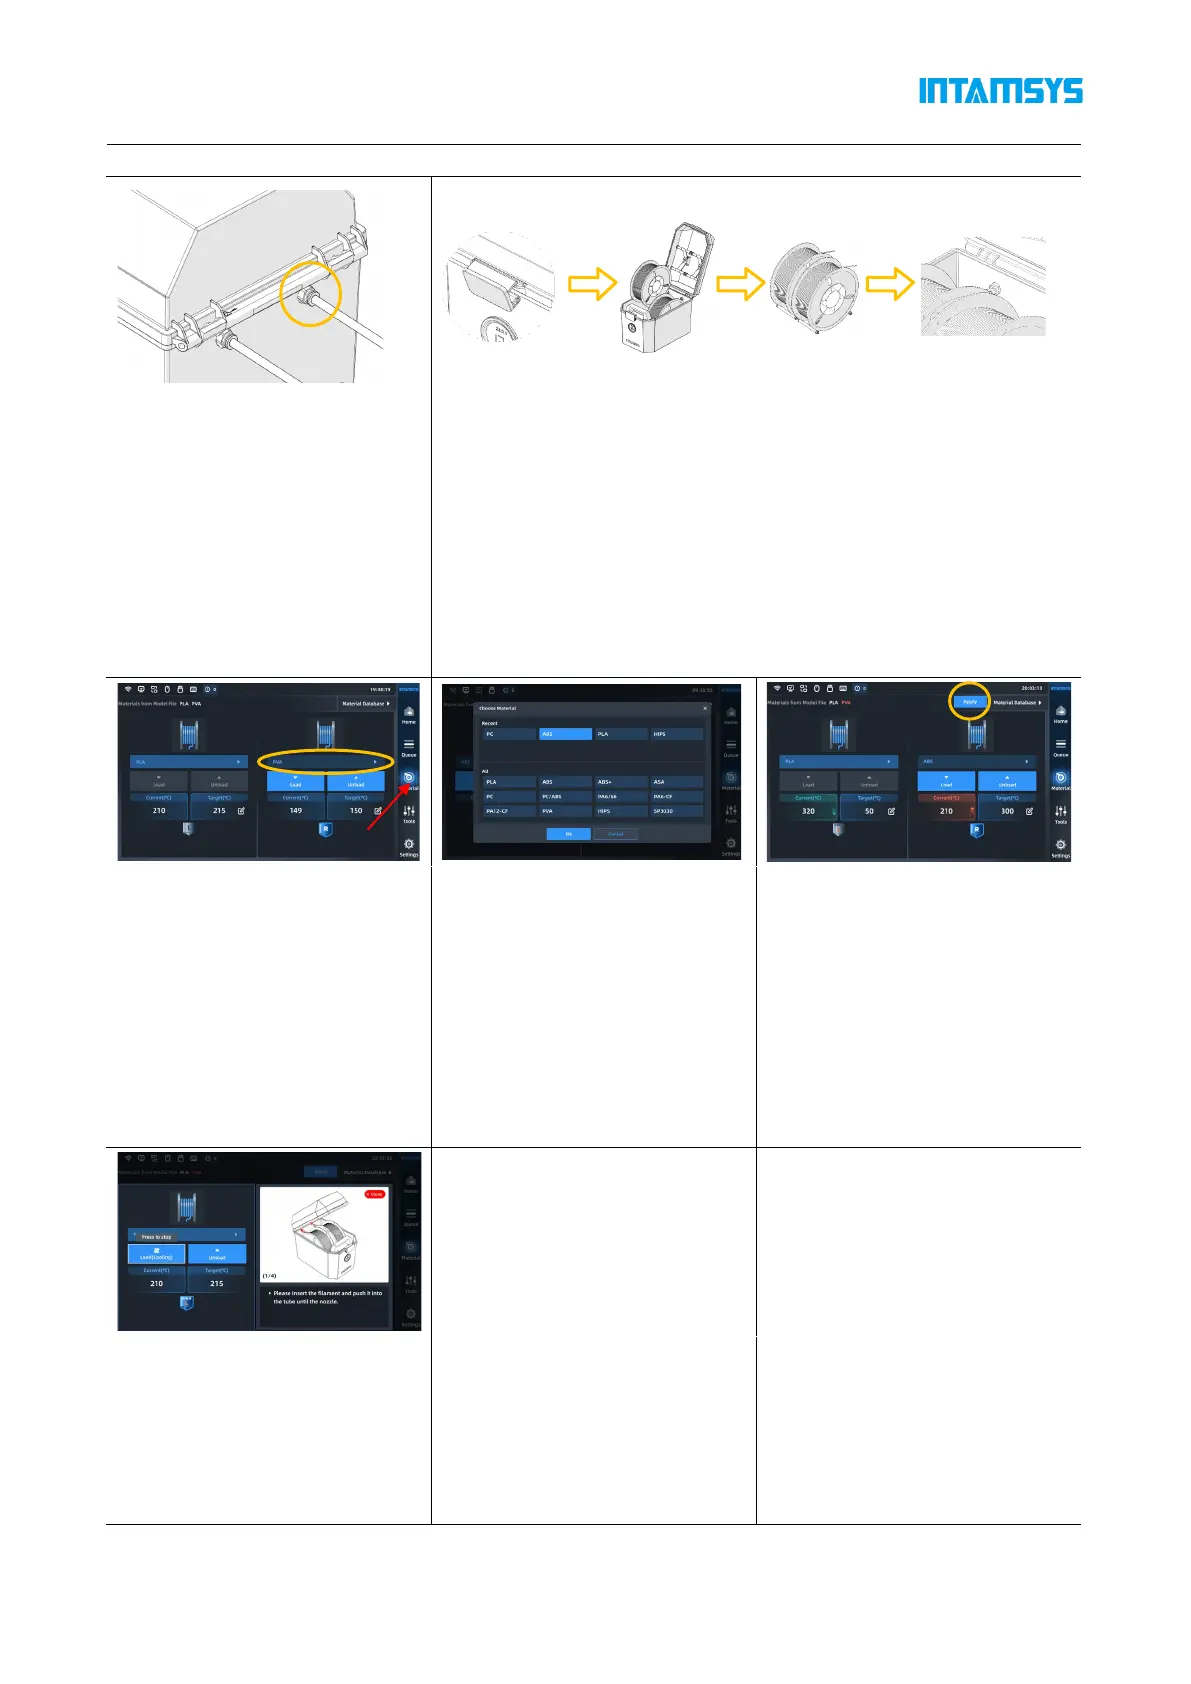
1) Insert the feeding pipe in the
accompanying accessories of the
filament box into the quick
connector and the other end into
the quick connector located on
the right side of the printer. The
feeding pipe should be inserted
to the bottom for smooth
feeding.
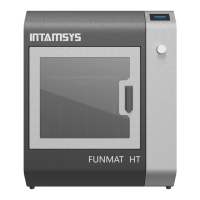
2) Unbuckle the upper cover of the filament box, place the drying box
in the front slot of the filament box, put the wire rod on the roller of
the filament box as shown in the figure, and then thread the wire rod
through the quick connector at the rear end until the material
protrudes from the feeding pipe of the printer. After manual loading
is completed, buckle the upper cover.
3) Click the "Material" button on
the screen operation interface,
click the left or right spool icon
to select the extruder to be
loaded with materials. The
highlighted icon indicates the
extruder is activated;
4) Pressing the "Material
Database" button will display
INTAMSYS materials and user-
defined materials. Materials that
we used recently and frequently
will be at the top, scroll down to
select available materials. User-
defined materials can be
configured in material database.
5) Specifically, if the material on
the printer is inconsistent with
the material settings in the G-
code print file, the system will
alert the user to check the
material. Click "Apply". Then the
material will be automatically
applied to the L&R Nozzle.
6) After selecting the material,
press the Load button to load the
material step by step according
to the pop-up wizard.