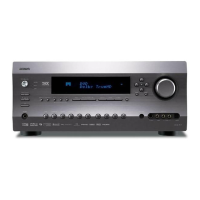
SERVICE PROCEDURE
DHC-9.9
1. Replacing the fuses
This symbol located near the fuse indicates that the
fuse used is show operating type, For continued protection against
fire hazard, replace with same type fuse, For fuse rating, refer to
the marking adjacent to the symbol.
Ce symbole indique que le fusible utilise est e lent.
Pour une protection permanente, n'utiliser que des fusibles de meme
type. Ce demier est indique la qu le present symbol est apposre.
2. To initialize the unit
1. Press and hold down VCR/DVR button, then press
On/Standby
On/Standby
button when the unit is powered on.
2. After " Clear " is displayed, the preset memory and each mode stored in the memory are initialized and will
return to the factory settings, and turn to Standby mode.
3. Safety check out
REF NO.
PART NAME
DESCRIPTION PART NO. REMARKS
F2501 FUSE 4A-UL/T-233
5A-UL/T-233
4A-UL/T-233
4A-UL/T-233
4A-UL/T-233
2.5A-UL/T-233
2.5A-UL/T-233
4A-UL/T-233
252325GR
252325GR
252325GR
252325GR
252321GR
252321GR
252326GR
252325GR
!, <DD>
!, <DD>
!, <DD>
F5000 FUSE
F5002 FUSE
F5003
FUSE
!
<Notes>
: DHC-9.9 USA model
<DD>
<MA> : DHC-9.9 Australian model
F2502 FUSE
F5001
F9000
F9301
FUSE
FUSE
FUSE
!
!
!
!
(U.S.A. model only)
After correcting the original service problem, perform the following safety check before releasing the unit to
the customer.
Leakage current Check
Measure the leakage current to a known earth ground (water pipe or conduct etc.) by connecting a leakage current
tester between the earth ground and exposed metal parts of the unit (input/output ground terminals, screw heads or
metal overlays etc.).
Plug the power supply cord directly into a 120Vac 60Hz wall socket and turn button on.
Any current measured must not exceed 0.5mA.
This model uses a EE-PROM IC in order to retain radio presets and other settings. So, memory contents will be
kept eternally with no care.
4. Memory Backup
When removing HDMI board (NAHDM-9114) from the unit, wait 10 minutes after having unplugged the power
supply cord from a wall socket. This is because perfect discharging of capacitos connected to U8000:VX-50 is
necessary to prevent from the break of VX-50.
Pay attention that this procedure is necessary every time when removing the HDMI board in testing or repairing
the board.
To make this procedure short, wait 15 seconds after having unplugged the power supply cord, then short TP1
(located beside J8002B) and unplug J8002B, and then unplug P2801B. If this order is not right, VX-50 would break.
. 5 Replacing HDMI Board (NAHDM-9114)
w
w
w
.
x
i
a
o
y
u
1
6
3
.
c
o
m
Q
Q
3
7
6
3
1
5
1
5
0
9
9
2
8
9
4
2
9
8
T
E
L
1
3
9
4
2
2
9
6
5
1
3
9
9
2
8
9
4
2
9
8
0
5
1
5
1
3
6
7
3
Q
Q
TEL 13942296513 QQ 376315150 892498299
TEL 13942296513 QQ 376315150 892498299
http://www.xiaoyu163.com
http://www.xiaoyu163.com
 Loading...