131 Eisenhower Lane North
Lombard, IL 60148
630.268.0010 / 1.800.251.2408
P/N 53-00066-400 Rev. B 033004
www.Intellitecsve.com
Intellitec
INSTALLATION MANUAL
BATTERY DISCONNECT
These instructions contain all the information needed to help you install the Battery Disconnect. It is assumed
the installer has basic skills in electrical wiring, mechanics and carpentry. If you have any doubts about these
techniques or instructions, consult with someone you connect a wire or cut a hole.
It is best to read before doing . These instructions are written for a typical travel coach,
not for any specific make or model. You should devote some thought and ingenuity to finding the best way to
accomplish each step, so that the finished job will be a worthy addition to the coach in which it is installed.
As you read these instructions, unpack each part and become familiar with it. Be sure that you have all the parts
and that you can identify each one.
1 Monitor Panel
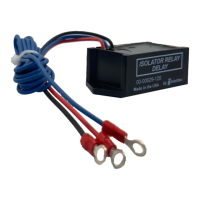
1 Disconnect Relay
1 five wire cable (length marked on box)
2 5 Amp fuses
4 Phillip head screws
Installation Manual
Since this kit is for many different types of vehicles, not everything you need can be included. The parts
required are listed below and can be purchased at any RV or automotive store.
1) Crimp on battery cable lugs. Two (2) for each relay. Must fit copper studs on relay.
2) Relay Mounting bolts, 1/4"-20, length to suit with nut, flat washer and lockwasher for each. Two (2) per relay.
3) If the battery cables are too short to reach where the relays will be mounted, additional cable will be needed.
BEFORE
EVERYTHING ANYTHING
UNPACKING
BATTERY DISCONNECT FOR A ONE BATTERY SYSTEM (BD-0 OR BD-1):
ADDITIONAL PARTS
3
 Loading...