2
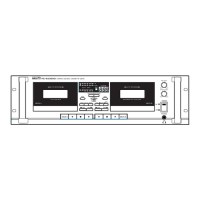
PC-9335AD
STEREO DOUBLE CASSETTE DECK
Unpacking
Please take a few minutes to read this manual to familiarize yourself with important information regarding
product features, and operation.
As with most electronic devices, ORIGINAL PACKAGING (OR EQUAL) IS REQUIRED in the unlikely event that
the product needs to be returned for servicing.
Short Form Instructions
Preparing your PC-9335AD for Recording or Playback in your system
1. Before switching on the AC mains power to the PC-9335AD, be sure to properly connect the input and output
signal cables to avoid pops and noise in your system (AC Mains will be connected at step 2 below). The PC-
9335AD is equipped with one set of input connectors for stereo program material, as well as two separate
sets of output connectors. Connect the input connectors to the device from which you will record. Then
determine which set of outputs is best suited for your application. One set of outputs utilizes stereo RCA
connectors and has a variable output level, controlled by a potentiometer located on the front panel. The other
output is monaural and is fixed in level, with a single output connector. Connect the appropriate output(s) to
the input(s) of the device intended to receive the signal. If you are using the stereo output connections, be sure
to connect the Left and Right outputs of the PC-9335AD to the Left and Right inputs of the device that follows
in the signal chain, in order to maintain the proper channel integrity of the stereo signal.
2. Connect the AC Mains power.
3. Make sure the input signal level control is at minimum (counterclockwise)
4. Make sure the Output level control is at minimum (counterclockwise) position if the stereo outputs are to be used.
5. Switch the AC mains power ON.
6. Depress the OPEN button to open the cassette door.
7. Load a Cassette into the player.
8. Close the Cassette Door.
9. Depress one of the PLAY buttons (◀) or (▶), to begin playback.
10. Slowly increase the output level to achieve the desired signal level (if the stereo output jacks are being used
in your system).
11. Depress the OPEN button to open the Deck B door.
12. Load a blank cassette into Deck B.
13. Close the Deck B door.
14. Position the MODE selector to record on one side or both sides of the cassette, as desired.
15. Press RECORD button.
16. Adjust RECORD LEVEL until -11dB LED indicator flashes (illuminates intermittently).
17. Press PLAY button to begin recording.
18. Press STOP button to end recording.