EasyManua.ls Logo

Intergas Rapid 32 - User Manual

Intergas Rapid 32
4 pages
Print Icon
To Next Page IconTo Next Page
Loading...
1
Rapid 25
Rapid 32
Operating Instructions
Installation of the appliance may only be carried out by an installer/competent person.
Please ask your installer to instruct you on how to fill and bleed the appliance and the
installation and on their operation. Strictly abide by all the instructions and warnings.
Always use the appliance in accordance with the Operating Instructions. It is forbidden to
interfere with a sealed component.
CONTENTS
1 Operation of the appliance 2
1.1 Operation of the central heating ................................................................. 2
1.2 Operation of domestic hot water supply ..................................................... 2
2 Operation and display read-out 2
2.1 Operating mode on the service display ...................................................... 3
2.2 Changing the settings of the various functions ........................................... 3
3 Start-up 3
4 Faults 3
5 Filling and bleeding appliance and installation 4
5.1 Central heating system ............................................................................... 4
5.2 Domestic hot water supply .......................................................................... 4
5.3 Frost protection ........................................................................................... 4
6 Maintenance 4
© 2015 Intergas Heating Ltd Subject to change.

Other manuals for Intergas Rapid 32

Question and Answer IconNeed help?

Do you have a question about the Intergas Rapid 32 and is the answer not in the manual?

Summary

Operation of the Appliance

1.1 Operation of the central heating

Describes how the boiler functions to heat the central heating system based on room thermostat demand.

1.2 Operation of domestic hot water supply

Explains how the boiler provides domestic hot water and its DHW comfort function settings.

Operation and Display Read-out

2.1 Operating mode on the service display

Details the different operating modes indicated on the appliance's service display.

2.2 Changing the settings of the various functions

Guides on how to adjust appliance settings and program functions like clock and switch moments.

Start-up

Faults

1 The CH system does not heat up or does not become sufficiently warm

Troubleshooting steps for insufficient central heating output, including thermostat and pressure checks.

2 The domestic hot water supply does not become hot or hot enough

Troubleshooting steps for inadequate domestic hot water temperature or flow, involving tap and setting adjustments.

3 The fault LED above the reset key is flashing

Explains how to interpret fault codes indicated by the LED and display, and how to reset the appliance.

Filling and Bleeding the Appliance and Installation

5.1 Central heating system

Instructions for filling the central heating system to the correct pressure and bleeding air.

5.2 Domestic hot water supply

Procedure for pressurizing the DHW part and removing air from the hot water pipework.

5.3 Frost protection

Details the appliance's frost protection feature and its operation, especially in cold conditions.

Maintenance

Overview

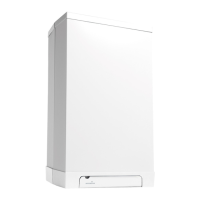
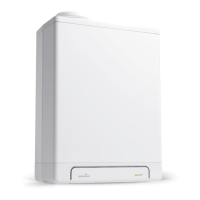
The Intergas Rapid wall-mounted gas-fired boiler is designed to provide both central heating (CH) and domestic hot water (DHW) from a single appliance. It features a modulating control system that adjusts power output in line with the required heat, ensuring efficient operation. The boiler controller responds to heat calls from either the heating or DHW system by igniting the burner and continuously monitoring the flame.

For central heating, the appliance activates when the room temperature falls below the setting on the room thermostat, provided there is no simultaneous call for DHW. The CH temperature control modulates based on the desired CH supply temperature, adjusting power as this temperature is approached. The CH pump has a post-purge period of one minute, which can be adjusted. To prevent blocking, the pump automatically runs for 10 seconds every 24 hours.

Domestic hot water is supplied automatically when more than two litres of water per minute are drawn. During DHW delivery, no heat is supplied to the central heating system. For rapid DHW delivery, a comfort function is integrated into the controller, maintaining the heat exchanger temperature. This function has three settings:

  • On (LED on): The DHW comfort function is continuously active, keeping the heat exchanger at temperature for instant hot water delivery.
  • Eco (LED on): This intelligent system adapts to DHW usage patterns, maintaining heat exchanger temperature only during periods when hot water was drawn on previous days.
  • Off (Both LEDs off): The heat exchanger temperature is not maintained, resulting in a slight delay for hot water delivery. This setting is suitable if rapid DHW delivery is not a priority.

The appliance features an intuitive display and control panel. The display shows the desired CH or DHW temperature in degrees Celsius, CH water pressure in bar, fault codes, and time. LEDs indicate various operating modes, such as CH operation, DHW operation, clock function status (on/off), DHW comfort function setting (off/eco/on), and whether a fault has occurred.

Users can interact with the appliance using several buttons:

  • On/Off button: To switch the appliance on or off.
  • DHW/CH button: To set the desired temperature for either DHW or CH.
  • Minus (-) and Plus (+) buttons: To adjust settings, including clock settings and switch moments.
  • Clock function setting button: To program two time blocks for CH operation (switch moments 1 to 4).
  • Service button: For accessing service-related information.
  • Reset button: To clear fault codes and restart the appliance after a fault has been rectified.

The service display provides information on the operating mode, including "Off" (frost protection active), "Wait mode," "CH pump post run," "Desired temperature reached," "Self test," "Ventilate," "Ignite," "CH mode," "DHW mode," and "Heat up appliance." A flashing red LED above the reset key indicates a fault, and a corresponding fault code appears on the temperature/clock display.

To change settings, users press and hold the DHW/CH button for two seconds to enter the user settings menu. A function LED will flash, and the desired value can be adjusted using the plus and minus buttons. The reset button saves changes and exits the menu. If no button is pressed for 30 seconds, changes are automatically saved, and the menu closes. The on/off button closes the menu without saving changes. The default settings for switch moments can be restored by holding the clock function setting button for five seconds.

The maximum CH supply temperature can be set between 30°C and 90°C (standard 80°C), with lower settings for moderately cold weather and higher settings for colder weather. The DHW temperature can be set between 40°C and 65°C (standard 55°C). Other advanced settings require an installer.

Before starting the appliance, ensure the CH and DHW systems are properly filled and bled. The appliance must be switched off, and the CH water pressure should be between 1 and 2 bar. The room thermostat should be set below the room temperature, and the gas tap must be open. Once switched on, the appliance will heat up for DHW until the set temperature is reached. The clock and switch moments should be set, and the room thermostat raised above the actual room temperature to activate the CH system.

Common faults and their resolutions include:

  • CH system not heating or not warm enough: Increase room thermostat temperature, open radiator valves, bleed the appliance and installation, check CH water pressure, and increase CH water temperature setting.
  • DHW supply not hot or hot enough: Open the hot water tap further and increase the DHW temperature setting.
  • Fault LED flashing (e.g., code 7): Indicates the appliance is too hot or has insufficient flow. Open radiator valves, bleed the appliance and installation, check CH water pressure, and top up if necessary.
  • Fault LED flashing (e.g., code 4): Indicates the burner is not lighting. In this case, an installer should be consulted.

After rectifying a fault, press the reset button to restart the appliance.

For maintenance, the appliance can be cleaned with a damp cloth; abrasive or aggressive cleaning agents should not be used. The appliance and installation, including flue and air supply pipes, should be checked and cleaned annually by a registered installer. In case of a gas smell or safety concerns, the National Gas Emergency Service should be contacted. All fitting, fixing, or servicing of the gas appliance must be performed by a Gas Safe registered engineer.

The appliance is equipped with frost protection, which, as long as mains current is present, switches on the CH pump and, if necessary, the burner when the heat exchanger temperature drops too low. If an internal or external frost thermostat is installed and connected, it is not active when the appliance is switched off at the operating panel.

Filling and bleeding the appliance and installation:

  • Central heating system: Ensure the cold water pressure is between 1 and 2 bar. If low, top up by connecting a filling hose to a drinking water tap and the filling/drain tap at the bottom of the appliance. Open both taps to fill until the desired pressure is reached, then close the taps. Bleed the system and appliance (bleeding point at top left of appliance, radiators, and piping). Recheck pressure and repeat if necessary. Frequent topping up may indicate a leak, requiring installer notification.
  • Domestic hot water supply: Pressurise the DHW part by opening the main tap or inlet assembly. Remove air by opening a hot water tap until all air has disappeared. Close the tap and check for leaks.

The appliance should be installed in a frost-free room to prevent freezing of the condensate drain.

Intergas Rapid 32 Specifications

General IconGeneral
ModelRapid 32
CategoryBoiler
Output32 kW
Efficiency RatingA
Flow Rate13.2 l/min
MountingWall Mounted
ERP EfficiencyA
Boiler TypeCombination

Related product manuals