Interklima High wall unit
II/IO - SCV1
14
Installation of indoor unit
Location
Select the location of the indoor unit with the following
considerations:
1. The front of the air inlet and outlet should be free from any
obstructions. The air should flow freely.
2. The wall where the unit is to be mounted should be stiff
enough not to resonate and produce noise.
3. The location should allow easy access to install the copper
pipes to the outdoor unit and where drainage can be easily
obtained.
4. Ensure the clearance on every side of the indoor unit
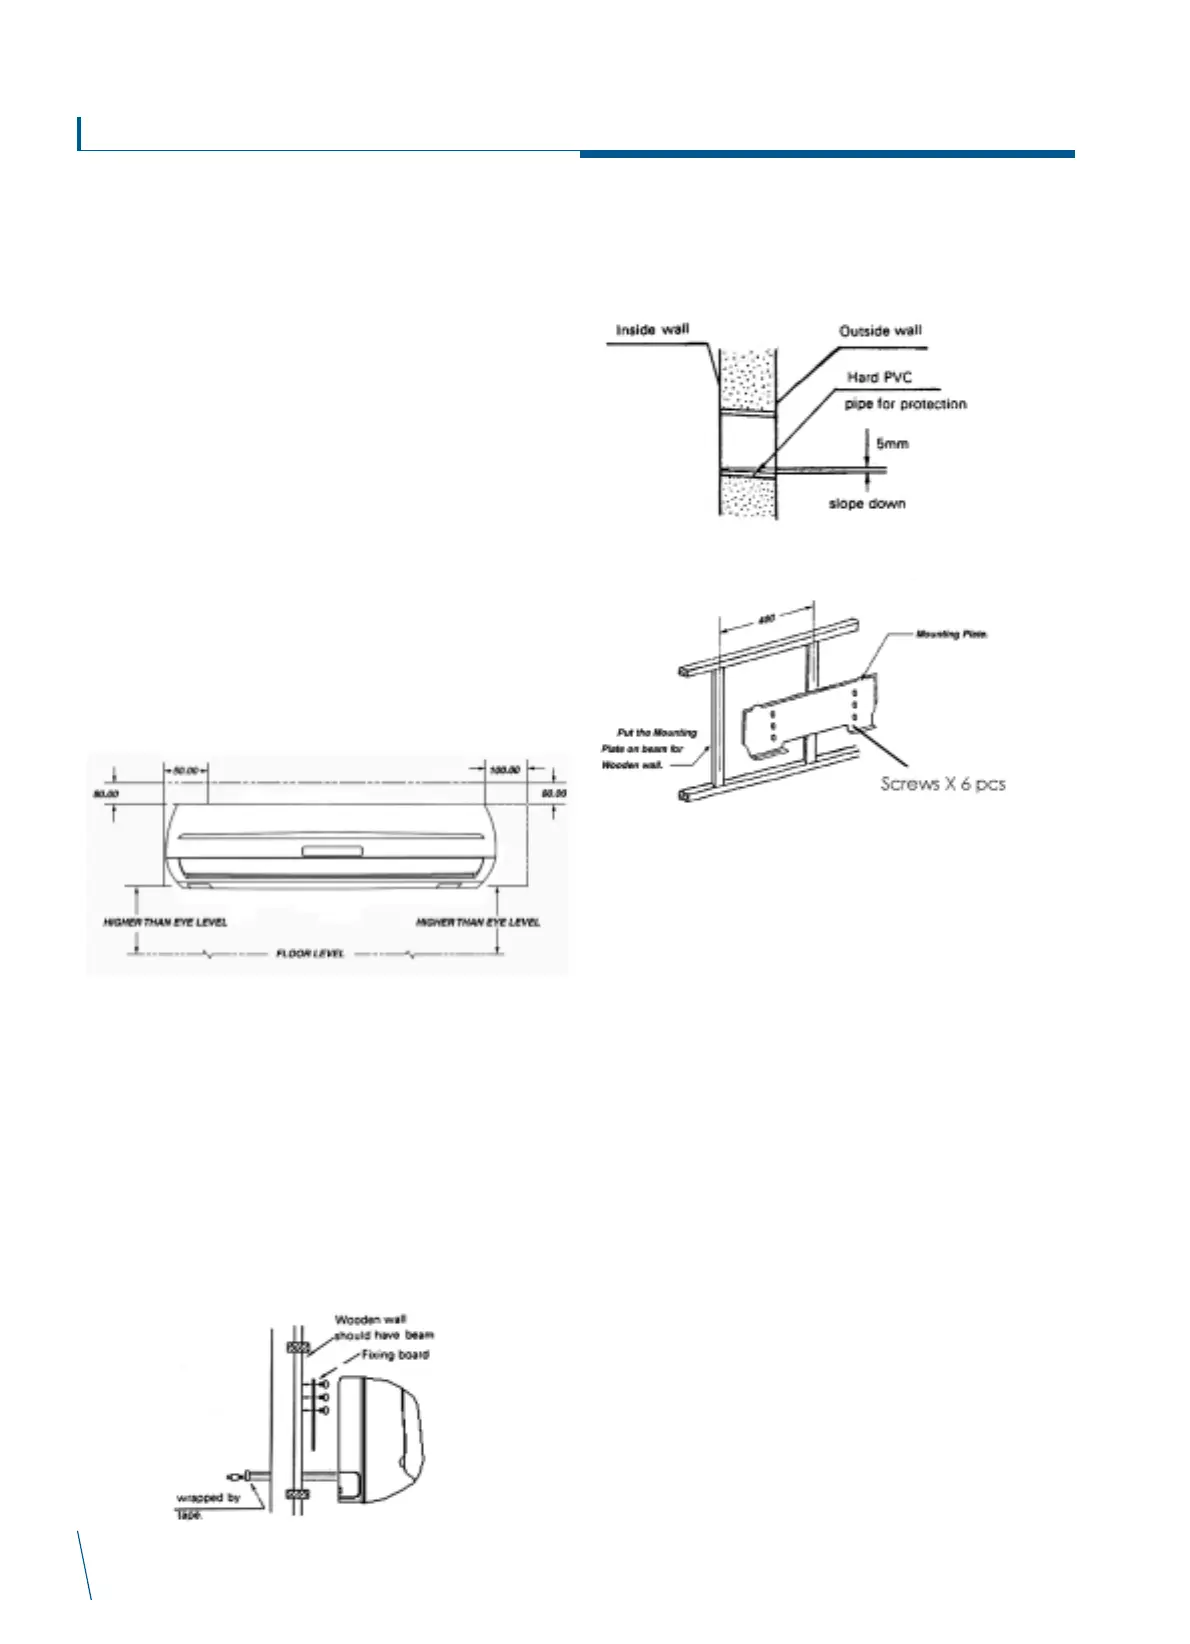
conforms to figure 1.
5. From the floor the height should be more than eye level.
6. Avoid installing the unit in direct sunlight.
7. The microprocessor of the unit must be kept away from any
high frequency emission.
8. Keep the unit away from fluorescent lamps; they could affect
the communication of the remote control.
MAINTENANCE & SERVICING SPACE
ñ AIR FLOW DIRECTION
DIMENSIONS IN mm
Installation of indoor unit
1. First connect the refrigerant pipe and the drain pipe to the
connection at the back of the indoor unit, then install the unit
to the fixing board as shown.
2. After hanging the unit, press it down, thus securing it to the
fixing board (after installing it pull it towards yourself making
sure it is properly in place and secured).
Wall penetration
1. Drill a hole in the wall as shown in diagram.
2. Hole should be drilled with a slight downward slant to the
outdoor side to enable the condensed water to flow freely.
Installing mounting plate
A. Brick or Concrete Wall:
1. Place the mounting plate flush against the wall making sure it
is horizontal, then trace out the holes to be drilled.
2. Drill holes, insert screw plugs to which the mounting plate
can be secured.
3. Before fixing screws tightly make a final check to make sure
mounting plate is horizontal.
4. See Fig 2 for dimensions.
B. Wooden Wall
1. Secure the mounting plate to the beams in order to prevent
vibration.
2. If there is no beam then you can only secure the mounting
plate with more screws to add strength.
3. Use the accompanying screws to secure the mounting plate,
but make sure it is horizontal before securing it tightly.
4. After securing the mounting plate, pull it to see whether it is
strong enough to hold the unit in place.
5. See Fig 2 for dimensions.
Fig. 1
 Loading...