Interklima High wall unit
II/IO - SCV1
20
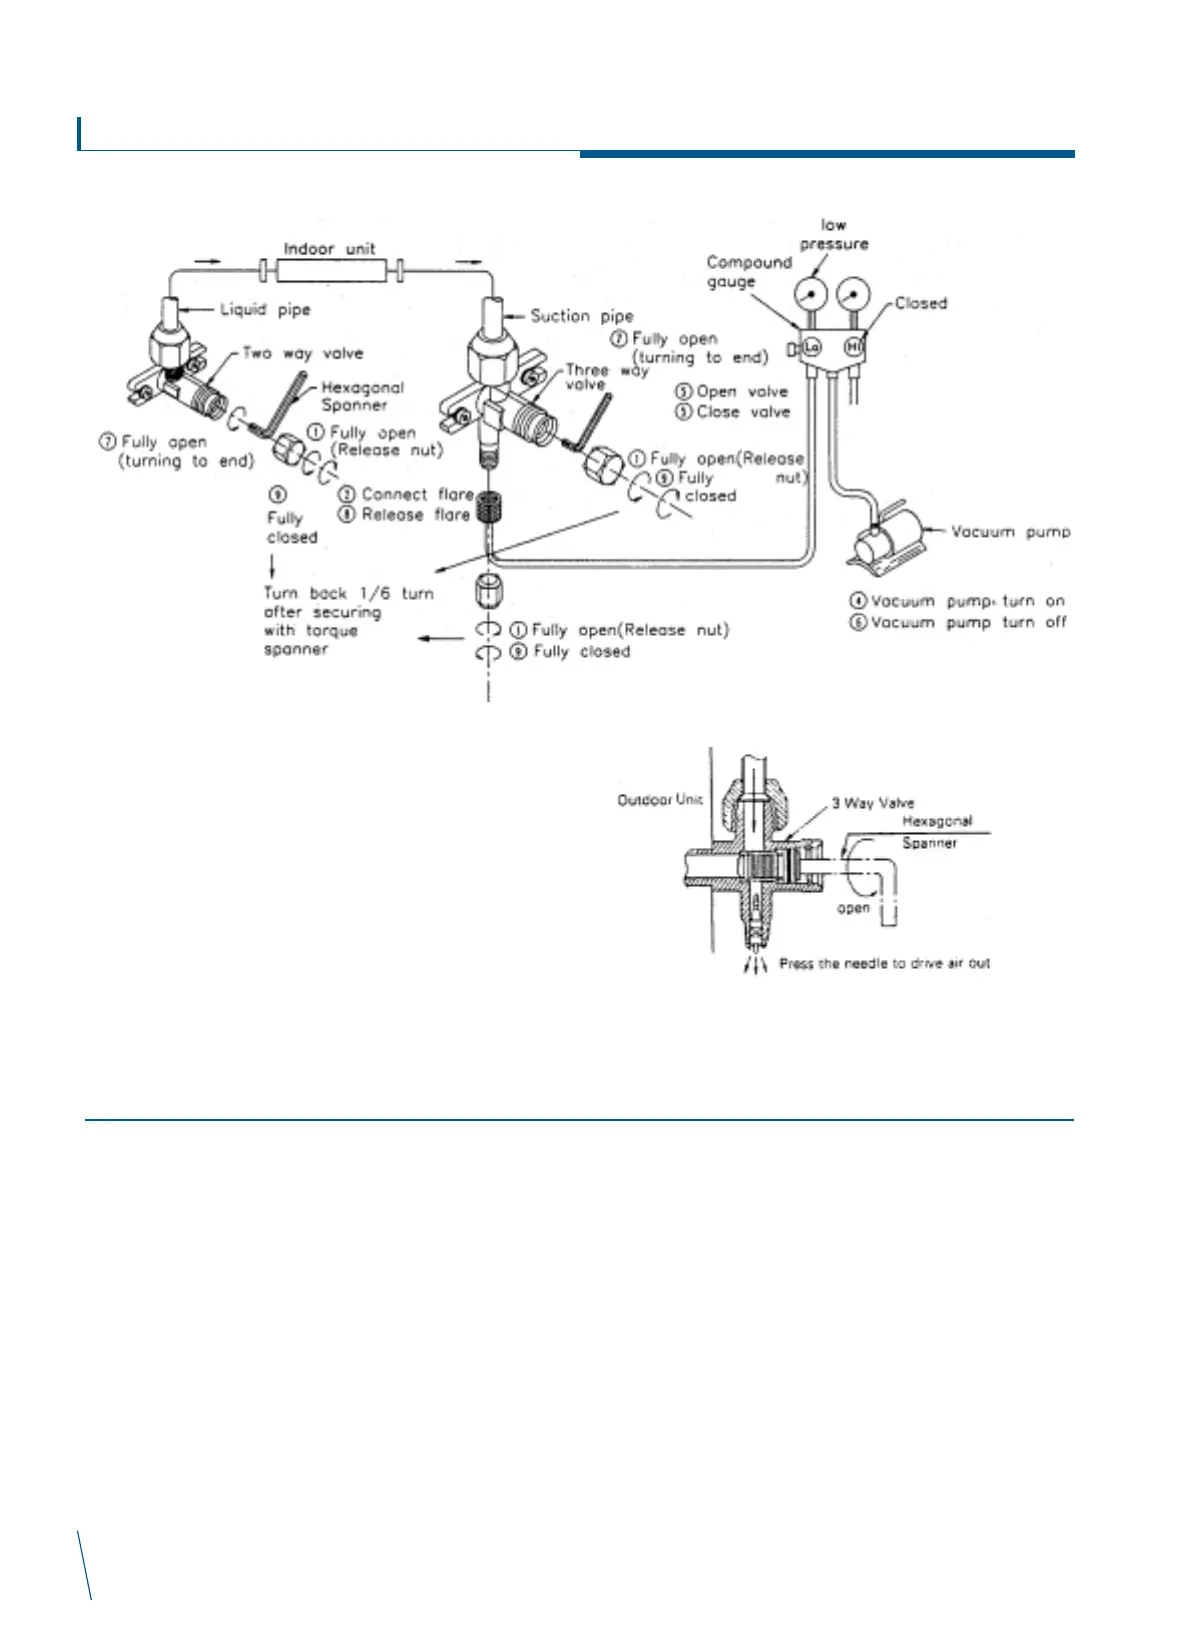
Outdoor unit piping and air release
Air release
Purge the air within the indoor unit and piping from the system by
using a vacuum pump.
1. Release air as the diagram shows.
2. [4] Shows the vacuum pump operating 15 minutes at least.
Read gauge meter and make sure pressure reaches-76
cmHg.
3. After [6] the vacuum pump is turned off. Please wait a few
minutes and check the gauge meter doesn’t change reading
to confirm no leakage in the piping.
4. [9] Shows locked position.
5. Please test for leaks with gas detection instrument or soapy
water before turning on the system. Cross section of 3 way valve (Before opening)
Start-up and service instructions for
condensing Units
STEP 1 - Complete pre-installation checks
Unpack unit - Move unit to its final location. Remove the carton
from unit being careful not to damage the service valves and
grilles.
Inspect shipment - File a claim with the shipping company if the
shipment is damaged or incomplete.
Consider system requirements - Consult the local building and
national electrical codes for any special installation requirements.
Allow sufficient space for air flow clearance, wiring, refrigerant
piping, and servicing the unit. See fig. 1.Locate the unit so that the
condenser's air flow is unrestricted on both sides. Refer to fig. 2.
The unit may be mounted on a level pad directly on its base legs
or mounted on raised pads at the support points.
STEP 2 - Rig and mount unit
Mounting on ground - Mount on a solid, level, concrete pad.
Position unit so water or ice from the roof cannot drop directly
onto the unit. If local codes require the unit be fastened to the pad,
tie down bolts should be used and fastened through the slots
provided in the unit's mounting feet.
Mounting on roof - Mount on a level platform or frame. See fig.2.