EasyManuals Logo

Intermec EasyCoder F4 Installation Instructions

Intermec EasyCoder F4
8 pages
To Next Page IconTo Next Page
To Previous Page IconTo Previous Page
Page #6 background imageLoading...
Page #6 background image
Printhead for EasyCoder F4 & F4 Compact Industrial, Installation Instructions4
EasyCoder F4-SeriesPrinthead Replacement
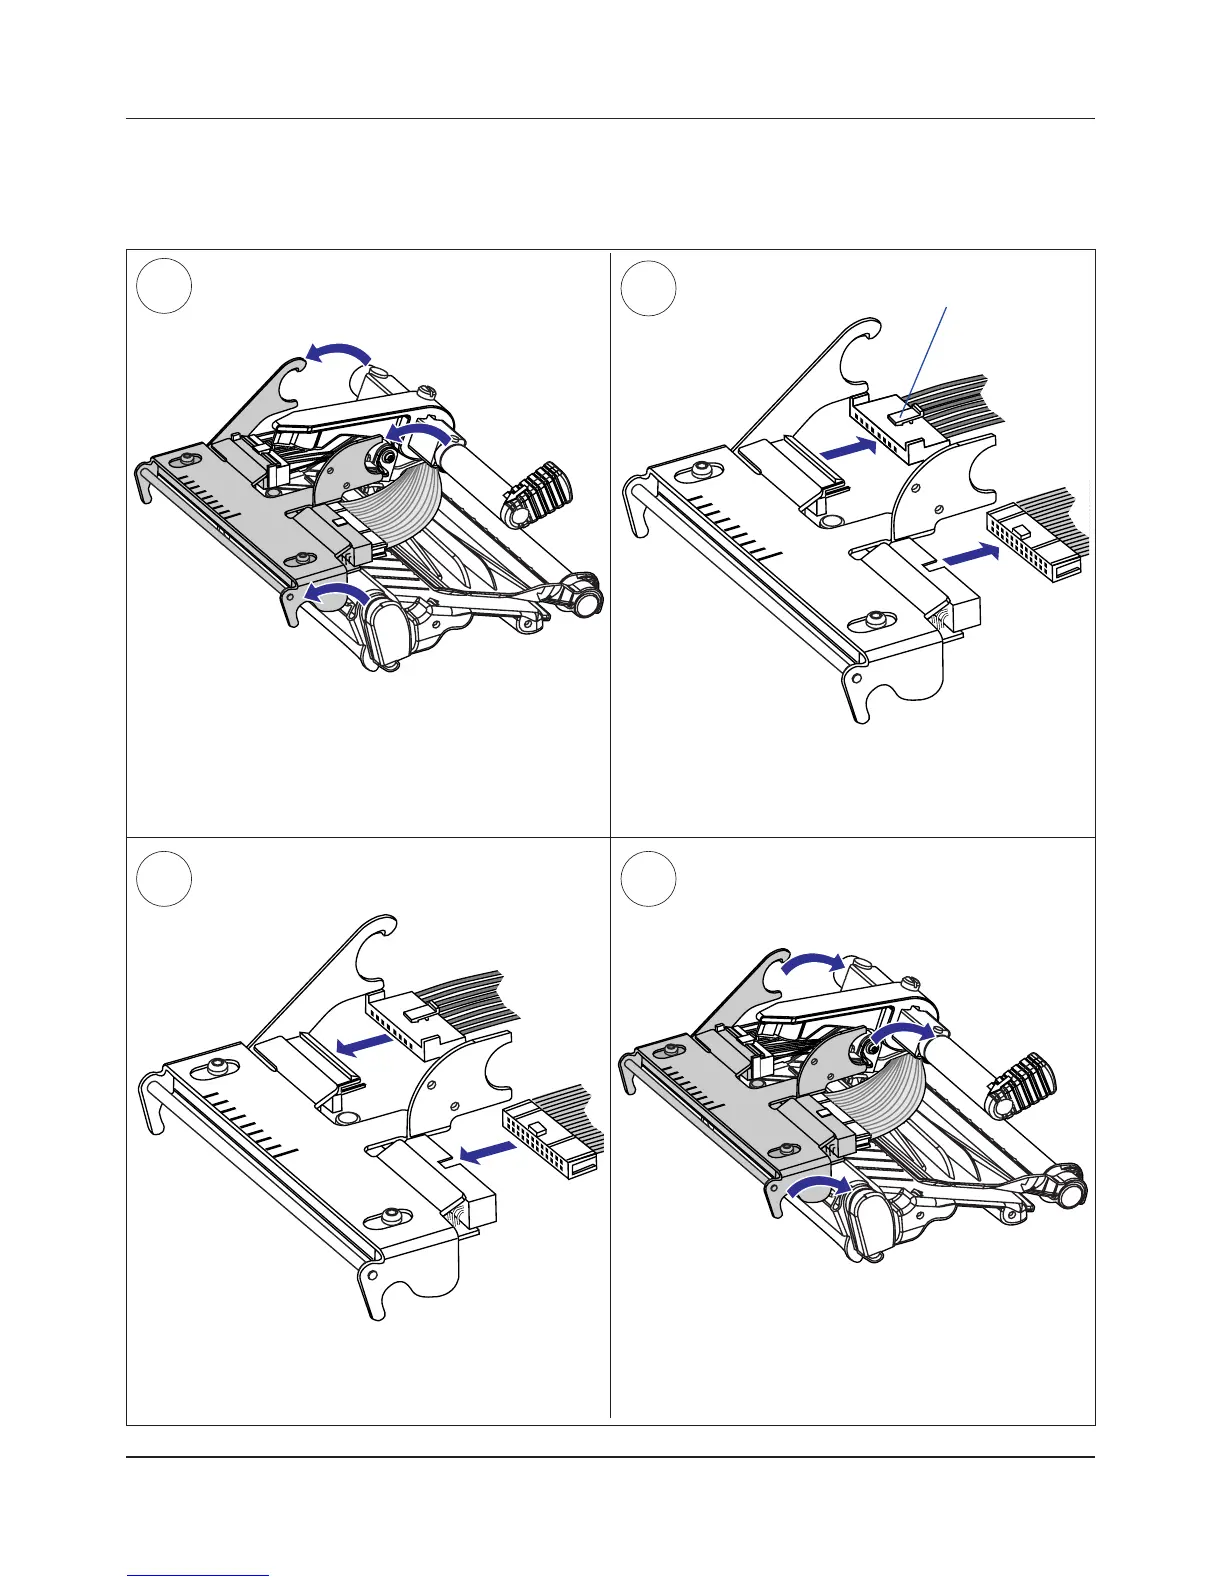
Step-by-Step Instructions, cont.
Disconnect the printhead bracket from the print
mechanism as indicated by the arrows and pull out the
printhead as far as the cables allow.
6
5
Disconnect the cables from the printhead. Note the
snap-lock on the inner connector. Pull at the connec-
torsnot at the cables!
Snap-Lock
Connect the two cables to the replacement printhead.
Put back the printhead in reverse order and check that
the printhead cables run freely.
87

Other manuals for Intermec EasyCoder F4

Questions and Answers:

Question and Answer IconNeed help?

Do you have a question about the Intermec EasyCoder F4 and is the answer not in the manual?

Intermec EasyCoder F4 Specifications

General IconGeneral
BrandIntermec
ModelEasyCoder F4
CategoryPrinter Accessories
LanguageEnglish

Related product manuals