EasyManua.ls Logo

International 710 - SETTING UP; IN-THE-FURROW OPERATION SETUP

International 710
48 pages
Print Icon
To Next Page IconTo Next Page
To Previous Page IconTo Previous Page
Loading...
SETTING
UP
IN-THE-FURROW OPERATION
Remove all
wires
and
arrange the parts
conveniently.
Lubricate all
bearings
and moving
parts
as
you
proceed,
and
see
that they
work
freely.
Bolts
must be used
in the
holes in
which
they are
found,
or in the
parts to
which they
are attached,
unless
otherwise
shown.
Whenever
the
terms "left"
and
"right"
are used,
it should be
understood to
mean
from a
position behind
and facing the
machine.
When
beginning
to assemble it is
recom-
mended
that the
plow frame be
laid
over
supports
about 30
inches high
until the hitch
and
wheels are
installed.
When the plow
can
be
hitched
to the tractor
and the
hydraulics
connnected;
raise
the plow
and put on the
bottoms and
colters.
m*
uxa
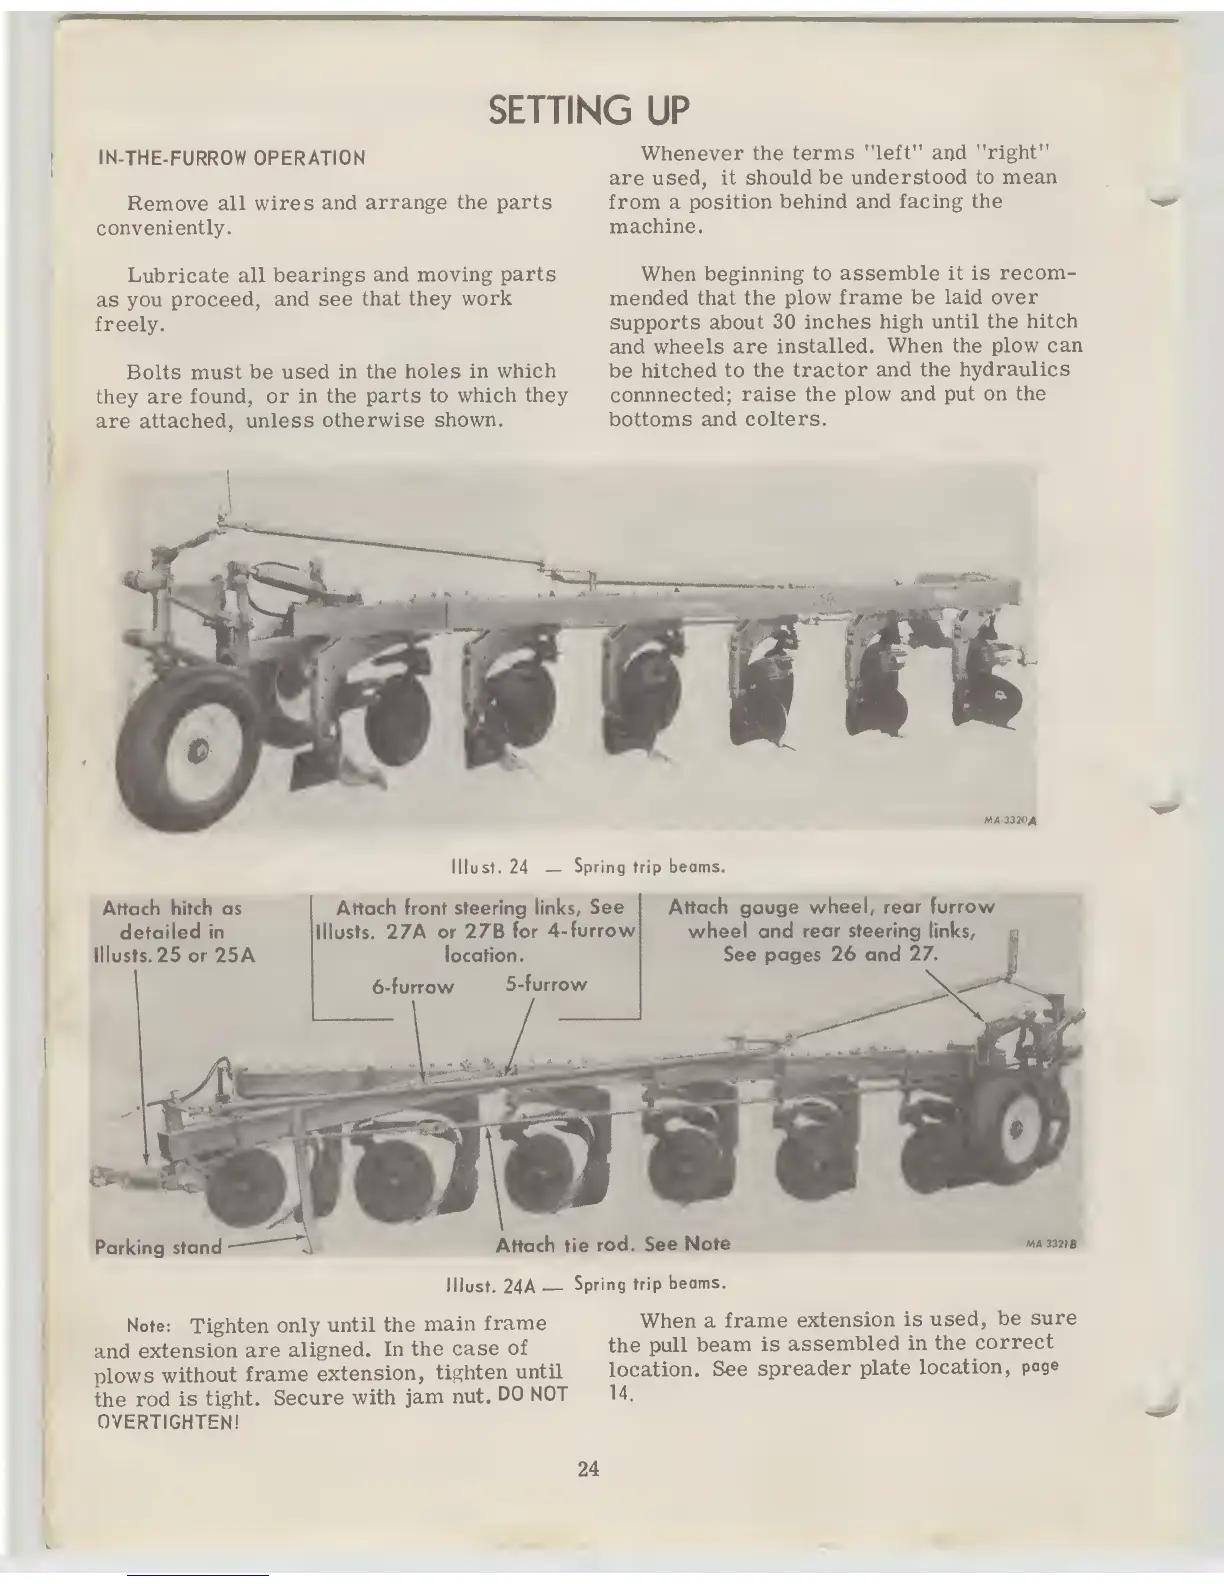
lllust. 24
— Spring
trip
beams.
Attach hitch as
detailed
in
Musts. 25
or
25
A
Attach front steering links,
See
Musts.
27A
or 27B
for
4-furrow
location.
6-furrow
5-furrow
Attach gauge
wheel, rear furrow
wheel and
rear steering
links,
§
See pages 26 and
27.
Parking
stand
Attach tie
rod.
See
Note
lllust.
24A
-—
Spring
trip
beams.
Note:
Tighten
only
until the
main
frame
and
extension
are
aligned.
In
the
case
of
plows
without
frame
extension,
tighten
until
the
rod
is
tight.
Secure
with
jam nut.
DO
NOT
OVERTIGHTEN!
When a
frame
extension
is
used,
be
sure
the
pull
beam is
assembled
in the
correct
location.
See
spreader
plate
location,
page
14.
24

Table of Contents