87PO
SAVE THESE INSTRUCTIONS
English
(87PO) METAL FRAME POOL ENGLISH 7.5” X 10.3” PANTONE 295U 06/02/2020
Page 13
POOL SETUP (continued)
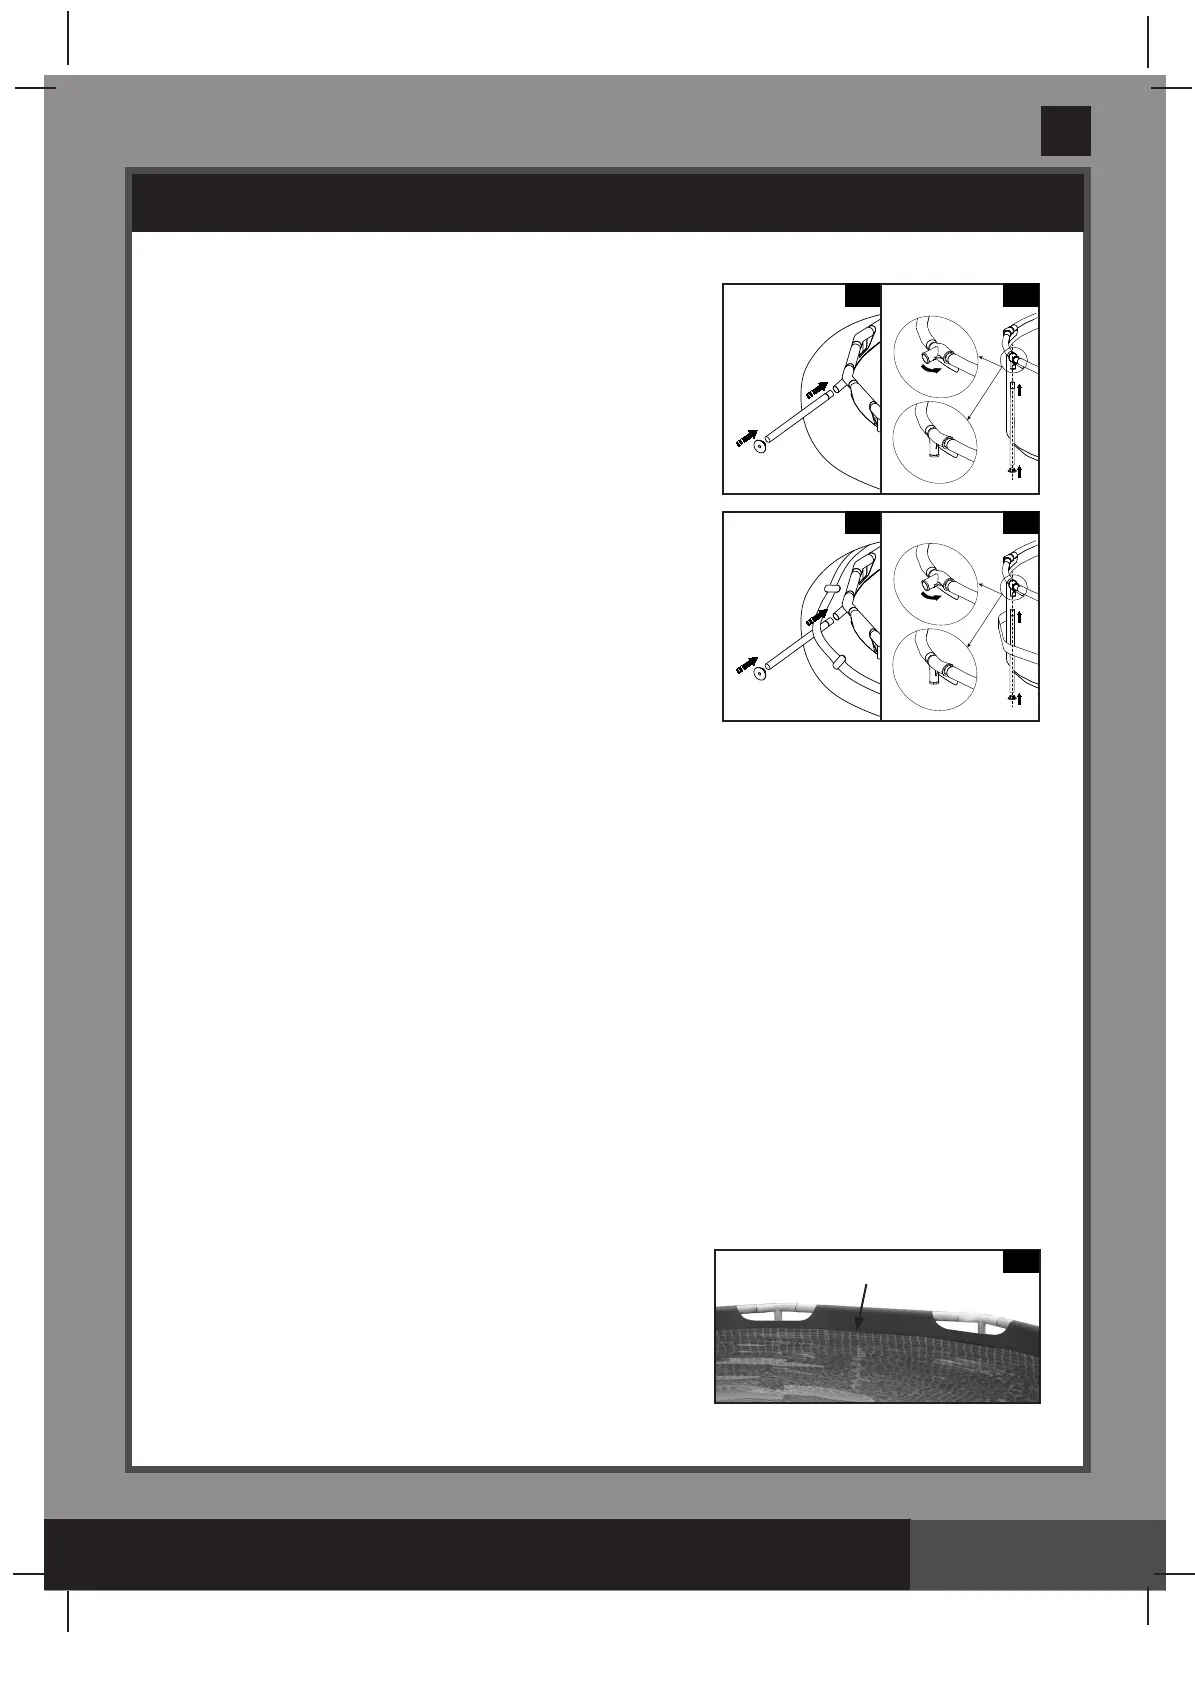
3. Vertical legs assembly
•
For
8’ x 20” (244 cm x 51 cm):
Attachtheleg’sendcap
(3)
to the bottom of each leg
(2)
first.
WiththebeamsandT-jointsassemblyrestingontheground,
insert the top of the leg into the bottom of the T-joint
(1) (see
drawing 3.1)
.Continuetheprocesswithalltheverticallegs.
NOTE:
Thispoolsizedoesnotcomewithanall-aroundcenter
belt.
• Liftthebeamsassemblyandmakesureallthelegsarein
averticalposition
(see drawing 3.2)
. Push all the T-joints
downward to ensure they are firmly connected to the legs.
•
For 10’ (305 cm) and above sizes:
Attachtheleg’sendcap
(3)
to the bottom of each leg
(2)
first.
WiththebeamsandT-jointsassemblyrestingontheground,
slideoneverticallegintothebeltlooplocatedinthemiddleof
the pool liner and insert the top of the leg into the bottom of
the T-joint
(1) (see drawing 3.3)
. Continue the process with
alltheverticallegs.
• Liftthebeamsassemblyandmakesureallthelegsarein
averticalposition
(see drawing 3.4)
. Push all the T-joints
downward to ensure they are firmly connected to the legs.
• Pullgently,inanoutwarddirection,thebottomofthelegmakingsurethelegisverticalandperpendicular
tothelevelground.
4. Filling of the pool
•
The following applies to pool liners
with
hoseconnectors(16’(488cm)&belowpools).Ifthepoolwas
purchased
without
a filter pump, insert the strainer hole plugs
(8)
intotheblackfilterpumpoutlets.Do
this from the inside of the pool so that water will not run out when filling it. If the pool was purchased
with
afilterpump,readtheKrystalClear™FilterPumpManualfirstand
then
proceed to next installation step.
• Beforefillingthepoolwithwater,ensurethatthedrainpluginsidethepoolisclosedandthatthedrain
capontheoutsideisscrewedontightly.Fillthepoolwithnomorethan1inch(2.5cm)ofwater.Check
toseewhetherthewaterislevel.
IMPORTANT: If the water in the pool flows to one side, the pool is not completely level. Setting
up the pool on unlevel ground will cause the pool to tilt resulting in the sidewall material bulging
and a potential collapse of the pool. If the pool is not completely level, you must drain the pool,
level the area or move the pool to a different area that is level, and re-fill the pool, following the
above directions.
• Smoothoutthebottomlinerwrinkles(frominsidethepool)bypushingoutwherethepoolfloorandpool
sidesmeet.Or,(fromoutsidepool)reachunderthesideofthepool,graspthepoolfloorandpullinan
outwarddirection.Ifthegroundclothiscausingthewrinkles,have2peoplepullfromoppositesidesto
removeallwrinkles.Usetheproperlyassembledpoolladderwhenenteringorexitingthepoolduringthis
process.
Alsomakesureallthelegsareverticalandperpendiculartotheground.
• Fillthepoolwithwateruptojustbelowthesleeveline
(see drawing 4)
.
5
.
Posting
aquatic safety signs
SelectahighlyvisibleareanearthepooltoposttheDanger
NoDivingorJumpingsignincludedlaterinthismanual.
4
WATERLEVEL
3.1
2
3
2
3
3.2
1
3.3
2
3
2
3
3.4
1