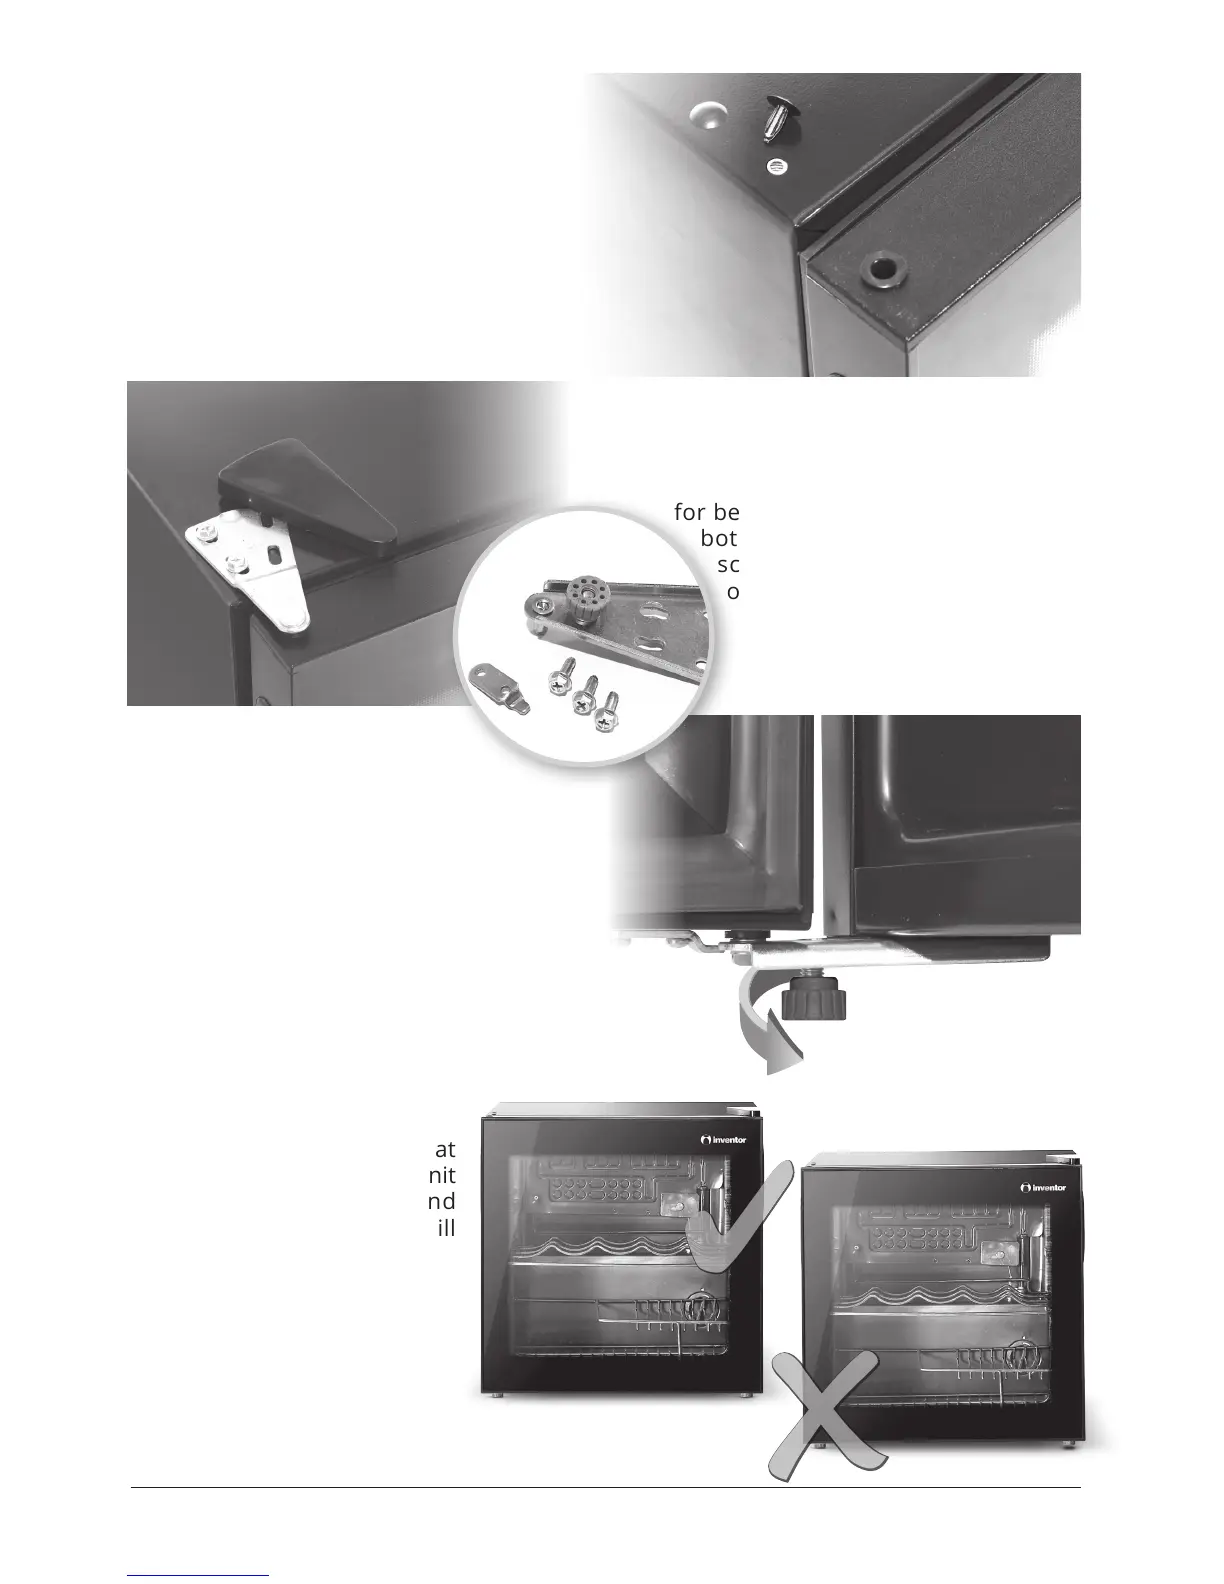
4. Remove the three plastic caps from
the side you are going to install the door,
and place them on the side where the
door was originally installed, in order to
cover the three screw holes.
5. Place the door on the desired side making
sure it is in its upright position. Screw the top
two screws of the door hinge. Slightly tilt,
for better positioning, and screw the
bottom hinge into place, and also
screw the removed foot on the
other side. Once completed clip
on the top plastic cap.
6. Check if door is aligned horizontally
and vertically and that the door when
shut is completely sealed from all sides.
Finally tighten the bottom hinge and re-
adjust the foot on the opposite side for
correct leveling.
Leveling the Unit
Adjust the two levelling feet at
the front of the unit. If the unit
is not aligned, the door and
magnetic seal alignments will
not be covered properly.